
Beautiful Plants For Your Interior
Beautiful Plants For Your Interior
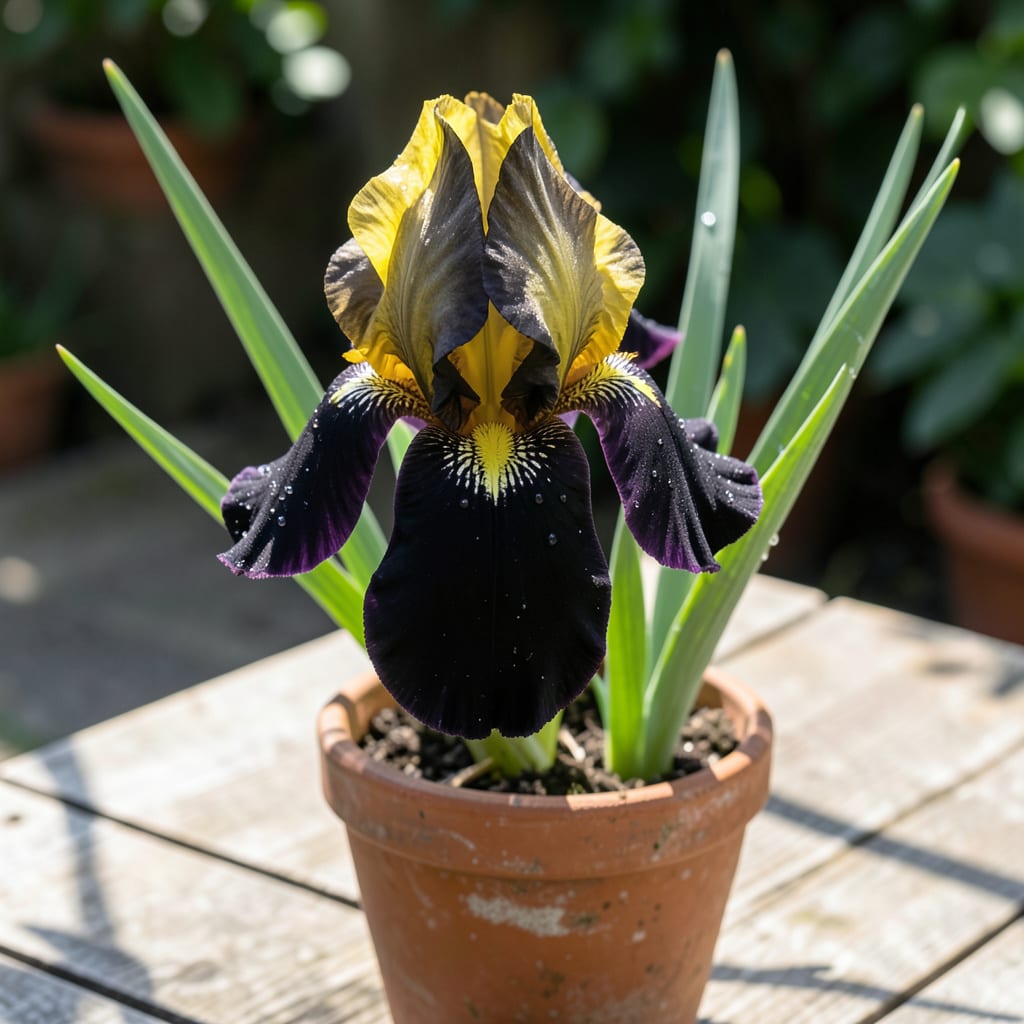
These dramatic blooms stop traffic in my garden every spring. The deep purple-black falls contrasted with bright yellow standards create a look that’s anything but ordinary.
They thrive in full sun with well-draining soil and need minimal care once established. Plant the rhizomes in late summer for show-stopping color the following year.
📚 In This Guide
This method delivers bold, dramatic blooms with minimal effort in any well-drained garden space.
Choose a site with full sun to partial shade—at least 6 hours of direct sunlight daily produces the most vibrant color contrast. Black and yellow iris thrive in USDA zones 3-9, tolerating a wide range but performing best where summers aren’t excessively hot.
Test drainage by digging a 12-inch deep hole and filling it with water. If it drains within 1 hour, you’re good. If water pools for 2+ hours, amending with compost or choosing a raised bed prevents rot. These rhizomes hate soggy feet.
Work the soil to a depth of 12-15 inches, removing rocks and breaking up clumps. Iris prefer slightly acidic to neutral soil (pH 6.8-7.0), but they’re adaptable. If your soil is heavy clay, mix in 2-3 inches of compost to improve drainage and fertility.
Real talk: skip the high-nitrogen fertilizer. Too much nitrogen promotes lush foliage at the expense of blooms. A light application of balanced 10-10-10 fertilizer in early spring is plenty. Avoid fresh manure—it’s too hot and can burn the rhizomes.
Plant rhizomes horizontally, with the top partially exposed to sunlight. Dig a shallow trench 4 inches deep and place the rhizome so the roots spread downward. Space them 12-24 inches apart—closer for immediate impact, farther for long-term growth.
Backfill with soil, pressing gently to eliminate air pockets, but don’t bury the rhizome. You want to see the top ½ inch above the soil line. Water deeply after planting to settle the soil around the roots, then don’t water again for 1-2 weeks unless the weather is extremely dry.
Apply a 2-inch layer of mulch around the plants, keeping it 1 inch away from the rhizome to prevent rot. Organic mulch like shredded bark or straw works well, but avoid thick layers that retain too much moisture.
Water established plants 1 inch per week during the growing season, but let the soil dry out between waterings. Overwatering is the fastest way to kill iris. In late fall, trim back foliage to 6 inches after it yellows to reduce disease risk and tidy the garden.
Every 3-4 years, dig up clumps in early summer after blooming stops. Use a sharp knife to divide the rhizomes, discarding any soft or diseased sections. Replant the healthy divisions immediately, following the same depth and spacing guidelines as initial planting.
This rejuvenates the plants, prevents overcrowding, and gives you free starts to expand your garden or share with neighbors. You’ll notice smaller blooms and reduced vigor when it’s time to divide—don’t wait until the center of the clump dies out completely.
Small details make the difference between thriving plants and a struggling garden bed.
Sunlight Strategy: Those 6 hours of direct sunlight mentioned in Step 1 aren’t just a suggestion. I learned the hard way that plants in shady spots produce weak stems and muted colors. Position them where morning sun hits first—it’s gentler and prevents petal scorch in hotter climates.
Drainage Test Insight: The 1-hour drainage test in Step 1 is your best insurance policy. Confession: I skipped this once and lost three rhizomes to rot within a month. If your hole doesn’t drain within that time, raised beds are your friend. Iris rhizomes literally drown in soggy soil.
Planting Depth Precision: In Step 3, that ½ inch of exposed rhizome isn’t arbitrary. Bury it too deep and you’ll get foliage with no flowers. The top needs sunlight to trigger blooming. Press the soil firmly around the roots but leave that crown breathing—think of it as giving your plant a sun hat.
Watering Discipline: The 1-2 weeks of no watering after planting feels counterintuitive, but it forces roots to grow deep in search of moisture. I break this rule only during extreme drought, and even then, I use just enough to dampen the top inch of soil. Overwatering turns those rhizomes to mush faster than you’d think.
Plant them in well-draining soil with full sun to partial shade. Water moderately, keeping the soil moist but not soggy. Divide clumps every 3-4 years to maintain vigor.
Late summer to early fall is ideal, allowing roots to establish before winter. Alternatively, plant in early spring, avoiding extreme heat or frost.
Yes! Try Iris ‘Before the Storm’ (deep purple) or Iris ‘Midnight Blue’ for dark blooms. Pair with yellow daylilies for a comparable contrast.
Lack of sunlight, overcrowding, or poor soil fertility may be the cause. Ensure 6+ hours of sun, divide clumps if needed, and fertilize lightly in early spring.
They’re moderately resistant but not deer-proof. Use repellents or companion plants like lavender to deter deer from your garden.
