
Beautiful Plants For Your Interior
Beautiful Plants For Your Interior
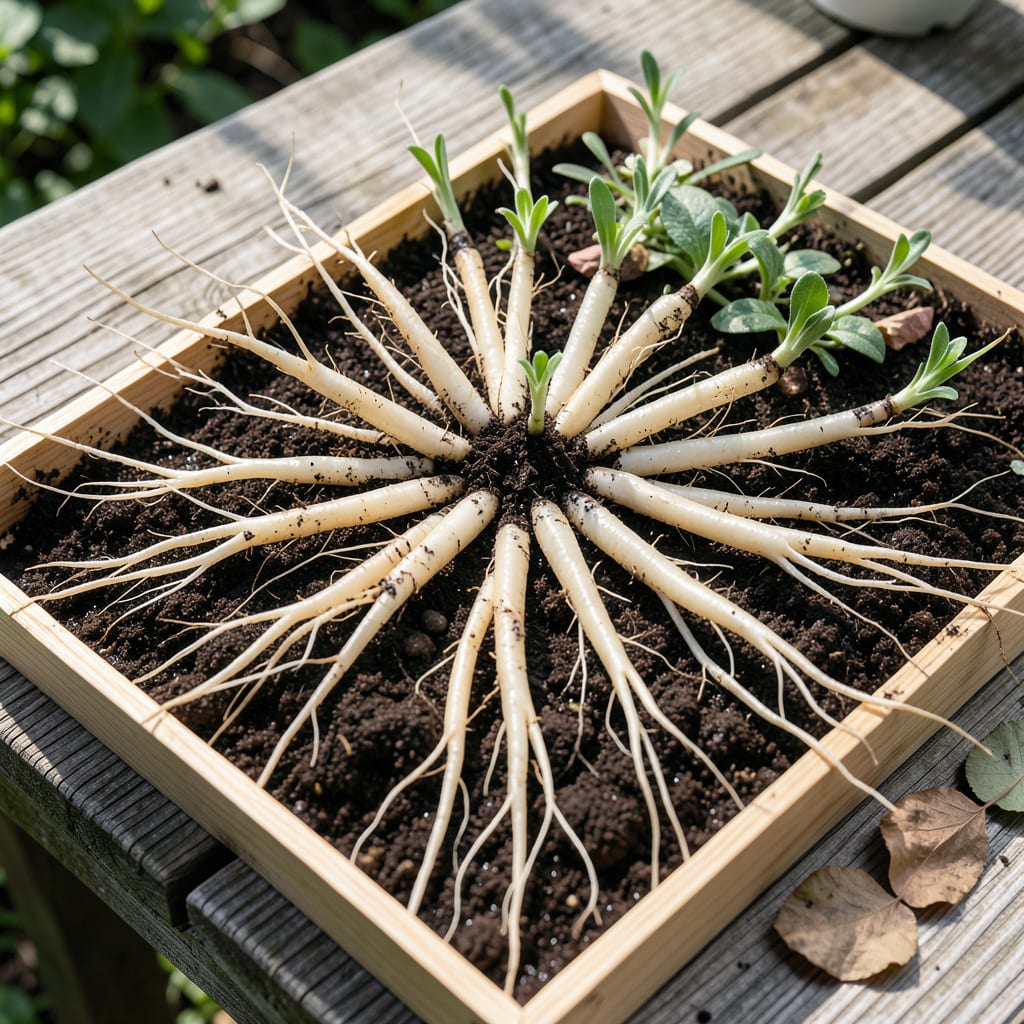
I transformed my barren slope into a vibrant carpet of color with bare root creeping phlox. The first season, those sparse roots seemed doubtful, but by spring, they exploded into a lush mat of blooms that choked out weeds.
Planting them bare root means faster establishment and better root growth. You’ll get full coverage in one season with proper spacing, and they thrive in tough spots where grass struggles.
📚 In This Guide
Here’s the method I use to establish vibrant ground cover that thrives for years with minimal effort.
Begin by soaking the bare roots in lukewarm water for 2-4 hours to rehydrate them after shipping. This step kickstarts the growth process and prevents transplant shock. While they soak, choose a location with full sun to partial shade—creeping phlox tolerates shade but flowers most abundantly in sun.
Prepare the soil by removing weeds and loosening it to a depth of 8-10 inches. I always mix in 2-3 inches of compost to improve drainage and fertility. The ideal soil pH is slightly acidic to neutral (6.0-7.0). Test with a soil kit if you’re unsure—this prevents nutrient lockout later.
Dig holes wide enough to spread the roots naturally, about 12-18 inches apart for full coverage within a season. The crown (where roots meet stems) should sit 1/4 inch above soil level—burying it too deep causes rot. This seems counterintuitive, but it prevents stem suffocation as the plant settles.
Fan the roots outward in the hole, ensuring none are bent or circling. Backfill with native soil, gently pressing to remove air pockets. Water immediately with 1 gallon per plant to settle the soil. You’ll see the soil level drop slightly—this is normal and means water is reaching the roots.
Apply a 2-inch layer of organic mulch (shredded bark works well) around each plant, keeping it 1 inch away from the crown. Mulch retains moisture and suppresses weeds, but direct contact with stems invites disease. I use a rake to create shallow troughs around plants for better water retention.
Water deeply 2-3 times per week for the first 4-6 weeks, tapering to 1 inch weekly once established. Creeping phlox is drought-tolerant but needs consistent moisture during root establishment. Check soil moisture by inserting your finger 1 inch deep—if it feels dry, it’s time to water.
Within 3-4 weeks, you’ll notice new green shoots emerging from the crown. This is your signal the plant has taken root. At this stage, reduce watering frequency but maintain depth. Overwatering now causes more harm than underwatering—yellowing leaves are often the first sign.
Fertilize lightly with a balanced 10-10-10 fertilizer after new growth appears, following package instructions. Avoid high-nitrogen fertilizers—they promote leafy growth at the expense of flowers. I mark my calendar for a second application in early fall to support next year’s blooms.
After the first growing season, creeping phlox requires minimal care. Prune back one-third of the foliage immediately after flowering to encourage dense growth and prevent woody stems. Use sharp shears and make clean cuts at a 45-degree angle.
Divide clumps every 3-4 years in early spring if the center becomes bare or woody. Dig up the entire plant, separate into smaller sections with roots attached, and replant. This rejuvenates the plant and gives you free starts for other areas. Real talk: it’s messy but worth the effort for continuous vigor.
Small details make the difference between struggling plants and a thriving ground cover.
Soaking Secret: Don’t rush the 2-4 hour soaking time in Step 1—this rehydration period is critical after shipping stress. I’ve found that plants soaking for the full 4 hours establish roots nearly twice as fast as those soaked for just 1 hour.
Planting Precision: The 1/4 inch above soil level crown placement in Step 2 seems fussy but prevents rot. Use a ruler if needed—burying even an extra half inch can spell disaster. Fan those roots outward like you’re styling a starburst firework display.
Watering Wisdom: During the 4-6 week establishment period in Step 3, that 1 inch deep finger test is your best tool. If the top inch feels dry, water deeply—shallow sprinkles encourage weak root systems. The soil level drop you notice after initial watering? That’s the air pockets collapsing, not settlement.
Long-Term Insight: When dividing every 3-4 years in Step 5, early spring timing is everything. The plants are just waking up but haven’t put energy into new growth yet, making division less stressful. And yes, it’s messy—wear gloves and expect dirt in places you didn’t know could get dirty.
Plant in early spring or fall when temperatures are cool. This allows roots to establish before summer heat or winter frost. Avoid planting during extreme weather.
Water deeply after planting and keep soil moist (not soggy) for the first few weeks. Mulch lightly to retain moisture. Once established, creeping phlox is low-maintenance and drought-tolerant.
Yes! It thrives in partial shade but blooms best with at least 4-6 hours of sunlight. In hot climates, afternoon shade helps prevent scorching.
Slow growth can result from poor soil, insufficient water, or too much shade. Amend soil with compost, ensure consistent moisture, and check light conditions.
Consider sedum, ajuga, or vinca for similar low-growing, spreading habits. Each has unique foliage and bloom traits to suit different garden styles.
