
Beautiful Plants For Your Interior
Beautiful Plants For Your Interior
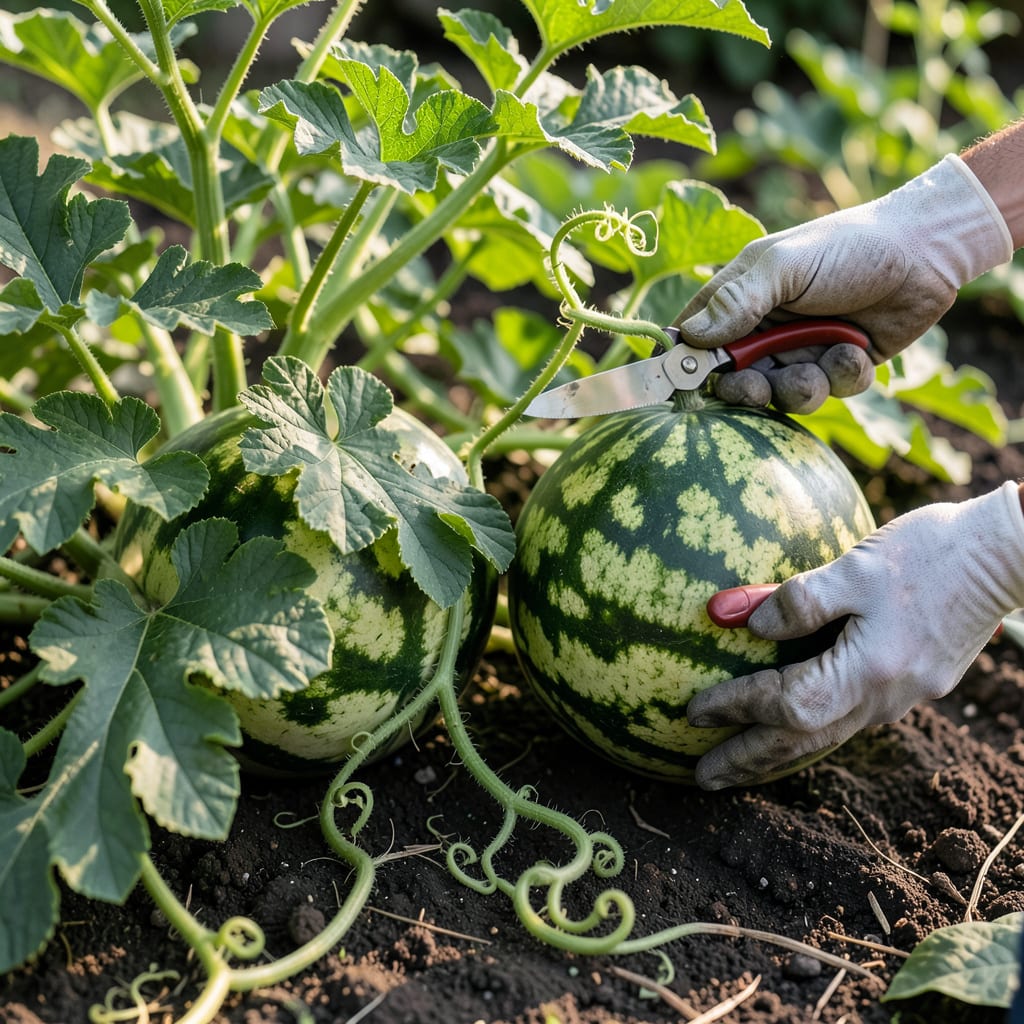
There’s nothing more disappointing than cutting into a watermelon that isn’t ripe. With the 🍉 Watermelon harvest window spanning July – September, timing is everything for that perfect sweetness.
I’ll show you the surefire signs to look for, from tendril color to that telltale thump. These simple checks guarantee you’ll pick at peak ripeness every time.


I always check the curly tendril near the stem first. When it turns brown and dry, that’s your first sign the watermelon is nearing ripeness. This small detail often gets overlooked by beginners.
The ground spot where the melon touches soil is another giveaway. A creamy yellow color indicates it’s ready, while white or pale green means it needs more time on the vine.
| Sign | Ready When |
|---|---|
| Curly tendril | Brown and dry |
| Ground spot | Creamy yellow |
| Rind texture | Dull, hard to scratch |
| Stem condition | Starting to dry |
Examine the rind texture next. A ripe watermelon will have a dull finish rather than a shiny one. When you press your thumbnail against it, the rind should resist penetration.
The stem condition offers another clue. While you shouldn’t rely on this alone, a stem that’s beginning to dry often accompanies other ripeness signs. I check this in combination with the tendril and ground spot.
Size matters too. Most watermelon varieties reach their full size about a week before they’re fully ripe. Compare your melon to the expected size for its variety—this helps confirm other visual signs.
I’ve found that morning harvesting works best. The melons are often at their peak freshness after a cool night. Plus, the vine is less likely to be stressed from midday heat.
Remember that weather affects ripening. Hot, dry periods may speed up the process, while cool, wet weather can delay it. Adjust your checking schedule accordingly during unusual weather patterns.
Finally, trust your instincts. After checking these visual signs a few times, you’ll develop an eye for spotting that perfect watermelon. With practice, you’ll rarely pick an unripe one again. ☀️
The thumping technique is my go-to method for checking ripeness. Tap the watermelon with your knuckles—a deep, hollow sound means it’s ready, while a high-pitched sound indicates it needs more time.
Another reliable test is the weight assessment. A ripe watermelon will feel heavy for its size, as the juicy flesh adds significant weight. Compare it to similar-sized melons to gauge this.
I also recommend comparing the melon’s size to the expected dimensions for its variety. Most watermelons reach their full size about a week before ripening, so this can help confirm other signs.
For the most accurate results, I combine multiple methods. The thump test works best alongside visual checks like the ground spot color and tendril condition. Using all these together gives me confidence in my harvest timing.
Remember that practice improves accuracy. The more watermelons you test, the better you’ll become at identifying that perfect, ripe sound and feel. I’ve found my success rate improves dramatically after just a few harvests.
Always test in the early morning when the vine is fresh. The melons are at their peak hydration, making your ripeness checks more reliable. This timing also helps prevent stress to the plant during hotter parts of the day. 🌱
I see many gardeners pick too early because they’re eager to taste their harvest. This often leads to underripe melons that lack sweetness. Patience is key when growing watermelons.
Another common error is ignoring the ground spot. That creamy yellow patch where the melon rests on the soil is one of the most reliable indicators. A white or pale green spot means it’s not ready yet.
⚠️ Avoid These Harvesting Pitfalls:
Picking before the curly tendril turns brown, relying only on the thump test, or harvesting during hot afternoon hours when the vine is stressed.
Some gardeners make the mistake of relying solely on thumping. While this method works, it’s most accurate when combined with other signs like tendril color and ground spot examination.
Mishandling the vine during harvest can damage both the plant and other developing melons. Always use clean, sharp tools and cut the stem carefully, leaving a few inches attached to the fruit.
I’ve learned that harvesting at the wrong time of day affects quality. The best time is in the early morning when temperatures are cooler and the melons are most hydrated. This helps preserve their freshness and flavor.
Lastly,
A ripe watermelon has a creamy yellow patch where it touches the soil. If it’s white or pale green, leave it on the vine for a few more days.
Yes! A deep, hollow sound when tapped means it’s ripe. A high-pitched sound indicates it needs more time. Combine this with visual checks for best results.
Early morning is ideal. The melons are most hydrated after a cool night, and the vine is less stressed. Avoid harvesting during hot afternoons.
No, most varieties need 70-100 days to mature. Picking too early results in underripe, less sweet fruit. Always check multiple ripeness signs first.
