
Beautiful Plants For Your Interior
Beautiful Plants For Your Interior
I used to think orchids were high-maintenance divas until I discovered the power of proper soaking. That simple change transformed my struggling plants into blooming powerhouses with roots so healthy they practically glowed. The difference between limp leaves and vigorous growth often comes down to how you water—not just how much, but how you deliver […]
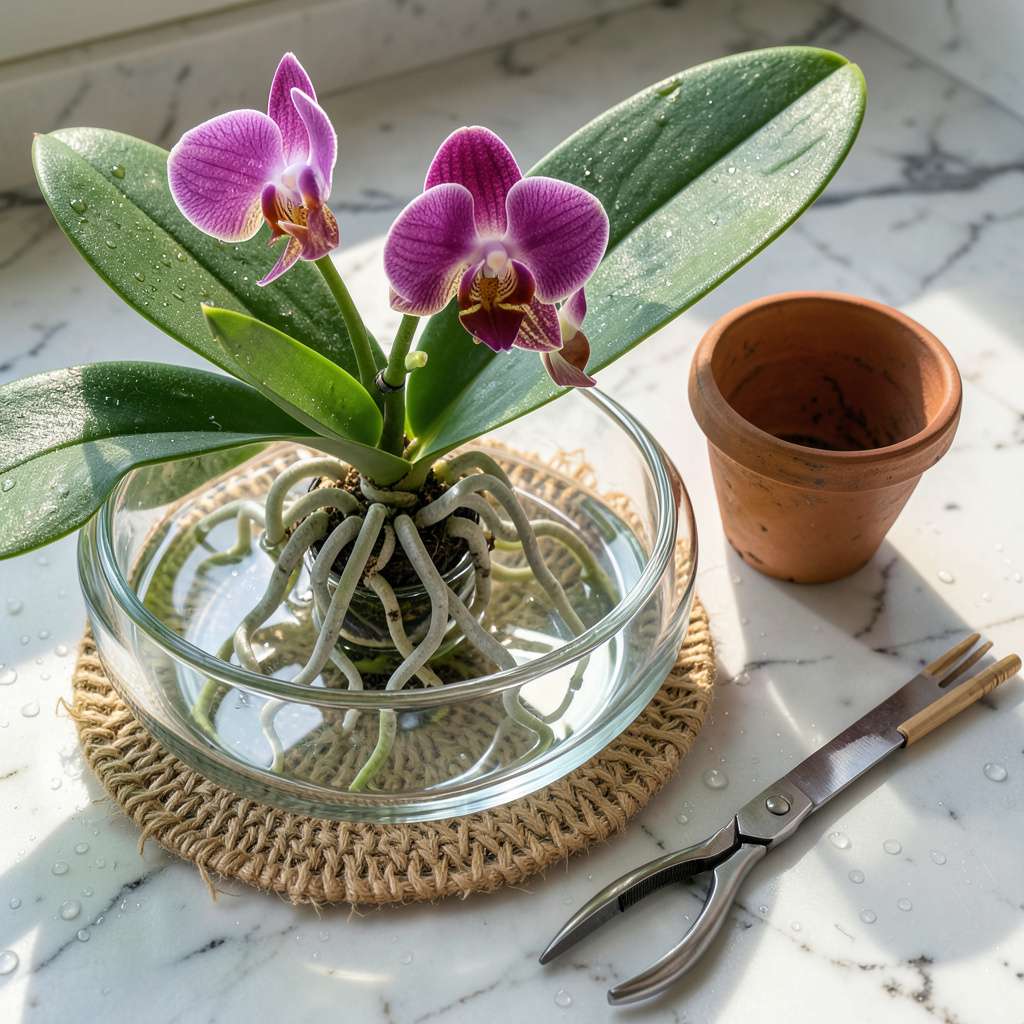
I used to think orchids were high-maintenance divas until I discovered the power of proper soaking. That simple change transformed my struggling plants into blooming powerhouses with roots so healthy they practically glowed. The difference between limp leaves and vigorous growth often comes down to how you water—not just how much, but how you deliver it.
Here’s the thing—most people water orchids like houseplants, and that’s where things go wrong. Soaking mimics the tropical downpours these plants evolved with, flushing salts from the medium while giving roots exactly what they need. My phalaenopsis now produces twice as many blooms since I switched to this method, and the roots stay plump and green instead of shriveled.
You’ll need just a bowl, room-temperature water, and about 15-20 minutes of your time. The technique works for most common orchids, though some species prefer shorter soaks. I’ve revived plants I thought were goners by simply adjusting my soaking routine—no fancy equipment required.
Fair warning: Overdoing it can be just as bad as underwatering. But get it right, and you’ll see new root growth within 2-3 weeks and stronger blooms by next season. The best part? This method actually saves time compared to daily misting or ice cube tricks that never quite work.
📚 In This Guide
This simple technique transforms struggling orchids into vibrant, bloom-ready plants—no special tools required.
First, gently remove the orchid from its decorative pot. I always run my fingers along the inner edges to loosen the root ball before lifting—this prevents snapping healthy roots. If the roots are tightly bound, soak the entire pot in room-temperature water for 5 minutes to help release them.
Inspect the roots carefully. Healthy roots should be plump and silvery-green when dry, turning bright green when wet. Black, mushy roots need trimming with sterilized scissors (cut back to healthy tissue). This step ensures the soaking process actually helps rather than harms your plant.
Fill a bowl or sink with 3-4 inches of lukewarm water—never hot or cold. For standard soaking, place the orchid’s root system directly in the water for 10-15 minutes. You’ll see the roots transform from silvery to vibrant green as they absorb moisture.
For severely dehydrated orchids, I use the “ice cube method” first: place 3-4 ice cubes on top of the potting medium and let them melt completely before soaking. This gradual rehydration prevents root shock. Either method works, but consistency matters more than the technique itself.
Watch for visual cues during soaking. The roots should plump up visibly, and the potting medium will darken as it absorbs water. If the roots still look wrinkled after 15 minutes, let it soak another 5 minutes—but don’t exceed 20 minutes total or you risk root rot.
Here’s the thing—oversoaking is just as dangerous as underwatering. I always set a timer and check the plant halfway through. When the roots feel firm (not squishy) and the medium looks evenly moist, it’s time to stop. Drain thoroughly before returning to its pot.
Most orchids thrive on a weekly soaking schedule, but adjust based on your environment. In dry climates or heated homes, you might need to soak every 5 days. The key indicator is the roots’ color: silvery means thirsty, bright green means hydrated.
After soaking, let the orchid drain completely in a colander or over the sink for 10 minutes. I place mine on a wire rack to ensure air circulates around the roots. This prevents the dreaded “wet feet” that leads to root rot and ensures your orchid stays healthy between soaks.
Track your orchid’s response over 4-6 weeks. You should see new root growth (look for bright green tips) and possibly a flower spike emerging. If leaves remain wrinkled or roots stay gray, increase soaking frequency slightly.
Real talk: some orchids need more time to recover. I’ve had plants take 2-3 months to show improvement, but the soaking method always works if you stay consistent. When you see that first new bloom, you’ll know all the careful soaking was worth it.
Between us, these simple adjustments make all the difference in bringing orchids back to life.
Water Temperature Matters: The instructions specify using room-temperature water for that initial 5-minute pot soak and lukewarm water for the main soaking. I learned the hard way that cold water shocks roots while hot water damages them. A quick test with your wrist—water should feel neutral, not warm or cool—ensures perfect conditions every time.
Root Inspection Secret: In Step 1, when examining roots, look beyond just color. Healthy roots should feel firm when gently squeezed, like a ripe grape. If they collapse or ooze liquid when pressed, they need trimming. I keep a small spray bottle of hydrogen peroxide (3% solution) to sterilize my scissors between cuts—this prevents spreading any potential rot to healthy tissue.
Drainage is Critical: After the 10-15 minute soak, don’t rush the draining process. The instructions specify 10 minutes of draining, and I’ve found placing orchids on a wire rack over a tray works best. This allows air to circulate around all sides of the root system, preventing moisture from pooling at the base where rot often starts.
Consistency Over Method: Whether you choose the standard soaking or ice cube method from Step 2, what matters most is sticking with your chosen approach. I’ve seen orchids thrive with both methods, but switching back and forth confuses the plant. Pick one technique and maintain that same routine for at least 4-6 weeks before evaluating results.
Most orchids thrive with a weekly 10–15 minute soak during active growth (spring/summer). Reduce to every 2–3 weeks in winter or for dormant types like Cattleyas. Over-soaking can rot roots—always let excess water drain!
Tap water works if it’s room temperature and not heavily chlorinated. For sensitive orchids (e.g., Phalaenopsis), use rainwater, distilled, or filtered water to avoid mineral buildup. Let tap water sit 24 hours to dissipate chlorine.
Soaking hydrates roots thoroughly and flushes out salts, while top-watering often misses lower roots. Think of it like a “spa day” for your orchid! Use soaking for reviving dehydrated plants or before fertilizing.
Yellow leaves often signal overwatering or poor drainage. Ensure your pot has slots/drainage holes and never let orchids sit in standing water. If roots look mushy, trim damaged areas and repot in fresh bark mix.
Avoid soaking terrestrial orchids (e.g., Paphiopedilums) or mounted orchids—they prefer mistings or drench-and-dry methods. Always research your specific type! For epiphytes (like Vandas), soaking is usually safe.
Soaking orchids isn’t just a quick fix—it’s a game-changer for healthier roots, vibrant blooms, and a thriving plant. 🌸 By mastering this simple technique, you’ll give your orchids the hydration and nutrient boost they crave, turning lackluster leaves into a stunning display. Remember, consistency is key: stick to a routine, observe your plant’s response, and adjust as needed.
Ready to see the difference? Start with a 10-15 minute soak this week and watch your orchid transform. For even better results, pair soaking with proper lighting and fertilization—your orchid will thank you with bigger, brighter flowers! 💐
