
Beautiful Plants For Your Interior
Beautiful Plants For Your Interior
I used to panic at the thought of repotting an orchid mid-bloom—until I realized the right technique actually boosts flowering instead of killing it. Three years ago, I saved a struggling Phalaenopsis with wilting roots during its bloom cycle, and it rewarded me with two months of additional flowers after repotting. The secret lies in […]
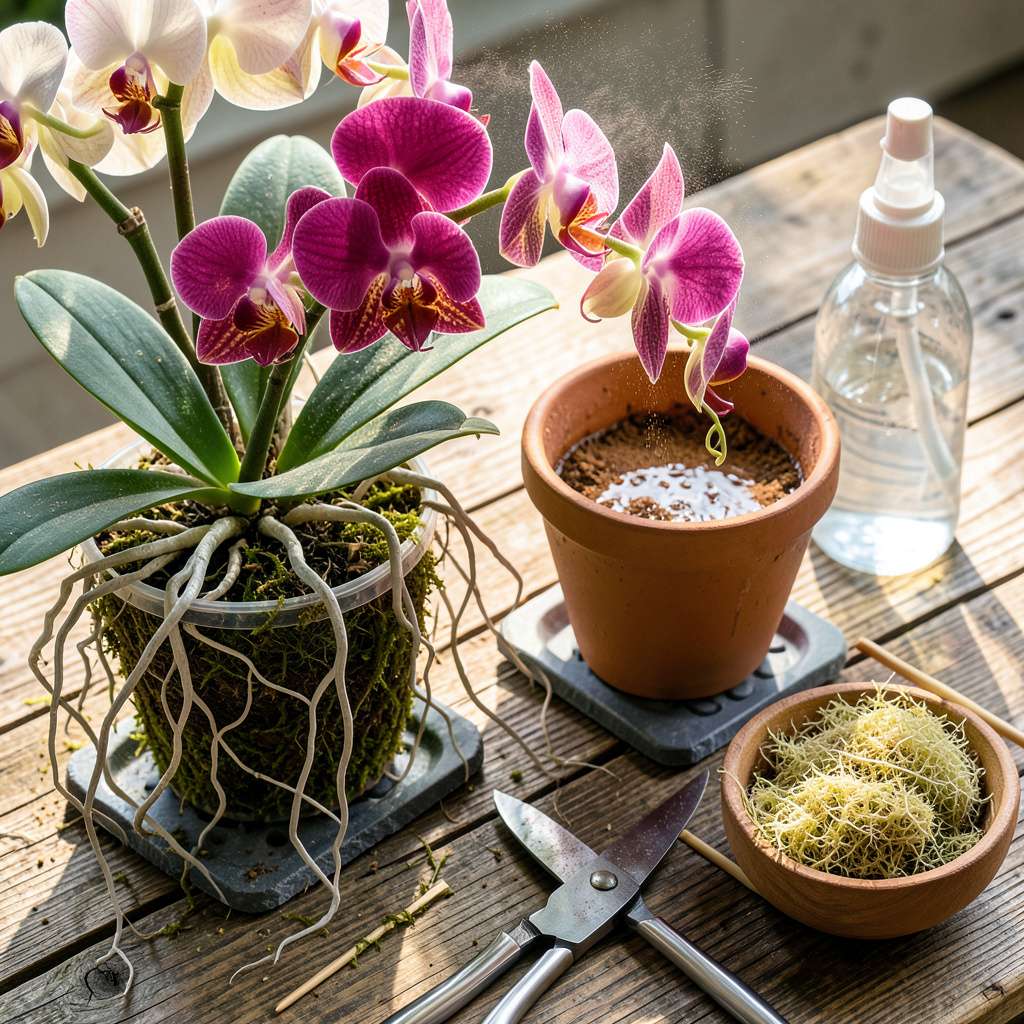
I used to panic at the thought of repotting an orchid mid-bloom—until I realized the right technique actually boosts flowering instead of killing it. Three years ago, I saved a struggling Phalaenopsis with wilting roots during its bloom cycle, and it rewarded me with two months of additional flowers after repotting. The secret lies in timing, gentle handling, and understanding what your orchid truly needs during this delicate phase.
Most guides warn against repotting blooming orchids, but sometimes you don’t have a choice—root rot, overcrowding, or unstable plants demand immediate action. I’ve developed a method that minimizes stress while giving roots the space they crave. You’ll need just 4 basic supplies, a clean workspace, and about 20 minutes of focused attention. The key is working with the plant’s natural rhythms, not against them.
What surprises people most? Properly repotted orchids often produce stronger stems and more vibrant blooms within weeks. I’ve watched rescue orchids perk up overnight when given fresh medium and proper drainage. You’ll see new root tips emerging within days, and the existing flowers will last longer than you’d expect—if you avoid the three critical mistakes most beginners make.
This works for Phalaenopsis, Cattleya, and Oncidium orchids alike, whether you’re dealing with a grocery-store rescue or a prized specimen. The technique adapts to any growing environment, from sunny windowsills to dedicated orchid cases. Here’s exactly how to do it without losing a single bloom.
📚 In This Guide
This delicate process keeps your orchid thriving through bloom—timing and technique make all the difference.
Select a pot that’s 1-2 inches larger than the current one, ensuring it has multiple drainage holes. Orchids despise soggy roots, so I always choose unglazed clay or slotted plastic pots that allow airflow. Soak the new pot in warm water for 10 minutes to prevent it from absorbing moisture from the potting mix later.
Water your orchid thoroughly 24 hours before repotting. This hydrates the roots and makes them more pliable, reducing breakage during the process. You’ll notice the roots turn from silvery-gray to bright green when properly hydrated—a clear sign they’re ready for handling.
Hold the orchid at its base where the stem meets the roots, then turn the pot sideways and tap the edges firmly against a table. The root ball should slide out intact. If it resists, run a butter knife around the inner rim to loosen it—never pull on the stem or you’ll damage the flower spike.
Real talk: Some roots will cling to the pot. Don’t force them. Instead, soak the entire pot in lukewarm water for 5 minutes to soften the medium. The roots will release more easily, and you’ll preserve the delicate bloom stems that make this process nerve-wracking.
Rinse the root ball under tepid water to remove all old potting medium. Healthy roots appear firm and green when wet, while dead roots turn mushy and brown. Use sterilized scissors to trim only the completely dead roots—cutting healthy tissue shocks the plant during bloom.
Here’s the thing—orchids can handle some root loss, but never remove more than 20% of the root mass at once. If you encounter a particularly stubborn dead root tangled in live ones, leave it. The plant will naturally shed it over time without the stress of aggressive pruning.
Place the orchid in the new pot so its base sits ½ inch below the rim. This prevents water from pooling around the stem. Add fresh orchid bark mix around the roots, tapping the pot gently to settle the medium without compacting it. The goal is to anchor the plant while leaving air pockets for root respiration.
Don’t bury the roots completely. Leave the top third exposed to mimic their natural epiphytic growing conditions. I use a chopstick to guide roots into position and ensure no air gaps remain under the base—this prevents the plant from wobbling and damaging new flower spikes.
Water the repotted orchid lightly—just enough to dampen the new medium. Overwatering now invites rot in the vulnerable roots. Place it in bright, indirect light (east or north window) for 5-7 days to reduce stress. You’ll know it’s adjusting well when the roots resume their green color within a week.
Resist the urge to fertilize immediately. Wait until you see new root growth (typically 2-3 weeks) before applying a balanced orchid fertilizer at half strength. The bloom spike may drop its current flowers—this is normal—but the plant will rebound stronger for the next flowering cycle.
Repotting orchids during bloom requires extra care, but these insights from years of experience will help you avoid common pitfalls.
Hydration Timing: The 24-hour pre-watering in Step 1 is non-negotiable. I learned this the hard way after losing several blooms from dry, brittle roots. When roots turn that bright green color, they’re perfectly pliable for handling. If you skip this step, you risk snapping healthy roots that support the flower spike.
Root Handling Technique: During Step 3, use room temperature water—not cold—for rinsing roots. Cold water shocks the plant, while tepid water (around 70°F) keeps the roots supple. When trimming, sterilize your scissors with rubbing alcohol between cuts to prevent bacterial transfer. That 20% root mass limit is critical; I once removed 30% and lost an entire bloom cycle.
Medium Placement Strategy: In Step 4, leaving the top third of roots exposed mimics their natural growing conditions. I use a chopstick to gently position roots without compacting the bark mix. The ½ inch below rim placement prevents stem rot—a common issue I see when orchids sit too deep in their pots.
Post-Repotting Care: The 5-7 day recovery period in Step 5 is when most people overwater. Lightly mist the medium surface if it feels dry, but don’t saturate it. I place my orchids in an east-facing window where they get gentle morning light without harsh afternoon sun that could stress the plant further.
Got questions about repotting orchids while they’re blooming? You’re not alone! Here are the most common concerns—and quick, plant-saving answers.
You can repot a blooming orchid if it’s urgent (like root rot or overcrowding), but it’s riskier. The stress may cause buds to drop. If possible, wait until after flowering—unless the plant’s health is at stake. Use extra care to minimize shock!
Not always, but it’s likely. Orchids are sensitive to change, and repotting can trigger bud blast (premature flower drop). To improve odds, keep humidity high (60-70%) and avoid direct sun for 1-2 weeks post-repot. Think of it as a “plant spa recovery.”
Stick to chunky, airy mixes like fir bark, sphagnum moss, or coconut husk chips. Avoid dense soils—they suffocate roots! For blooming plants, add 10% perlite or charcoal to prevent rot. Pro tip: Soak bark mix for 1 hour before repotting to reduce dust stress.
Skip watering for 5-7 days to let roots heal. Then, water lightly (just enough to dampen the mix) and mist leaves daily. Avoid soaking—wet roots + stress = rot. Use room-temperature water to prevent shock. Think “gentle sips, not a flood!”
My orchid’s leaves are wilting after repotting—help!
Wilting is normal for 1-2 weeks, but if it persists, check for:
Trim mushy roots ASAP if you suspect rot. Patience is key—most bounce back in 3-4 weeks!
Repotting orchids in bloom doesn’t have to be stressful—for you or your plant! 🌸 With the right timing, gentle handling, and a cozy new home, your orchid can thrive through the transition and keep flaunting those gorgeous blooms. Remember: patience and care are your best tools.
Now that you’re equipped with the know-how, why not grab your supplies and give your orchid the upgrade it deserves? Happy repotting—and enjoy the show as your plant continues to dazzle! ✨
