
Beautiful Plants For Your Interior
Beautiful Plants For Your Interior
I’ll be real with you: repotting orchids in bark changed everything for my collection. What started as a desperate attempt to save a struggling plant turned into my secret for bigger blooms and healthier roots. The first time I made the switch, I watched roots that had been rotting in moss suddenly take off with […]
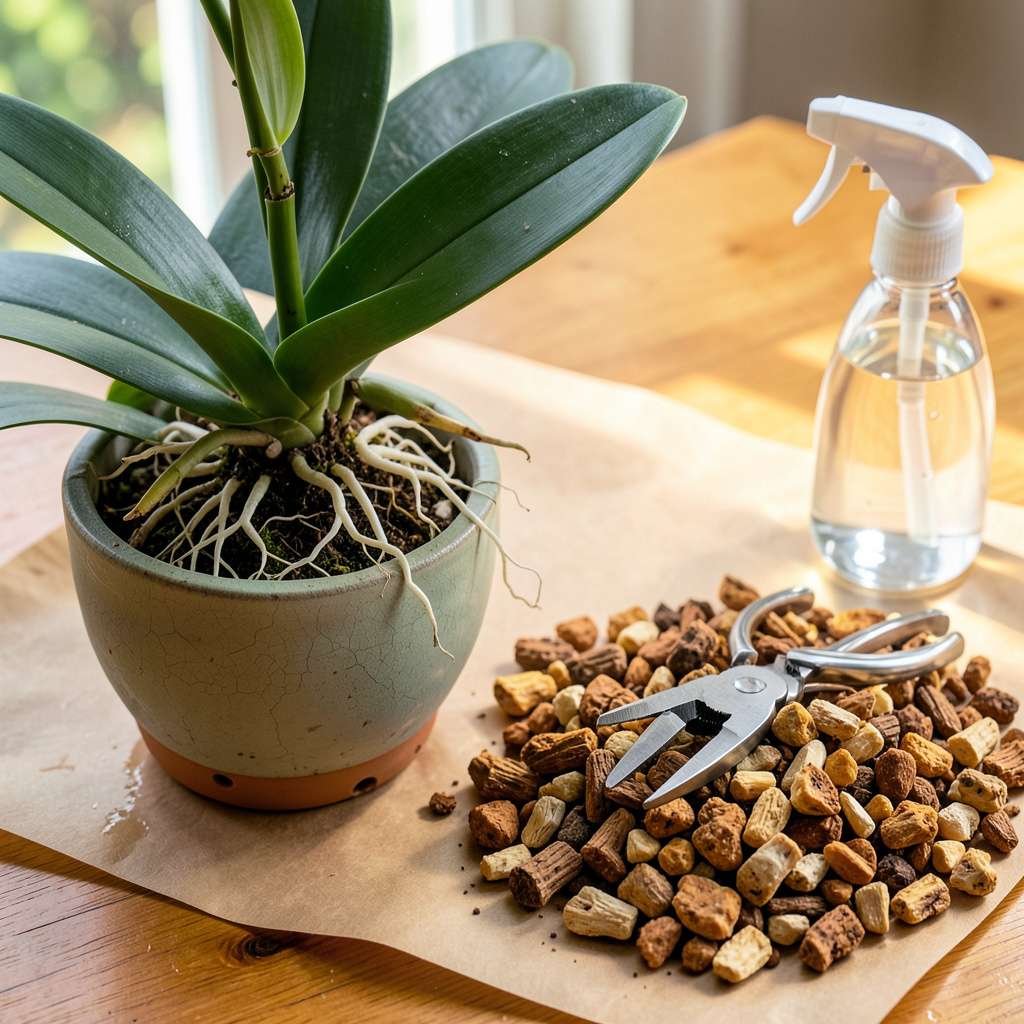
I’ll be real with you: repotting orchids in bark changed everything for my collection. What started as a desperate attempt to save a struggling plant turned into my secret for bigger blooms and healthier roots. The first time I made the switch, I watched roots that had been rotting in moss suddenly take off with new growth within weeks.
Here’s the thing—orchids in nature cling to bark, not sit in damp moss. When you mimic those conditions, the difference shows fast. My plants now stay firmer, resist rot better, and bloom more reliably. The process takes about 30 minutes per plant once you know the steps, and the supplies are simple: just bark, a clean pot, and a few basic tools you probably already own.
You’ll see the payoff in 4-6 weeks when new roots start pushing through the bark, thick and silver-green. Those roots mean stronger plants that can support more flowers. I’ve had orchids that wouldn’t bloom for years suddenly produce spikes after switching to bark—it’s that dramatic of a change.
Works for phalaenopsis, cattleyas, oncidiums—pretty much any epiphytic orchid. The key is timing it right (just after blooming) and using the correct bark size. Let me walk you through exactly how to do it without the guesswork.
📚 In This Guide
This method ensures your orchids thrive with proper airflow and drainage—just follow these clear steps.
Gather all supplies before starting: fresh orchid bark mix, a clean pot with drainage holes, sterile scissors or pruners, and a spray bottle with lukewarm water. I work on a clean, flat surface covered with newspaper to contain the mess. The bark should be chunky—about ½ to 1 inch pieces—to allow air circulation around roots.
Soak the bark in water for 10-15 minutes before use. This helps it absorb moisture initially while still providing the fast-draining environment orchids need. Drain it thoroughly in a colander afterward—soggy bark leads to root rot. Your new pot should be just 1-2 inches larger than the current one; too much space slows growth.
Gently squeeze the sides of the current pot to loosen the root ball, then slide the plant out. If it resists, run a butter knife around the inner edge to free stuck roots. Hold the base of the plant and shake off old bark—don’t worry if some clings to healthy roots.
Rinse the roots under lukewarm water to remove all remaining media. This lets you examine them clearly. Healthy roots are firm and silvery-green when dry, turning bright green when wet. Use sterile scissors to trim any mushy brown or black roots—these are dead and will spread rot. Cut back to where the tissue looks clean and white.
Place a layer of damp bark in the bottom of the new pot—about 1-2 inches deep. Position the orchid so its base sits just below the rim, allowing space for new growth. The oldest pseudobulbs (if present) should be against the pot’s edge, with newer growth centered.
Hold the plant steady while adding bark around the roots. Don’t pack it tightly—orchid roots need air pockets. Gently tap the pot on the table every few inches to help bark settle without compacting. The crown (where leaves meet) should remain above the bark line to prevent rot. You’ll know it’s right when the plant sits firmly but you can still wiggle it slightly.
After filling the pot, use a chopstick or pencil to gently work bark between roots, eliminating large air gaps. The plant should stand upright without support. If it leans, add a stake: insert it near the base, then loosely tie the stem with soft plant tape or a hair tie.
Mist the bark surface lightly and place the pot in bright, indirect light (east or north windows work well). Avoid watering for 5-7 days—this gives damaged roots time to callus. You’ll see new root tips emerging in 2-3 weeks, a sign your orchid is adjusting well to its fresh home.
Repotting orchids can feel intimidating, but these practical insights will help you avoid common pitfalls and set your plant up for success.
Bark Preparation: The 10-15 minute soaking time in Step 1 is crucial—don’t skip it! I’ve found that bark soaked for exactly 15 minutes holds just enough moisture to support new root growth without staying soggy. Drain it thoroughly in a colander and give it a gentle squeeze to remove excess water. This balance prevents root rot while giving your orchid the hydration it needs during the adjustment period.
Root Health Check: When examining roots in Step 2, pay special attention to the texture. Healthy roots should feel firm like a green bean, not mushy like an overripe banana. I always keep a small bowl of diluted hydrogen peroxide (1 part peroxide to 3 parts water) nearby to dip my scissors between cuts—this prevents spreading any potential bacteria to fresh cuts. Remember, it’s better to trim aggressively than leave questionable roots that might spread rot.
Positioning Precision: In Step 3, the 1-2 inch bark layer at the bottom makes all the difference. I use exactly 2 inches for larger orchids with extensive root systems, as this creates better air circulation around the roots. When positioning your plant, rotate the pot as you work to ensure the roots are evenly distributed—this prevents the plant from becoming top-heavy and tipping over as it grows. The crown should sit just above the bark line; I aim for about a quarter-inch of space to prevent moisture from collecting at the base of the leaves.
Post-Repotting Care: The 5-7 day waiting period in Step 4 is non-negotiable. I learned this the hard way after losing a prized phalaenopsis to root rot from premature watering. During this time, maintain humidity by misting the bark surface lightly every other day. Place your orchid in that bright, indirect light and resist the urge to check on it constantly—those new root tips will emerge in 2-3 weeks if you’ve done everything correctly.
Orchids in bark mix typically need repotting every 1–2 years, or when the medium breaks down (loses chunkiness). Signs it’s time: roots spilling over the pot, slow drainage, or salt buildup on the bark. Spring—just before new growth—is the best time for repotting!
Nope! Regular soil suffocates orchid roots by holding too much moisture. Bark mimics their natural epiphytic habitat, allowing airflow and quick drainage. For alternatives, try coconut husk chips or _LECA_ (with adjustments for watering).
Yellowing leaves post-repot are usually stress-related. Check for: overwatering (bark stays soggy), underwatering (roots dry too fast), or root damage during repotting. Give it 2–3 weeks to adjust—avoid fertilizing immediately!
Yes! Soak bark for 30–60 minutes in warm water to hydrate it and remove dust. This prevents the mix from absorbing all the water meant for your orchid’s roots. Drain well before potting—soggy bark = root rot risk!
Choose a pot just 1–2 inches larger than the root ball. Too big = excess bark retains moisture; too small = cramped roots. Pro tip: Clear pots help monitor root health, and slotted pots improve airflow!
Repotting your orchids in bark doesn’t have to be intimidating—it’s a simple way to boost their health and encourage stunning blooms! 🌸 By choosing the right bark mix, timing your repotting carefully, and giving your plants gentle aftercare, you’re setting them up for long-term success. Remember, orchids thrive on patience, so don’t rush the process.
Now that you’re equipped with the know-how, grab your supplies and give your orchids the fresh start they deserve! For next steps, check your plant’s roots in a few weeks to see how they’re adjusting—or explore tips on fertilizing after repotting to keep the growth going strong. Happy growing! 🌱
