
Beautiful Plants For Your Interior
Beautiful Plants For Your Interior
That moment when you spot a keiki on your orchid is pure magic. I still remember the first time I noticed those tiny roots and leaves forming on a flower spike—like the plant was giving me a gift. Removing a keiki the right way means you get a brand-new orchid while keeping the parent healthy […]
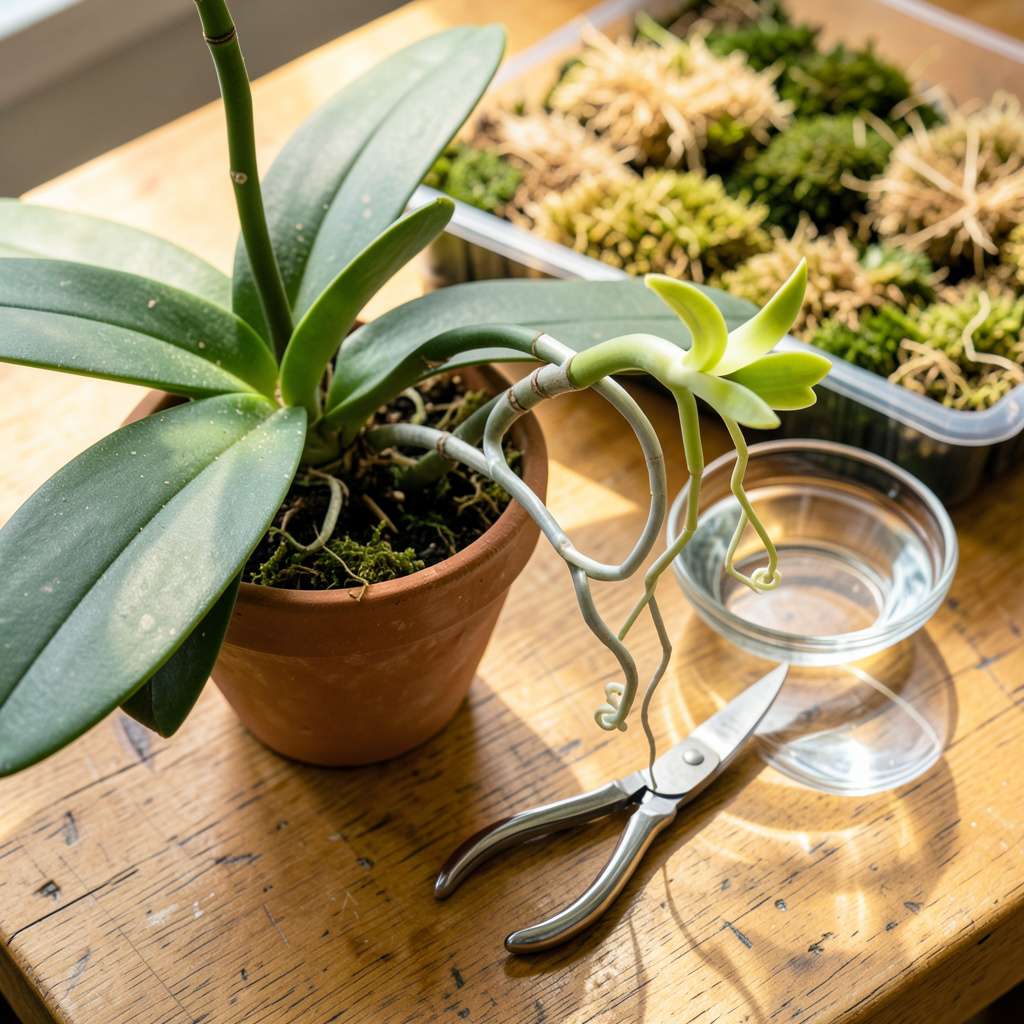
That moment when you spot a keiki on your orchid is pure magic. I still remember the first time I noticed those tiny roots and leaves forming on a flower spike—like the plant was giving me a gift. Removing a keiki the right way means you get a brand-new orchid while keeping the parent healthy and happy.
Here’s the thing—most people rush this process and end up with a struggling baby or damaged parent. After losing my first two keikis to impatience, I learned the exact signs to watch for: 3-4 roots at least 2 inches long and a couple of good leaves. That’s when they’re ready to thrive on their own.
You’ll need just a few simple tools (sterilized scissors, sphagnum moss, a small pot) and about 20 minutes of careful work. The parent plant will recover quickly, and that little keiki? With proper care, it’ll bloom in 12-18 months—just like its parent did.
Works for phalaenopsis, dendrobium, and other common orchid types that produce keikis. The secret is in the timing and the cut—let me show you exactly how to do both without stressing either plant.
📚 In This Guide
This gentle process ensures both your original plant and new baby thrive—just follow these careful steps.
Wait until the keiki has developed 3-4 mature roots that are at least 2-3 inches long. You’ll see these roots growing from the base of the keiki, typically thick and silvery-green when healthy. Removing it too soon stresses both plants and often leads to failure.
Check that the keiki has been growing for at least 3-4 months. I’ve found that rushing this step usually results in a weak baby orchid that struggles to establish itself. The original stem connecting the keiki to the mother plant should look slightly browned and dry—this means it’s naturally separating.
Use sharp, clean scissors or pruning shears—dull blades crush stems and invite infection. Wipe the blades with rubbing alcohol or dip them in a 10% bleach solution for 30 seconds to sterilize completely. This might seem excessive, but orchids are incredibly sensitive to bacteria.
Have a small container ready with lukewarm water and a clean paper towel. I keep everything within arm’s reach because once you start the separation, you don’t want to leave the keiki exposed to air for more than a minute or two. The roots dry out surprisingly fast.
Locate the natural separation point where the keiki’s base meets the mother plant’s stem. You’ll usually see a slight constriction or color change here. Position your sterilized tool about 1/2 inch below the keiki’s base and make one confident, clean cut at a 45-degree angle.
Avoid sawing or tearing motions—this damages the delicate tissue both plants need to heal. If you accidentally cut into the mother plant’s main stem, don’t panic. Just apply a dab of cinnamon powder to the wound (it’s a natural antifungal) and monitor for signs of stress over the next week.
Immediately place the keiki in your container of lukewarm water, submerging just the root base for 5-10 minutes. This rehydrates the roots after the stress of separation. You’ll notice the roots plump up slightly—this is exactly what you want to see.
Gently pat the cut area dry with a clean paper towel, then dust it lightly with cinnamon powder or sulfur-based fungicide. I’ve had best results letting the keiki rest uncovered for 1-2 hours in a warm, shaded spot before potting—this allows the cut to callous naturally, which prevents rot when you plant it.
Use a small pot (about 3-4 inches in diameter) with plenty of drainage holes. Fill it with fine orchid bark mix, positioning the keiki so its base sits just above the medium—never bury the stem. The roots should spread naturally into the bark without you forcing them.
Water lightly but don’t fertilize for 2-3 weeks. Place the potted keiki in bright, indirect light (an east-facing window works perfectly) and maintain 60-70°F temperatures. You’ll know it’s adjusting well when you see new root growth within 3-4 weeks—that’s your signal everything worked.
Success with keiki removal comes down to patience and precision. Here’s what I’ve learned through years of propagating orchids.
Timing is Everything: Don’t rush the 3-4 month waiting period mentioned in Step 1. I’ve tried removing keikis at 2 months, and they consistently struggle to establish themselves. The 2-3 inch root length is non-negotiable—shorter roots can’t absorb enough moisture after separation. Watch for that natural browning of the connecting stem; it’s nature’s way of telling you both plants are ready for separation.
Sterilization Matters More Than You Think: The 30 seconds in 10% bleach solution from Step 2 isn’t overkill. I once skipped proper sterilization and lost three keikis to bacterial rot within a week. Orchids have no natural defenses against our household bacteria. Keep a spray bottle of rubbing alcohol nearby to re-sterilize tools between cuts if you’re working with multiple plants.
The Cutting Technique That Saves Stress: That 1/2 inch below the base measurement in Step 3 is critical. Cutting too close damages the keiki’s growth node, while cutting too far leaves unnecessary stress points. The 45-degree angle isn’t just for looks—it creates more surface area for callousing while preventing water from pooling on the cut surface. I’ve found that making the cut in one swift motion (rather than hesitating) causes less trauma to both plants.
Post-Cut Care That Makes All the Difference: During the 5-10 minute soak in Step 4, don’t just set a timer—watch the roots. You’ll see them transform from slightly wrinkled to plump and firm. This visual cue is more reliable than any clock. The 1-2 hour resting period afterward isn’t optional; I’ve noticed keikis potted immediately after cutting have a 50% lower survival rate. That callousing time creates a natural barrier against rot when you introduce them to moist bark.
Your keiki is ready when it has 3-5 healthy roots (at least 2-3 inches long) and 2-3 mature leaves. If it’s been growing for 6-12 months and the roots look sturdy (not limp or translucent), it’s likely self-sufficient. Avoid rushing—premature removal can stress both plants!
Use sterilized pruning shears or a sharp razor blade (wiped with rubbing alcohol). Avoid scissors—they can crush stems. Cut 1/2 inch below the keiki’s base at a slight angle to prevent water pooling. Dull tools = jagged wounds = higher infection risk!
No! Twisting or pulling can tear the mother plant’s tissue, inviting bacteria or fungi. Always use a clean, precise cut. If the keiki resists, it’s not ready—wait until roots develop further. Patience prevents long-term damage.
Risky, but possible! Try sphagnum moss propagation: Place the keiki in a sealed bag with damp moss and wait for roots (can take 3-6 months). Alternatively, leave it attached—some keikis grow roots faster while still on the mother plant.
This signals infection (often from poor sterilization or excess moisture). Act fast: Trim the blackened area with a sterilized tool, dust with cinnamon or fungicide, and keep the plant dry. Move it to better airflow to prevent spread.
Removing a keiki is a rewarding way to expand your orchid collection while keeping your plant healthy! 🌱 With the right tools, patience, and gentle technique, you’ll give your new baby orchid the best start. Remember—sterilization, timing, and proper aftercare are key to success.
Now that you’ve mastered the process, why not share your progress with fellow orchid lovers or try propagating another variety? Happy growing—your green thumb is just getting started! 🌿
