
Beautiful Plants For Your Interior
Beautiful Plants For Your Interior
There’s something magical about seeing orchids blooming naturally on tree branches—like discovering nature’s own living jewelry. I first tried this method after years of struggling with potted orchids that never quite thrived. Mounting them on trees mimics their natural epiphytic habitat, and the difference in growth and flowering is shocking. The key is choosing the […]
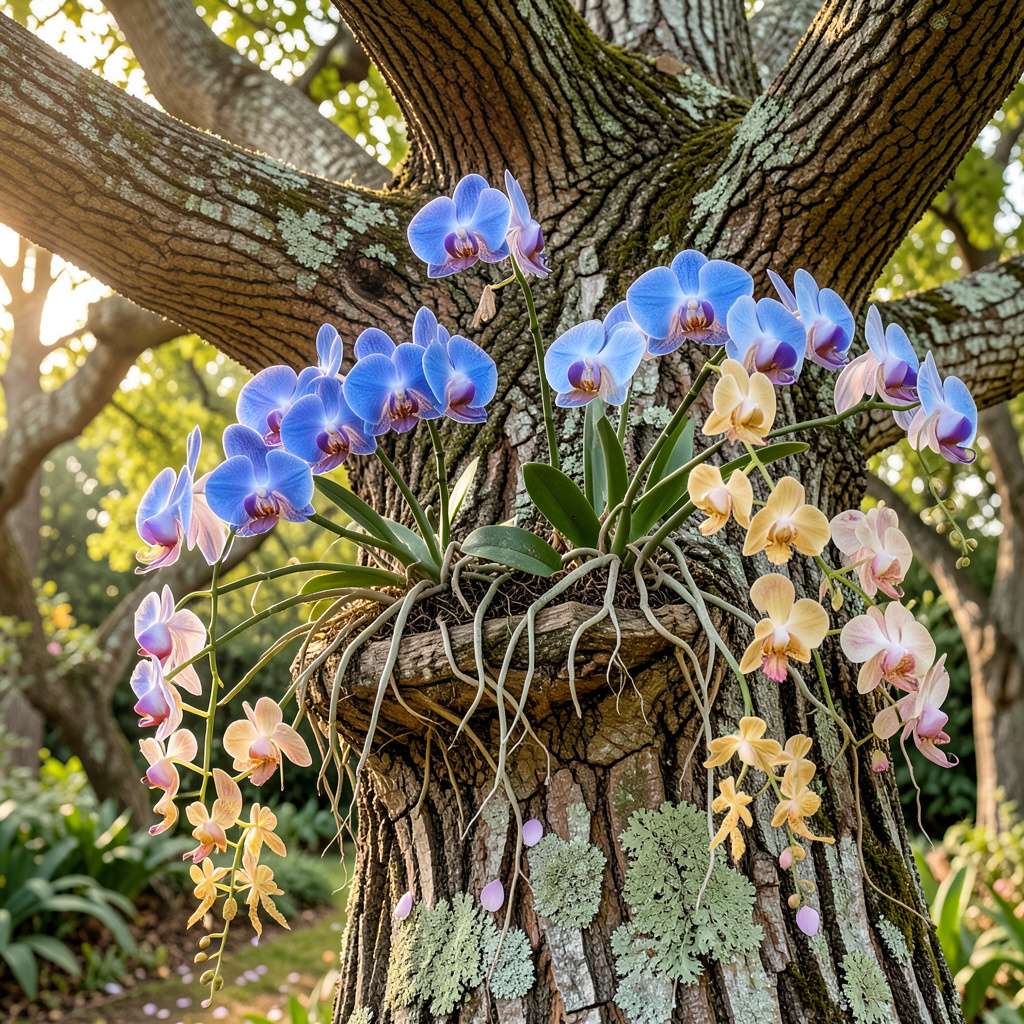
There’s something magical about seeing orchids blooming naturally on tree branches—like discovering nature’s own living jewelry. I first tried this method after years of struggling with potted orchids that never quite thrived. Mounting them on trees mimics their natural epiphytic habitat, and the difference in growth and flowering is shocking.
The key is choosing the right species (Vandas, Cattleyas, and Dendrobiums work beautifully) and the right tree (rough-barked varieties like oak or cypress hold moisture better). You don’t need fancy equipment—just some sphagnum moss, fishing line, and a healthy orchid. Within 4-6 weeks, you’ll see new roots grasping the bark, anchoring the plant naturally.
What surprised me most was how much less maintenance these require than potted orchids. No soggy roots from overwatering, no crowded pots stunting growth. The tree’s microclimate provides perfect air circulation while the orchid’s roots stay happily exposed to air and occasional rain. First blooms appear faster than you’d expect.
This method works in humid climates and even in drier areas with morning mist or occasional spraying. Whether you’re mounting a single showstopper or creating an orchid tree, the process is simpler than it looks. Here’s how to make it work in your garden!
📚 In This Guide
Transforming bare branches into living orchid displays is simpler than you might imagine—here’s how to do it with confidence.
Choose a mature tree with rough, textured bark like oak, cypress, or palm that allows orchid roots to grip naturally. Avoid smooth-barked species such as crepe myrtle or birch—they won’t provide enough anchorage. I prefer trees with horizontal branches that create natural “shelves” for mounting.
For beginners, start with resilient epiphytic orchids like Phalaenopsis, Dendrobium, or Cattleya. These adapt readily to tree life and tolerate the learning curve of outdoor conditions. Examine your orchid’s root system—healthy roots should be plump, silvery-green, and at least 3-4 inches long for secure attachment.
Select a branch that receives dappled morning sunlight and afternoon shade—the ideal light condition for most epiphytic orchids. Use a soft-bristle brush to gently remove any loose bark or debris from the mounting area. This creates a clean surface for root contact while preserving the tree’s natural texture.
Soak your orchid’s roots in lukewarm water for 10-15 minutes to hydrate and soften them. This makes the roots more pliable for positioning and helps prevent breakage during mounting. Gently untangle any circling roots with your fingers, working from the base outward to maintain their natural growth direction.
Position the orchid against the tree so its roots spread naturally over the bark. Use nylon stockings or breathable cotton strips (never wire) to create a loose harness that holds the plant in place. Thread the material through the orchid’s root mass and around the branch, tying it with a simple knot that allows for future growth.
The mounting should be snug enough to prevent shifting in wind but loose enough to accommodate root expansion. Leave the base of the orchid slightly elevated from the bark to allow air circulation—a critical factor in preventing rot. You’ll know it’s correct when the plant stays positioned without wobbling but you can still slide a finger between the roots and bark.
Water your mounted orchid every 2-3 days for the first month, then reduce to once weekly once established. Use a gentle misting nozzle to simulate natural rainfall, ensuring water reaches both the roots and surrounding bark. The bark should feel slightly damp but never soggy—test by pressing your palm against it after watering.
Fertilize monthly with a balanced 20-20-20 orchid fertilizer diluted to half strength. Apply it as a foliar spray in the early morning when stomata are open for maximum absorption. Watch for new root growth—healthy roots will extend outward, gripping the bark within 4-6 weeks, signaling successful establishment.
Inspect your orchid weekly for signs of stress: yellowing leaves indicate too much sun, while dark green foliage suggests insufficient light. Adjust positioning by moving the plant to a different branch if needed—most trees offer multiple microclimates. I’ve found that orchids mounted on the north side of trees often perform best in hot climates.
After 6-8 months, you can remove the mounting material if roots have fully attached. Use clean scissors to cut away the stocking or cotton, leaving the natural root system intact. This is when you’ll see the true beauty of epiphytic growth—roots weaving organically into the bark, creating a self-sustaining display that can thrive for years.
Mounting orchids on trees creates stunning living displays, but these details make the difference between survival and thriving.
Root Preparation Secret: The 10-15 minute soak in lukewarm water mentioned in Step 2 isn’t just about hydration—it’s critical for root flexibility. I’ve found that water just warm to the touch (about 85°F) works best to soften roots without shocking the plant. Gently massage the roots during soaking to help untangle them before positioning. This small step prevents breakage when you’re securing the orchid to the tree.
Mounting Material Wisdom: While nylon stockings work well as suggested in Step 3, I prefer using strips of old cotton t-shirts. The natural fibers break down more slowly than nylon and provide better air circulation. Cut 1-inch wide strips and tie them with a square knot—it holds securely but is easier to remove later. Remember to leave that finger-width gap between roots and bark; I use a wooden skewer to maintain consistent spacing while tying.
Light Assessment Technique: The “dappled morning sunlight” mentioned in Step 2 can be tricky to judge. Here’s my method: at 10 AM, hold your hand 12 inches above the mounting spot. If you see distinct shadow outlines of your fingers, the light is too direct. Ideal conditions will cast soft, blurred shadows. In hot climates, I’ve had best results with east-facing branches that get morning sun but are shaded by the tree’s canopy by noon.
Establishment Timeline Insight: The 4-6 week period mentioned in Step 4 for root attachment is accurate, but watch for these milestones: within 2 weeks you should see roots beginning to turn from silvery-green to slightly darker as they make contact with bark. By week 4, you’ll notice tiny root hairs extending into bark crevices. This is when you can reduce watering frequency, as the orchid is starting to draw moisture from the tree’s microclimate.
Got questions about growing orchids on trees? You’re not alone! Here are the most common curiosities—answered simply and clearly.
Not all orchids are epiphytes (tree-dwellers)! Stick to Phalaenopsis, Dendrobium, Cattleya, or Vanda—these thrive without soil. Avoid terrestrial orchids like Paphiopedilum; they need potting mix. Always check the species’ natural habitat first!
Spring or early summer (when temps stay above 50°F/10°C) is ideal. This gives roots time to attach before winter dormancy. Avoid extreme heat or cold—stress slows growth. Pro tip: Mist daily for the first 2 weeks to help roots acclimate!
Yes! Tree-mounted orchids dry out faster. Water 2–3 times a week in warm weather (soak roots thoroughly), but cut back in winter. Rainwater or distilled water prevents mineral buildup. Check roots—silver-gray means thirsty; green means hydrated!
Yellowing leaves often signal overwatering, sunburn, or poor airflow. Ensure the tree bark isn’t retaining moisture (use a mounting pad if needed). Move to dappled shade if leaves scorch. Trim dead roots with sterilized shears to prevent rot.
No tree? No problem! Try:
Just ensure the material is non-toxic and allows airflow!
Growing orchids on trees isn’t just a unique gardening technique—it’s a way to unlock their natural beauty while keeping them healthy and vibrant. 🌿 By mimicking their epiphytic roots and providing the right balance of light, air, and moisture, you can transform your space into a lush, thriving display.
Ready to get started? Pick a sturdy, well-suited tree, gather your materials, and let your orchids flourish in their new aerial home. Your green thumb just got a little more adventurous! 🌸
