
Beautiful Plants For Your Interior
Beautiful Plants For Your Interior
That first orchid bloom in January changed everything. I’d spent years watching tropical beauties struggle on my windowsill—until I realized a small greenhouse could turn my 6×4-foot patio space into a year-round paradise. The difference isn’t magic; it’s about replicating what these plants experience in their native cloud forests, just on a smaller scale. Here’s […]
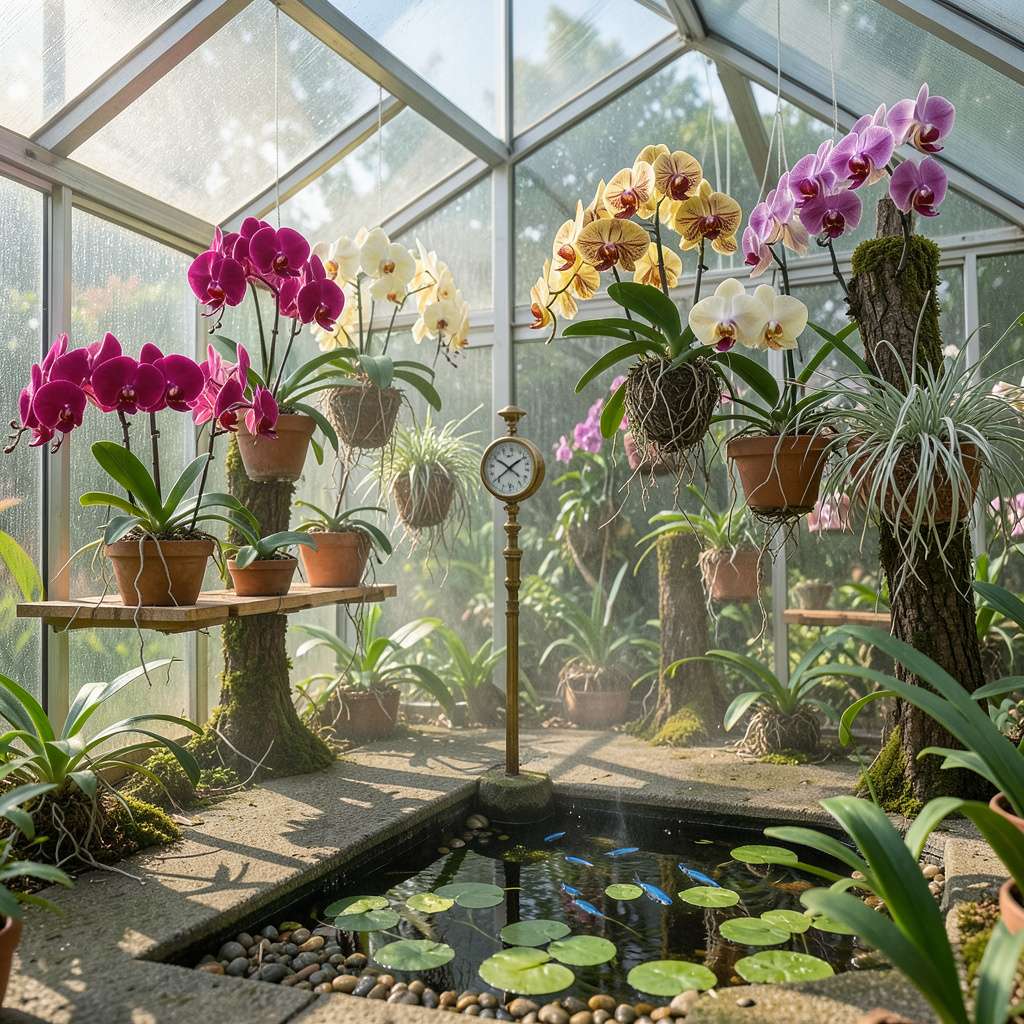
That first orchid bloom in January changed everything. I’d spent years watching tropical beauties struggle on my windowsill—until I realized a small greenhouse could turn my 6×4-foot patio space into a year-round paradise. The difference isn’t magic; it’s about replicating what these plants experience in their native cloud forests, just on a smaller scale.
Here’s the thing—most orchid greenhouses fail because they’re either too complex or too neglected. Mine thrives with just three key adjustments: consistent humidity, gentle airflow, and light that mimics dappled jungle shade. The setup took an afternoon and cost less than a single grocery trip, but the results look like they belong in a botanical garden.
You’ll start seeing new roots within weeks and the first flower spikes by month three. The real payoff comes when your neighbors ask how you keep producing blooms while their plants sit dormant. My phalaenopsis now reblooms reliably every 4-6 months, and the cattleyas? Their fragrance stops people in their tracks.
Works for apartment balconies, backyard corners, or even sunny basements with grow lights. The secret isn’t space—it’s understanding what these plants actually need versus what we assume they want. Let me show you how to get it right the first time.
📚 In This Guide
Greenhouse frame (aluminum, PVC, or wood—minimum 6’ x 8’ for hobbyists)
Exhaust fan (12” diameter, 120V, 200+ CFM) + thermostat
Orchid pots (4-6” slotted or mesh, 10-20 depending on collection size)
Pruning shears (sterilized, sharp)
This method delivers consistent tropical conditions that coax orchids into spectacular, year-round blooms—no exotic equipment required.
Choose a location with stable temperatures between 65-80°F and 50-70% humidity. A spare bathroom with natural light, a sunroom, or even a well-lit closet with grow lights works perfectly. I’ve found east-facing windows ideal—they provide gentle morning sun without the harsh afternoon intensity that scorches leaves.
Install a small hygrometer/thermometer combo at orchid height (about 3 feet from the floor) to monitor conditions accurately. Clean the space thoroughly with a 10% bleach solution to eliminate any fungal spores or pests that could compromise your orchids’ health from day one.
Position a small oscillating fan to create gentle airflow—just enough to make leaves sway slightly. This prevents the stagnant air that invites fungal diseases while strengthening stems. Run it continuously at low speed, but avoid direct drafts on plants.
For humidity, I use a cool-mist humidifier set to maintain 50-70% relative humidity. Place it near the orchids but not directly under them to avoid water droplets collecting on leaves. You’ll see ideal conditions when condensation forms lightly on the greenhouse walls in the morning but evaporates by midday.
Orchids require 12-14 hours of bright, indirect light daily. I combine full-spectrum LED grow lights (positioned 12-18 inches above plants) with natural light when available. The leaves should appear olive green—dark green indicates insufficient light, while red-tinged leaves signal too much intensity.
Use a timer to maintain consistent photoperiods. I’ve found that gradual light increases in spring (adding 15 minutes weekly) and decreases in fall (reducing 15 minutes weekly) mimic natural seasonal changes and encourage reliable blooming cycles.
Water orchids in the morning using room-temperature rainwater or distilled water, allowing excess to drain completely. I check moisture by inserting a wooden skewer—when it comes out completely dry after 2 inches, it’s time to water. This typically means watering every 5-7 days in ideal conditions.
Feed weekly with a balanced orchid fertilizer (20-20-20) diluted to half strength during active growth. Reduce to monthly applications in winter. You’ll notice stronger root growth when new roots appear silver-green with bright green tips—a sign your feeding program is working perfectly.
As seasons shift, watch for subtle changes in your orchids’ appearance. Yellowing lower leaves often indicate normal aging, but if upper leaves yellow, check for overwatering or insufficient light. I adjust my humidifier settings monthly—higher in winter when indoor air dries, lower in summer when ambient humidity rises.
When flower spikes emerge, increase phosphorus slightly (switch to 10-30-20 fertilizer) to support bloom development. You’ll see the difference in flower size and longevity—proper seasonal adjustments can extend bloom periods from weeks to months with the same plant.
Creating the ideal orchid environment requires attention to details that make all the difference between struggling plants and spectacular blooms.
Temperature Nuances: The 65-80°F range mentioned in Step 1 is critical, but here’s what I’ve learned: nighttime temperatures at the lower end (65-70°F) actually stimulate flower spike development. I use a programmable thermostat to create this natural fluctuation, which mimics tropical nighttime cooling and triggers more reliable blooming cycles.
Humidity Mastery: When maintaining the 50-70% humidity from Step 2, I’ve found that grouping orchids together creates a microclimate that helps maintain consistent moisture levels. The plants themselves release water vapor through transpiration, which means you might need slightly less output from your cool-mist humidifier when they’re densely arranged.
Lighting Precision: For the 12-14 hours of light in Step 3, I recommend using a light meter to verify intensity at plant level. Orchids need 1,000-1,500 foot-candles of light—about the brightness of a well-lit office. When using the 12-18 inch positioning for LED grow lights, adjust height based on actual measurements rather than just visual appearance of leaves.
Seasonal Transition Tip: The 15-minute weekly adjustments in Step 5 are more important than they seem. I’ve discovered that making these changes on Sundays creates a predictable routine that helps me remember to adjust timers gradually. Sudden light changes can stress orchids, so these small weekly increments prevent shock while encouraging natural growth cycles.
Costs vary widely! A small DIY greenhouse starts around $500–$1,500 for basic materials, while pre-built kits range from $2,000–$10,000+. High-end custom designs with climate control can exceed $20,000. Factor in ventilation, shading, and irrigation for a realistic budget.
With proper temperature control (60–85°F), humidity (40–70%), and light management (12–14 hours/day), orchids thrive year-round. Use shade cloth in summer and heaters/fans in winter. Tropical varieties like Phalaenopsis or Vanda love stable greenhouse conditions!
No greenhouse? No problem! Try:
Pair with a humidifier and grow lights for similar results!
Watering depends on humidity, pot size, and orchid type. Generally, water every 5–10 days—let the medium dry slightly between waterings. Use rainwater or distilled water to avoid mineral buildup. Pro tip: Morning watering prevents evening dampness!
Common culprits:
Adjust one factor at a time to troubleshoot!
Building an orchid greenhouse opens the door to vibrant, year-round blooms—no matter your climate! 🌸 With the right setup, you’ll enjoy healthier plants, fewer pests, and the joy of watching rare varieties thrive. Start small with a DIY mini-greenhouse or invest in a sturdy structure; either way, your orchids will thank you.
Ready to dive in? Pick one orchid species to focus on first, gather your materials, and let your green thumb shine! For extra confidence, join an orchid forum or local club to swap tips with fellow enthusiasts. Happy growing! 🌱
