
Beautiful Plants For Your Interior
Beautiful Plants For Your Interior
There’s something magical about seeing orchids thrive without soil—just as nature intended. Mounting orchids transforms them into living sculptures, revealing their true epiphytic beauty. I’ve been growing orchids this way for years, and the difference in health and flowering compared to potted plants is stunning. The roots breathe freely, growth accelerates, and blooms become more […]
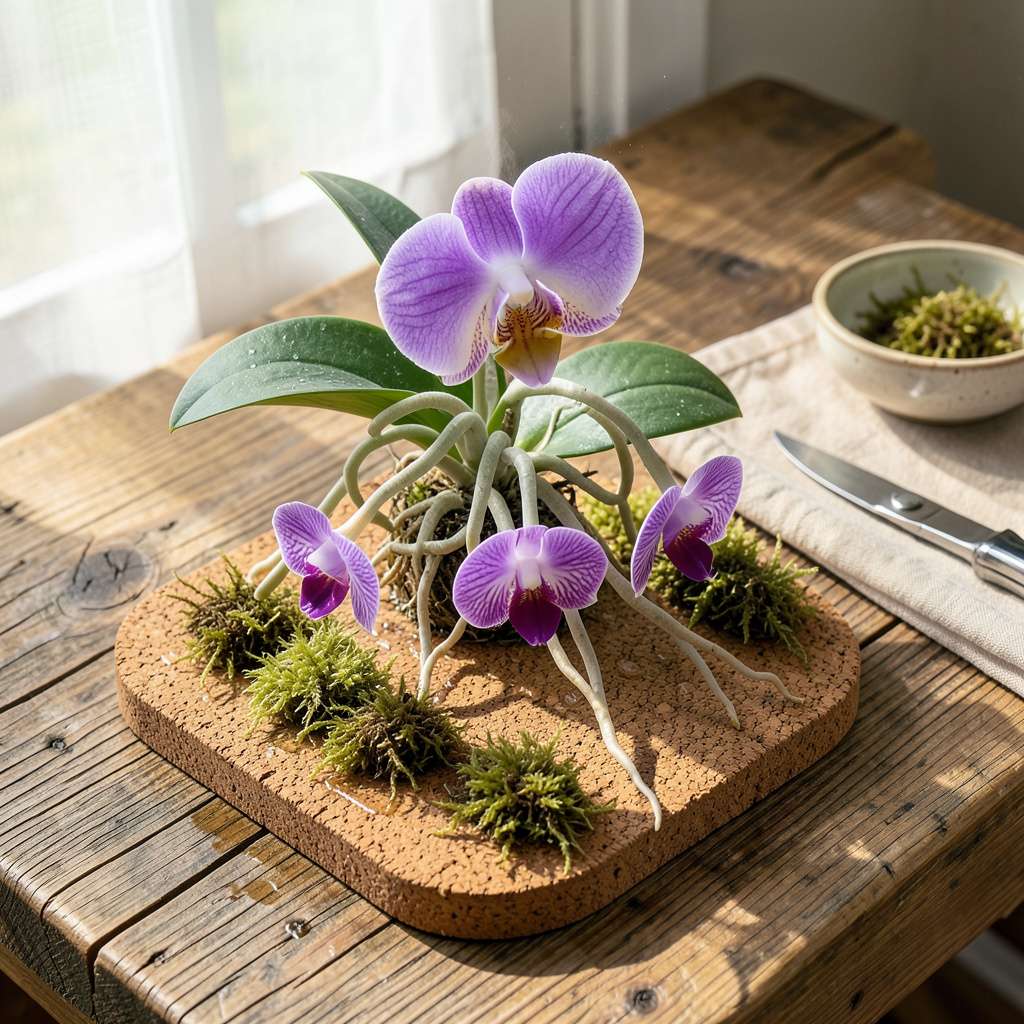
There’s something magical about seeing orchids thrive without soil—just as nature intended. Mounting orchids transforms them into living sculptures, revealing their true epiphytic beauty. I’ve been growing orchids this way for years, and the difference in health and flowering compared to potted plants is stunning. The roots breathe freely, growth accelerates, and blooms become more abundant when you get the mounting right.
The process feels intimidating until you realize it’s simpler than traditional potting. You’ll need just a few basic materials: a suitable mount (cork, tree fern, or driftwood works beautifully), some sphagnum moss for moisture retention, and the right fastening technique. My first mounted orchid took about 20 minutes from start to finish, and it’s still thriving three years later with minimal care.
What you’ll achieve is a display that looks like it belongs in a tropical forest. The roots cling naturally to the mount, new growth emerges faster than in pots, and the plants develop that coveted “specimen” look that makes orchid enthusiasts jealous. Watering becomes intuitive once you understand the rhythm—no more guessing about soggy medium or root rot.
This method works for Vandas, Cattleyas, Phalaenopsis, and dozens of other epiphytic types. Whether you’re mounting one prized plant or creating a living wall of orchids, the technique scales beautifully. The key is starting with healthy roots and choosing the right mount for your space and climate conditions.
📚 In This Guide
1–2 yards of nylon stockings (cut into strips) OR
This method transforms bare-root orchids into stunning, long-lasting displays that mimic their natural habitat.
Choose a mounting material that allows for excellent airflow and moisture retention—cork slabs, tree fern plaques, or rough-barked hardwood branches work best. I prefer cork for beginners because its natural texture gives roots something to grip immediately. Soak your chosen mount in lukewarm water for 30 minutes to fully saturate it before mounting.
The soaking step is critical: dry mounts will wick moisture away from roots during the initial attachment phase. While the mount hydrates, inspect your orchid’s root system. Healthy roots should appear silver-green when dry and bright green when wet. Trim any black or mushy roots with sterilized scissors, as these indicate rot that could spread to your healthy display.
Lay your orchid on the mount with the growth point (where new leaves emerge) positioned at the top. Spread the roots naturally across the surface—they should fan out like fingers rather than bunching. For Vanda or Phalaenopsis types, I position the base slightly off-center to allow room for future growth without crowding the mount’s edges.
Use nylon stocking strips or orchid mounting clips to secure the plant—never wire, as it can cut into stems over time. Thread the stocking through the mount’s holes or around its back, then tie it snugly but not tightly around the orchid’s base. The roots should maintain contact with the mount but not be compressed. Check that the plant can’t shift when you gently tug it.
After mounting, immediately soak the entire display in room-temperature water for 10-15 minutes. This first soaking hydrates both the mount and roots simultaneously, creating the moisture bond that helps roots attach. I add a drop of superthrive solution to the water to reduce transplant shock and encourage root growth during this critical phase.
Place your mounted orchid in an area with 70-80% humidity and bright, indirect light (east-facing windowsills work well). Mist the roots twice daily for the first week, then reduce to once daily. You’ll know the mounting is successful when new roots begin growing along the mount’s surface rather than into the air—this typically occurs within 3-4 weeks.
Water your mounted orchid by soaking the entire display for 5-7 minutes every 3-5 days, depending on your humidity levels. The mount should feel slightly damp but not soggy between waterings. I fertilize with a balanced orchid fertilizer (20-20-20) at quarter strength every other watering during active growth periods, reducing to monthly applications in winter.
Watch for new root growth emerging from the base—these will naturally adhere to the mount over time. As the orchid establishes, you can gradually reduce misting to every other day. The real test comes when you see new leaves or flower spikes developing: this confirms your mounting technique has successfully replicated the orchid’s epiphytic conditions. Most mounted orchids will bloom within 6-12 months when properly cared for.
Mounting orchids successfully comes down to understanding their epiphytic nature and replicating their natural conditions. Here’s what we’ve learned through years of trial and error.
Mount Preparation Insight: The 30-minute soaking time for your mount isn’t arbitrary—it ensures complete saturation that prevents moisture competition between the mount and roots during those critical first weeks. I’ve found that cork slabs absorb water more quickly than tree fern, so if using tree fern, you might extend the soak by 5-10 minutes to achieve the same level of saturation. Always test by pressing the surface—it should feel uniformly damp without dripping.
Root Positioning Technique: When spreading the roots in Step 2, resist the urge to arrange them “neatly.” The natural fanning pattern you’re creating mimics how orchids grow on trees in nature, where roots explore bark crevices. For Vanda orchids with particularly long roots, I’ve had success gently coiling the excess roots in a loose spiral rather than cutting them—this preserves their moisture-absorbing capacity while keeping the display compact.
Initial Care Critical Window: The first 10-15 minute soak after mounting serves two purposes: it hydrates the roots and creates that essential moisture bond with the mount. What most guides don’t tell you is that the water temperature matters—room temperature is ideal because cold water can shock the roots while warm water may encourage bacterial growth. During the first week’s twice-daily misting, use a fine spray bottle and focus on the root-mount interface rather than the leaves to encourage attachment.
Long-Term Establishment Tip: The 3-4 week period mentioned in Step 3 for new root growth along the mount is when you’ll see the most dramatic changes. This is when the orchid transitions from surviving to thriving in its new environment. I mark my calendar to check for three signs of successful establishment: new root tips appearing (they’ll be bright green), the base feeling firmly anchored when gently tugged, and the mount staying damp slightly longer between waterings as the roots begin functioning normally.
Here are the most common questions about mounting orchids—answered simply!
Spring or early summer is ideal, when orchids enter active growth. Avoid mounting during dormancy (fall/winter) or while blooming. Healthy roots and new growth indicate the perfect time to attach them to a new surface.
Mounting mimics an orchid’s natural epiphytic habitat (like tree branches), promoting better airflow and faster drying. Potting holds more moisture, which suits terrestrial orchids. Mounting works best for Vandas, Cattleyas, or Phalaenopsis with thick roots.
Dry roots often mean underwatering or low humidity. Mist daily in dry climates or soak the mount for 5–10 minutes every 3–5 days. If roots are shriveled, increase humidity with a tray of water + pebbles nearby.
Stick to natural, breathable materials like cork, tree fern plaques, or untreated wood. Avoid chemically treated or smooth surfaces (e.g., plastic, painted wood)—they trap moisture and lack grip for roots.
Roots typically anchor in 2–6 months, depending on species and conditions. Speed it up by keeping humidity high (50–70%) and avoiding disturbances. Use sphagnum moss or cotton ties for temporary support if needed.
Mounting orchids is your ticket to healthier, more vibrant plants that mimic their natural habitat! 🌿 With the right materials—like cork, tree fern plaques, or even driftwood—and a little patience, you’ll create a stunning display that thrives for years. Remember, proper airflow and humidity are key to keeping your epiphytic beauties happy.
Ready to take the next step? Start small with a single orchid and experiment with different mounts to see what works best in your space. Before you know it, you’ll have a lush, eye-catching collection that turns heads! 🌸 Grab your supplies and get mounting—your orchids will thank you!
