
Beautiful Plants For Your Interior
Beautiful Plants For Your Interior
Orchids develop stronger roots and more vibrant blooms when watered properly—not too much, not too little. After losing several orchids to root rot early in my gardening journey, I perfected a method that keeps plants thriving with minimal effort. The key lies in understanding their natural growing conditions and replicating that balance in your home […]
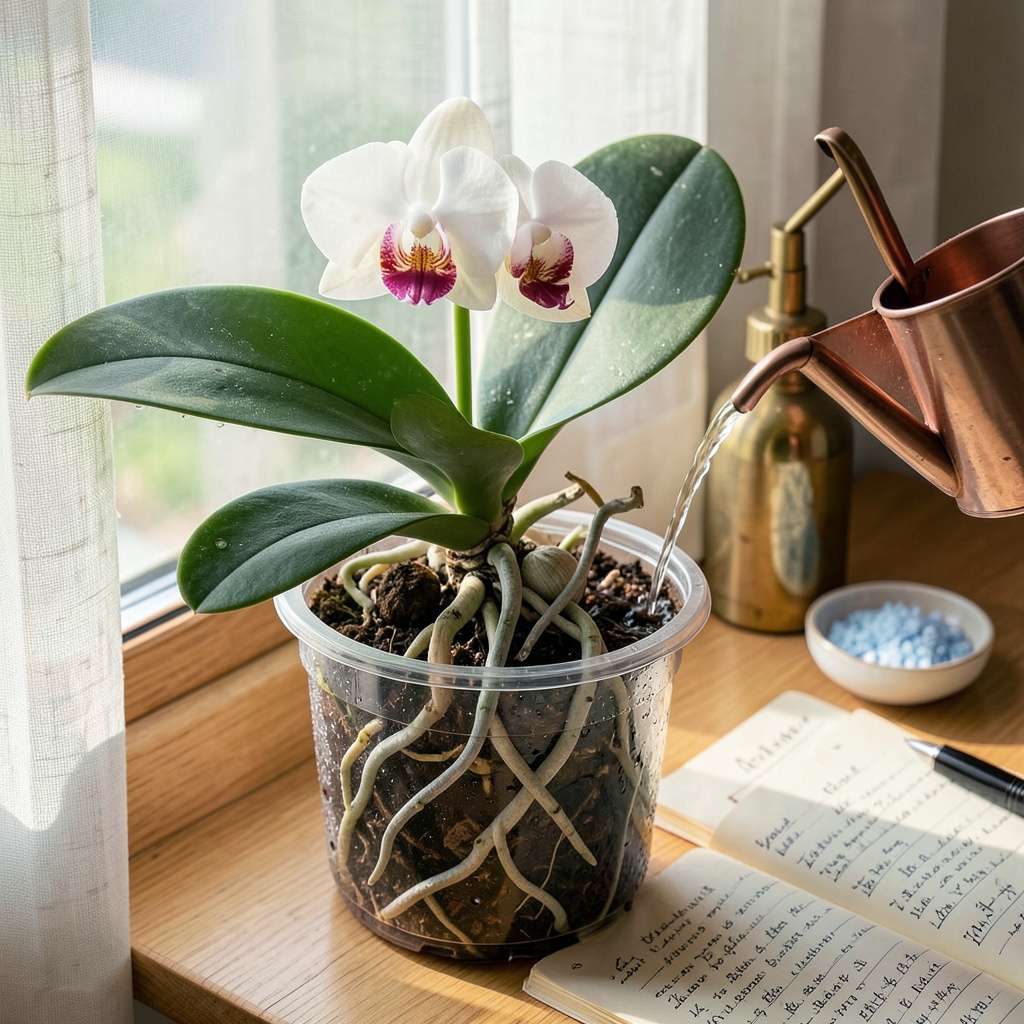
Orchids develop stronger roots and more vibrant blooms when watered properly—not too much, not too little. After losing several orchids to root rot early in my gardening journey, I perfected a method that keeps plants thriving with minimal effort. The key lies in understanding their natural growing conditions and replicating that balance in your home environment.
Most orchid owners overwater out of concern, but these plants actually prefer a drying period between waterings. A simple finger test (inserting your fingertip 1 inch into the potting mix) tells you exactly when water is needed. The right technique also involves water quality—room temperature, filtered water prevents mineral buildup that damages roots over time.
You’ll notice healthier growth within 2-3 weeks of consistent proper watering: firmer leaves, emerging flower spikes, and roots that transition from silvery to vibrant green when hydrated. The method works equally well for Phalaenopsis, Cattleya, and Dendrobium varieties, adapting only slightly for each type’s specific needs.
This approach eliminates the guesswork that leads to yellowing leaves or bud blast. Whether you’re reviving a struggling plant or maintaining a collection, the principles remain the same—consistent moisture without waterlogging. The results speak for themselves in extended bloom cycles and vigorous growth year after year.
📚 In This Guide
Mastering this technique will transform your orchids from struggling to spectacular—here’s exactly how I do it.
Before reaching for water, examine the root system through the pot’s drainage holes. Healthy roots appear silver-green when dry and bright green when hydrated. If you see wrinkled pseudobulbs or limp leaves, your plant is already stressed from improper watering.
Check the potting medium by inserting your finger 1 inch deep near the pot’s edge. The surface often dries faster than the center, so don’t rely on visual cues alone. If the bark feels even slightly damp, wait another day—overwatering kills more orchids than underwatering.
For most Phalaenopsis orchids, I use the soak-and-drain method. Fill a basin with room-temperature water (never cold) to about 3 inches deep. Place the orchid pot in the water and let it soak for 10-15 minutes. This allows the bark medium to fully hydrate without compacting.
For mounted orchids, mist thoroughly until water runs off the roots, then repeat after 5 minutes to ensure complete saturation. Avoid getting water in the crown (where leaves meet)—this is the fastest way to cause rot. Always water in the morning so foliage dries before evening.
After soaking, lift the pot and let it drain completely for 15-20 minutes before returning it to its decorative container. I place mine on a wire rack to guarantee no water pools at the base. Stagnant water around roots creates the perfect environment for bacterial and fungal infections.
Increase airflow around the plant with a gentle fan set to low. This mimics their natural epiphytic environment and prevents moisture-related issues. You’ll notice the difference within days—leaves will feel firmer and roots will show that healthy silvery hue when dry.
Most orchids thrive on a 7-10 day watering cycle, but environmental factors matter more than calendar dates. In high humidity (60%+), you can extend this to 12 days. During winter with low light and cool temperatures (below 65°F), reduce frequency to every 14 days.
Here’s the thing—orchids communicate their needs. When roots turn that bright green after watering, you’ve done it right. If they stay green for more than 4 days, you’re watering too frequently. Adjust based on what you observe, not just a fixed schedule.
Watch for new root growth—healthy roots should extend 1-2 inches annually. If you’re not seeing this, reassess your watering. Yellowing lower leaves often indicate overwatering, while pleated leaves suggest chronic underwatering.
I keep a watering journal noting dates, medium dryness, and plant response. This reveals patterns you’d otherwise miss. Remember, orchids in bark mix dry faster than those in sphagnum moss, so adjust accordingly. The goal is consistent moisture with perfect drainage—master this, and you’ll have blooms year after year.
After years of trial and error (and more than a few lost orchids), we’ve discovered these essential insights that make all the difference.
Root Observation Technique: In Step 1, don’t just glance at the roots—examine them under good lighting. The color transition from silver-green to bright green after watering is your most reliable indicator of proper hydration. I’ve found that roots that stay green for more than the 4 days mentioned in Step 4 are a sure sign you need to extend your watering interval. Keep a small flashlight near your orchids to check root color easily through the pot’s drainage holes.
Water Temperature Matters: The room-temperature water specified in Step 2 isn’t just a suggestion—it’s critical. Cold water shocks orchid roots, while warm water can encourage bacterial growth. I fill my watering basin the night before to let it reach ambient temperature. This small preparation makes a noticeable difference in how quickly your orchid recovers from watering stress.
Drainage Discipline: The 15-20 minute drainage time in Step 3 is non-negotiable. I learned this the hard way after losing two orchids to root rot. Create a dedicated drainage station with a wire rack over a tray—this ensures complete drainage while catching any runoff. Never rush this step, as even small amounts of standing water can create problems over time.
Environmental Journaling: Take the journaling suggestion in Step 5 seriously. Note not just watering dates but also humidity levels, temperature fluctuations, and any changes in leaf turgidity. I use a simple spreadsheet that tracks these factors alongside my watering schedule. You’ll start seeing patterns emerge that help you anticipate your orchid’s needs before they become problems.
Most orchids thrive with watering every 7–10 days, but frequency depends on your environment. Check the roots: silver-green means they’re dry, while bright green signals they’re hydrated. Adjust based on humidity, pot size, and airflow—overwatering is the #1 killer!
While ice cubes are a popular hack, they’re not ideal for most orchids. Cold temps can shock roots, and uneven melting may leave some areas dry. Stick to room-temperature water for consistent moisture. If you love convenience, try slow-drip irrigation instead.
Yellow leaves often mean overwatering or poor drainage. Check if the pot has drainage holes and the roots aren’t sitting in water. If the roots look mushy or smell foul, trim the rotten parts and repot in fresh bark mix. Less water + more airflow usually fixes it!
Rainwater or distilled water is safest to avoid mineral buildup from tap water. If using tap, let it sit out for 24 hours to dissipate chlorine. Avoid softened water—salt can harm roots. For extra care, flush the pot with clean water monthly to remove excess salts.
Bark dries faster—soak the pot for 10–15 seconds until roots turn green, then drain. Moss holds moisture longer; water lightly when the top feels dry. Pro tip: Lift the pot—if it’s heavy, skip watering! Bark-loving orchids (like Phalaenopsis) prefer drying out between drinks.
Mastering how to water orchids doesn’t have to be complicated! 🌸 Remember: less is more, and consistency—paired with the right technique—will keep your orchids happy and blooming. By observing your plant’s needs and adjusting for its environment, you’ll build confidence and watch those stunning flowers thrive.
Ready to put your new skills to the test? Start with one simple step: Check your orchid’s roots and potting mix today, then water only when they’re just starting to dry out. Your patience will pay off with vibrant, long-lasting blooms! 🌿✨
