
Beautiful Plants For Your Interior
Beautiful Plants For Your Interior
Orchids have a reputation for being finicky, but the secret to their success lies in how you water them. After years of trial and error (and more than a few lost plants), we’ve perfected a method that keeps orchids thriving in pots with minimal effort. The key isn’t frequency—it’s technique and observation. Most orchid problems […]
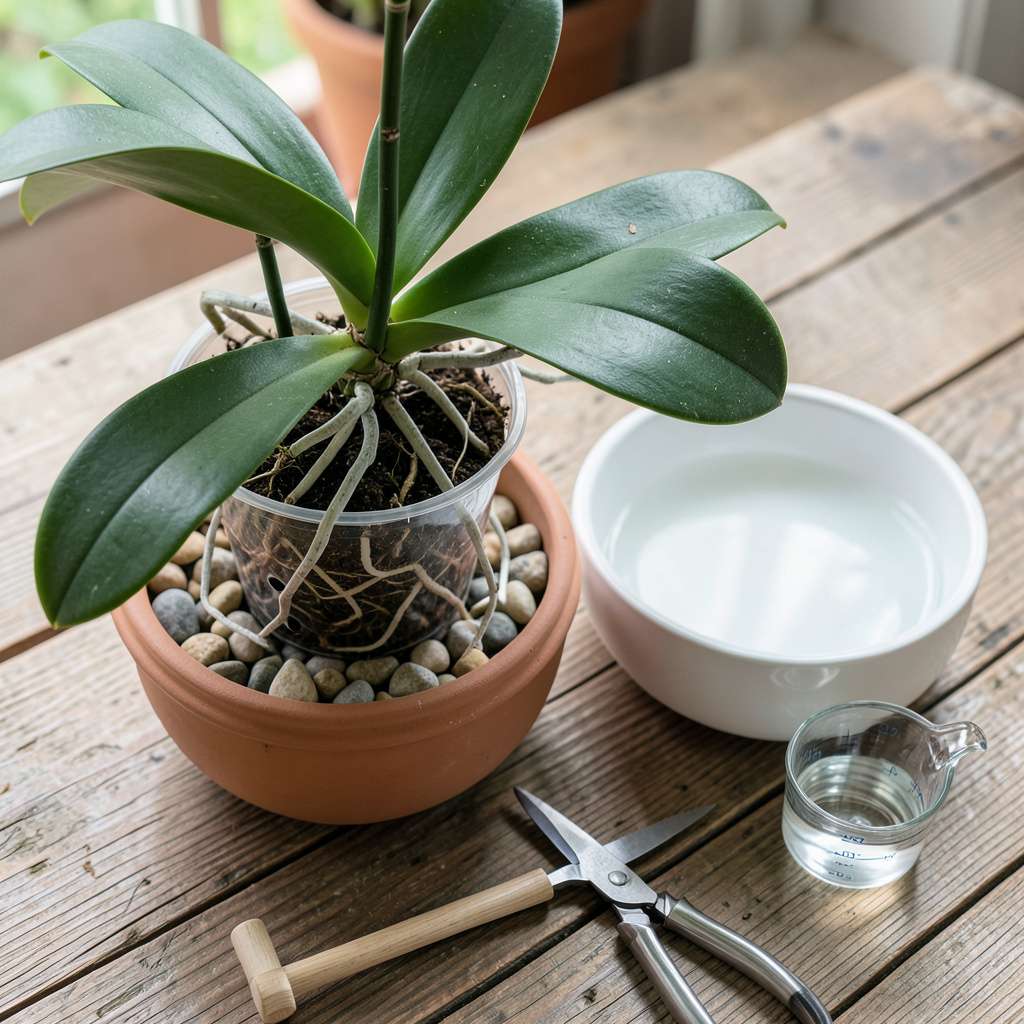
Orchids have a reputation for being finicky, but the secret to their success lies in how you water them. After years of trial and error (and more than a few lost plants), we’ve perfected a method that keeps orchids thriving in pots with minimal effort. The key isn’t frequency—it’s technique and observation.
Most orchid problems start with water: too much, too little, or the wrong approach. We learned the hard way that soggy roots are the fastest way to kill these plants. The right method mimics their natural environment—brief moisture followed by thorough drying. You’ll need just a pot, water, and a simple routine that takes less than 5 minutes per week.
What you’ll achieve is remarkable: plants that produce more blooms, last longer between waterings, and develop stronger root systems. The leaves stay firm and vibrant, the roots remain healthy and white, and you’ll see new growth emerging regularly. No more guessing when to water or worrying about rot.
This approach works for any potted orchid, from Phalaenopsis to Cattleya, and adapts to different home environments. Whether you’re growing on a windowsill, under lights, or in a humid bathroom, the principles remain the same. Here’s how to make it work for your plants.
📚 In This Guide
This simple method keeps your orchids perfectly hydrated—no guesswork, no overwatering, just healthy plants.
Before adding any water, examine the roots through the pot’s drainage holes or by gently lifting the plant. Healthy roots should appear silver-green when dry and bright green when hydrated. If they look gray or shriveled, it’s time to water.
Next, stick your finger about 1 inch deep into the potting mix. The medium should feel almost completely dry—not just at the surface. Orchid bark mix dries faster than regular soil, so don’t rely on surface moisture alone. If you detect any dampness at all, wait another day or two.
Fill a basin or sink with 2-3 inches of lukewarm water (about 70-80°F). Place the orchid pot in the water, ensuring the water level stays below the pot’s rim. Let it soak for 10-15 minutes—this gives the bark time to fully absorb moisture without waterlogging the roots.
You’ll see air bubbles rising as the dry bark rehydrates. After soaking, lift the pot and let all excess water drain completely. I usually leave mine in the sink for another 5 minutes to ensure no water pools at the bottom. Never let orchids sit in standing water, as this leads to root rot within days.
After watering, watch how your orchid reacts over the next 24-48 hours. The roots should plump up and turn that healthy bright green color. Leaves will feel firm and slightly leathery to the touch. If you notice water droplets collecting in the leaf crowns, gently blot them with a paper towel to prevent bacterial rot.
Check the pot’s weight before and after watering—you’ll quickly learn what a properly hydrated orchid feels like. A well-watered plant will feel noticeably heavier, while a dry one feels almost weightless. This tactile check becomes your most reliable indicator over time.
Most orchids in 4-inch pots need watering every 7-10 days, while larger 6-inch pots can go 10-14 days. Mark your calendar after each watering, but always verify dryness before proceeding. Environmental factors like humidity and air flow affect drying time significantly.
I’ve found that early morning watering works best—it gives the plant all day to dry slightly before cooler evening temperatures. Avoid watering at night, as prolonged moisture in cooler conditions encourages fungal growth. Your orchid will develop a rhythm, and you’ll notice it perks up right before it needs water again.
During active growth periods (typically spring through fall), your orchid will need more frequent watering. In winter or dormancy, cut back to every 14-21 days. Watch for wrinkled pseudobulbs or pleated leaves—these are clear signs your plant needs more consistent moisture.
If you’re using a humidity tray, ensure the pot never sits directly in water. Place pebbles in the tray and keep water below the pebble line. This creates beneficial humidity without waterlogging. Remember that orchids in higher humidity environments (like bathrooms) will need less frequent watering than those in dry living rooms.
Mastering orchid care becomes much easier when you understand these subtle but important details.
Water Temperature Matters: The 70-80°F water temperature in Step 2 isn’t arbitrary—it mimics the warm tropical rains orchids experience in nature. Cold water shocks the roots, while hot water can damage them. I keep a small thermometer in my watering basin to ensure I’m always in this ideal range. Trust me, your orchids will show their appreciation with healthier growth.
Drainage Discipline: Those extra 5 minutes of draining after the 10-15 minute soak in Step 2 are absolutely critical. I learned this the hard way after losing two orchids to root rot. Even a small amount of standing water at the pot’s bottom creates a perfect environment for harmful bacteria and fungi. Always tilt the pot at different angles to ensure complete drainage.
Root Color Clues: The silver-green to bright green color change mentioned in Step 1 is your orchid’s way of communicating. When roots turn that vibrant green after watering, you’ll know you’ve hit the perfect moisture level. I’ve found that photographing my orchid’s roots weekly helps me track these subtle changes over time and catch problems early.
Seasonal Sensitivity: The 14-21 day winter watering schedule in Step 5 isn’t just about frequency—it’s about survival. During dormancy, orchids need that longer drying period to prevent rot. I mark my calendar with both watering dates and seasonal transitions to stay ahead of my plants’ changing needs. This simple habit has dramatically improved my orchids’ bloom cycles.
Most orchids thrive with watering every 7–10 days, but frequency depends on your environment. Check the roots: silver-green means they’re dry, while bright green signals they’re hydrated. In humid climates, stretch intervals to 10–14 days; in dry heat, shorten to 5–7 days. Always let the potting mix dry slightly between waterings!
While ice cubes are a popular hack, they’re not ideal for most orchids. Cold water can shock roots, and uneven melting may lead to rot. Instead, use room-temperature water poured slowly over the mix. If you prefer ice, limit to 1–2 small cubes max and place them away from the plant’s base.
Yellow leaves often mean overwatering or poor drainage. Check if the pot has drainage holes and if the mix is soggy. Let the roots dry out before watering again, and trim any mushy roots with sterilized scissors. If the issue persists, repot with fresh orchid-specific bark mix to prevent rot.
Water in the morning (before 10 AM) to give leaves time to dry before evening. This prevents fungal growth like botrytis. Avoid nighttime watering—cool temps + moisture = trouble! If you forget, early afternoon works, but never water under direct sun (hello, root burn!).
Tap water is fine if it’s not heavily chlorinated or hard. Let it sit out for 24 hours to allow chlorine to evaporate. For sensitive orchids (like Phalaenopsis), use filtered, rainwater, or distilled water to avoid mineral buildup. If your tap water is soft, you’re in the clear!
Mastering how to water orchids in a pot doesn’t have to be complicated! Remember: less is more—water only when the roots look silvery-gray, use room-temperature water, and avoid soggy soil. With patience and the right technique, your orchids will reward you with stunning, long-lasting blooms. 🌸
Ready to take your orchid care to the next level? Start by checking your plant’s roots today and adjusting your watering routine. Happy growing!
