
Beautiful Plants For Your Interior
Beautiful Plants For Your Interior
That moment when your orchid’s blooms fade is heartbreaking—but it’s actually the perfect time to give your plant a fresh start. I used to dread trimming my orchids, worried I’d damage them, until I learned the simple technique that turns a tired plant into a blooming powerhouse. The right cut in the right place can […]
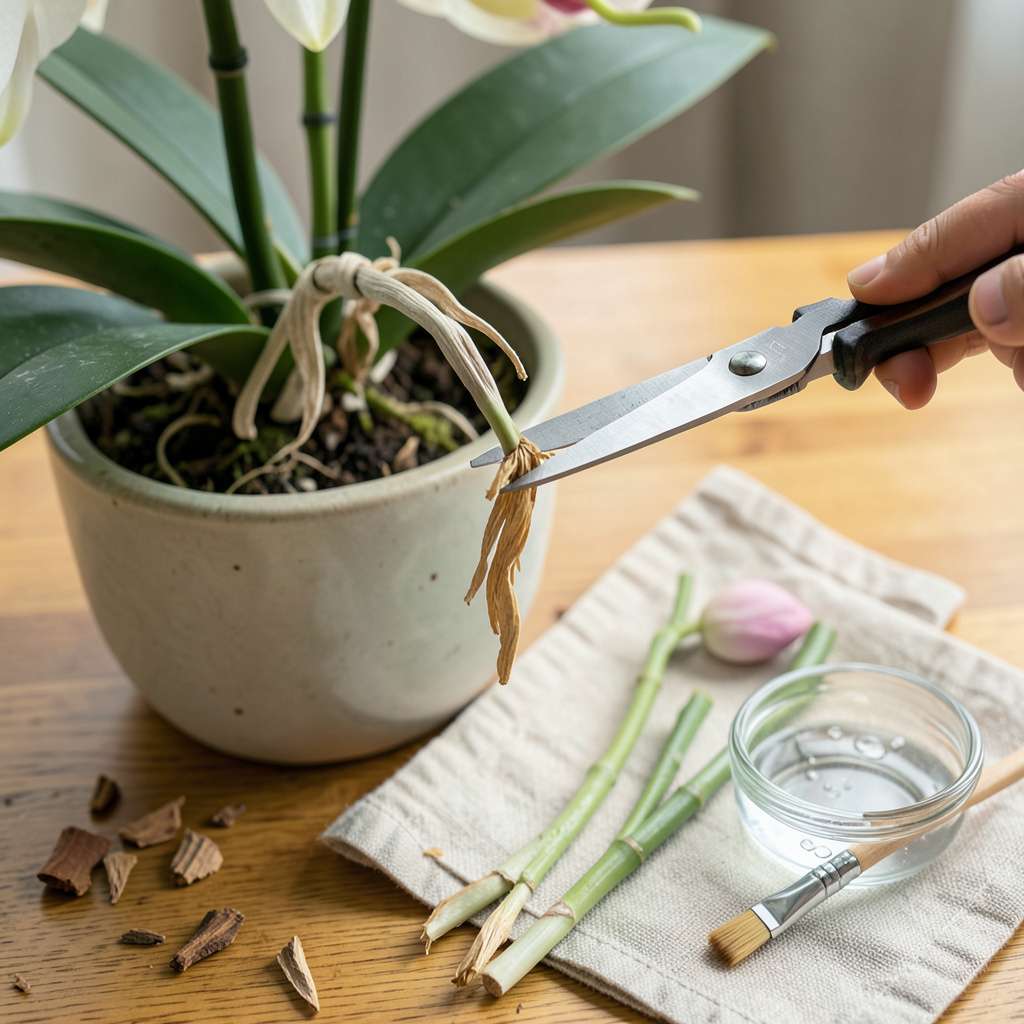
That moment when your orchid’s blooms fade is heartbreaking—but it’s actually the perfect time to give your plant a fresh start. I used to dread trimming my orchids, worried I’d damage them, until I learned the simple technique that turns a tired plant into a blooming powerhouse. The right cut in the right place can trigger months of new growth and flowers.
What changed everything for me was realizing orchids tell you exactly where to trim. Look for the nodes along the stem—those little bumps are your roadmap. With just a clean pair of scissors and 10 minutes, you can reshape your plant for better air circulation and energy distribution. No fancy tools required, just confidence and a steady hand.
The results show fast: new roots emerge within 2-3 weeks, and fresh flower spikes often appear by the next blooming cycle. Your orchid will look fuller, healthier, and ready to produce those stunning blooms you fell in love with. The best part? This process works for phalaenopsis, cattleya, and most common house orchids.
Fair warning: I’ve ruined more orchids by over-trimming than under-trimming. The key is knowing when to stop—something I’ll show you step by step. Whether you’re rescuing a gift orchid or maintaining a prized collection, this method keeps them thriving for years, not just seasons.
📚 In This Guide
With the right technique, you’ll encourage stronger growth and more spectacular blooms next season.
Wait until your orchid’s blooms have completely faded and the flower spike turns brown or yellow. This usually happens 6-8 weeks after flowering. I check by gently running my finger along the spike—if it feels dry and brittle, it’s ready to be trimmed.
Never trim while the spike is still green and firm, as this can prevent future blooms. Some varieties like Phalaenopsis may produce secondary spikes from the same stem, so I wait until I’m certain no new buds will form before making any cuts.
Use sharp scissors or pruning shears and wipe the blades with rubbing alcohol or a 10% bleach solution before and after trimming. This prevents disease transmission that can kill your orchid. I keep a small spray bottle of alcohol handy for quick sterilization between plants.
Dull blades crush stems instead of making clean cuts, which invites infection. Test your tool’s sharpness on a piece of paper—if it doesn’t slice cleanly, sharpen the blades before proceeding. Always cut at a slight angle to allow water to run off the wound.
For Phalaenopsis orchids, locate the first node (the small brown line) below the lowest spent flower and cut 1 inch above it. This encourages a new flower spike to emerge. Other varieties may require cutting the entire spike back to the base—check your specific orchid type.
I hold the spike gently with one hand while cutting to prevent tearing the stem. The cut should be smooth and clean. If you see any white or green tissue inside the stem, you’ve cut too low—this can damage the plant’s ability to produce future blooms.
After trimming, I move my orchid to a location with bright, indirect light and reduce watering by about 30% for 2 weeks. This gives the plant time to heal without stress. Watch for new growth at the base—this indicates your orchid is recovering well.
Apply a balanced orchid fertilizer at half strength 3 weeks after trimming to support new growth. I use a spray bottle to mist the leaves lightly, which also helps maintain humidity around the plant during its recovery period.
Within 4-6 weeks, you should see either a new flower spike or fresh leaf growth emerging. I check weekly for these signs of healthy recovery. If no new growth appears after 8 weeks, reassess your light and watering conditions.
Yellowing leaves after trimming usually indicate overwatering, while wrinkled leaves suggest underwatering. Adjust your care routine accordingly. Remember that some orchids take longer to rebound—patience is key to seeing those beautiful blooms return.
After years of trial and error with our own orchid collections, we’ve learned that small details make all the difference in encouraging healthy regrowth.
Timing Precision: That 6-8 week window mentioned in Step 1 is absolutely critical. I learned the hard way that trimming too early can prevent blooms for an entire season. When checking if the spike is ready, look for a color change from green to yellow or brown along the entire length – not just at the tip. The dry, brittle texture should extend at least 3 inches down the spike before you make any cuts.
Sterilization Technique: For Step 2, we’ve found that wiping tools with rubbing alcohol between each plant prevents cross-contamination better than a single pre-use cleaning. Keep a small container of alcohol near your workspace and dip the blades for 10 seconds between cuts. This extra precaution saved several of our prized Phalaenopsis from bacterial infections that had spread through our collection before we adopted this method.
Cutting Method: When making that 1-inch cut above the node in Step 3, use your non-dominant hand to gently support the stem about an inch below where you’re cutting. This prevents the weight of the upper spike from tearing the remaining stem as you cut. Also, make the cut at a 45-degree angle – this creates a larger surface area for healing while still allowing water to run off.
Post-Trim Care: During the 2-week reduced watering period in Step 4, we’ve had the best results by watering in the morning rather than evening. This gives any moisture that gets on the fresh cut time to evaporate during the day, reducing the risk of fungal infections. Use room temperature water and pour it slowly around the base of the plant rather than over the leaves or cut stem.
Got questions about trimming your orchids? You’re not alone! Here are the most common concerns—with quick, actionable answers to keep your plants thriving.
Trim after blooming when flowers fade but before new growth starts—typically late fall or early spring. For Phalaenopsis (moth orchids), cut the spike when it turns brown or yellow. Avoid trimming during active blooming!
Yes, you can trim both! Prune dead or mushy roots (healthy ones are firm and green/silver) during repotting. For stems, remove only spent flower spikes—never cut healthy green stems unless propagating. Sterilize tools first!
Patience is key! Ensure it gets bright, indirect light (east-facing windows work great), consistent watering, and a balanced fertilizer (20-20-20). If no blooms in 6–9 months, check for pests or root rot. Stress = fewer flowers!
For Phalaenopsis, you can try partial trimming: Cut above a dormant node (little brown bump) to encourage a secondary bloom. If the spike stays green, leave it—it may rebloom! Remove only if yellow/brown.
Yellowing leaves often signal overwatering, poor drainage, or shock. After trimming, avoid soaking the plant—mist lightly and keep it in stable temps (65–80°F). Check roots for rot if yellowing spreads!
Trimming your orchids doesn’t have to be intimidating—with the right tools and techniques, you’ll encourage stronger growth and stunning blooms for seasons to come! 🌸 Remember: sterilize your tools, cut at the right node, and give your plant time to recover. Every snip is a step toward a healthier, happier orchid.
Now that you’re equipped with the know-how, grab your shears and start practicing on a single stem. Want to dive deeper? Explore our guide on orchid repotting to keep your plant thriving year-round!
