
Beautiful Plants For Your Interior
Beautiful Plants For Your Interior
I’ll be real with you: laying sod is the closest thing to magic in lawn care. One day you’re staring at bare dirt, and by sunset you’ve got what looks like a mature, lush lawn. But here’s the thing—it only works if you do the prep right. We’ve seen too many people rush this step, […]
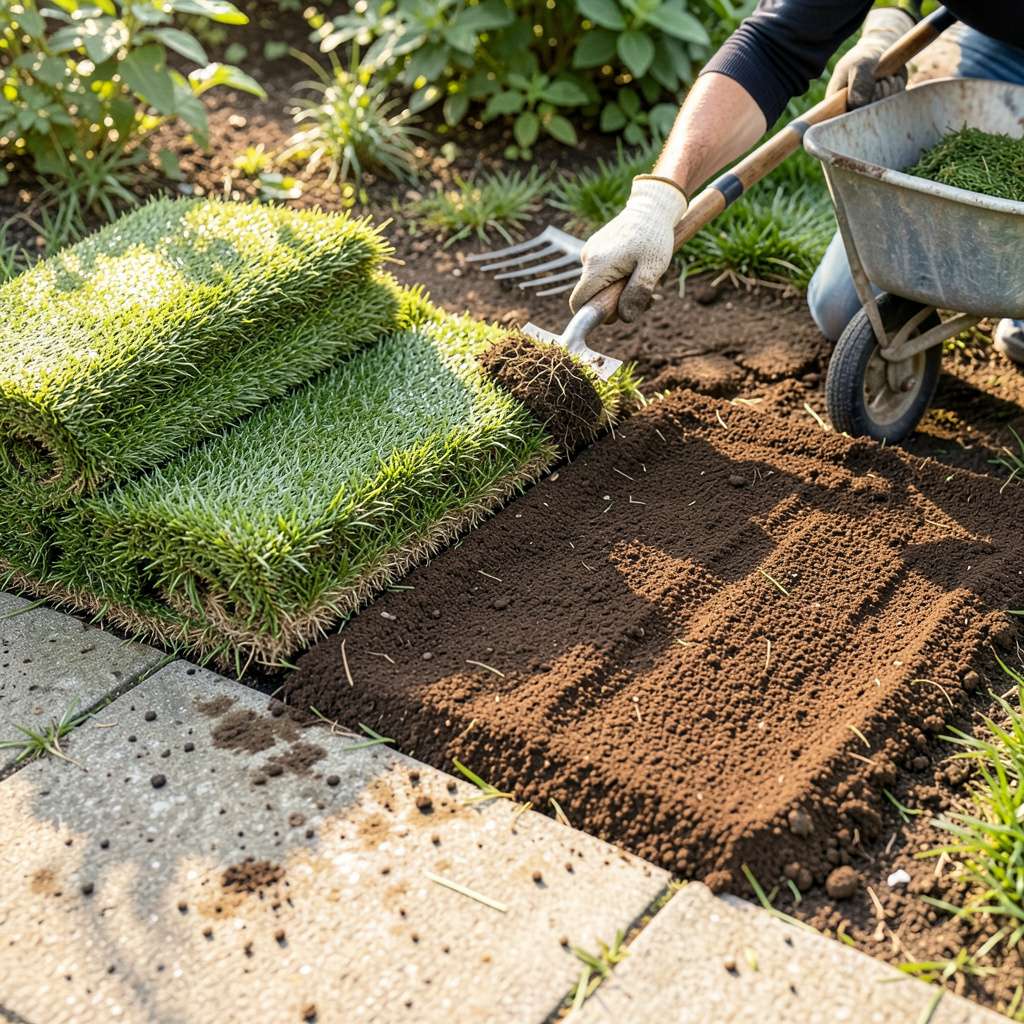
I’ll be real with you: laying sod is the closest thing to magic in lawn care. One day you’re staring at bare dirt, and by sunset you’ve got what looks like a mature, lush lawn. But here’s the thing—it only works if you do the prep right. We’ve seen too many people rush this step, only to watch their new grass turn brown within weeks.
The difference between success and failure comes down to three things: soil prep, timing, and watering. Get these right, and your sod will root faster than you’d expect. My first attempt failed because I skipped tilling the soil—lesson learned the hard way. Now we use a simple 4-step method that guarantees the roots knit into the ground properly.
You’ll be walking on your new lawn within 2-3 weeks, but the real payoff comes months later when it’s indistinguishable from established grass. No weeds, no bare spots, just that perfect green carpet. The key is what happens in the first 48 hours after laying—this determines whether your sod thrives or struggles.
Works for front yards, backyards, or even small patch repairs. Whether you’re fixing dog spots or starting from scratch, the process scales easily. Here’s exactly how to make it take—without wasting a single square foot of sod.
📚 In This Guide
This method delivers a lush lawn in hours instead of weeks—just follow these proven steps.
Start by removing all debris, rocks, and old vegetation from the area. I use a garden rake to clear everything down to bare soil. This ensures your new sod makes direct contact with the earth, which is critical for root establishment.
Loosen the top 4-6 inches of soil with a rototiller or spade. You want it crumbly but not powdery—think cake batter consistency. Level the area with the back of your rake, filling low spots and removing high ones. A perfectly flat base prevents water pooling that can drown new roots.
Add a 1-inch layer of compost and work it into the top 2 inches of soil. This boosts nutrients without creating a thick layer that could smother roots. Water the prepared area lightly to settle everything before laying sod.
Begin laying sod along a straight edge like a sidewalk or driveway. Stagger the seams in a brick-like pattern—this prevents visible lines and helps the pieces knit together. Press each piece firmly against its neighbor; you shouldn’t see gaps between rolls.
Use a sharp utility knife to trim pieces for tight fits around curves or obstacles. I keep a bucket of water nearby to rinse my hands—the sap from fresh sod can be sticky. Work quickly: sod starts drying out within hours of being cut.
Walk on a board laid across the sod to check for soft spots. If any piece feels spongy underfoot, lift it and add soil beneath until firm. This prevents depressions that could collect water and damage the grass.
Water the entire area immediately after laying to a depth of 4-6 inches. You’ll know it’s enough when you can lift a corner and see moisture in the soil beneath. Use a sprinkler for even coverage, avoiding hard streams that could dislodge pieces.
For the first 10-14 days, water twice daily—early morning and late afternoon. The sod should stay damp but never soggy. Check by lifting a corner: if the soil underneath feels dry, increase watering frequency.
After 2 weeks, reduce to once daily, then gradually taper to 2-3 times weekly by week four. You’ll see the grass perk up and deepen in color as roots establish—this is your signal the sod has taken hold.
Avoid walking on the new lawn for at least 2 weeks. When you must cross it, use a board to distribute your weight. I mark off my sodded areas with string and stakes as a visual reminder to stay off.
Mow only after the grass reaches 3-4 inches tall, and never remove more than one-third of the blade height at once. Use a sharp mower blade—dull blades tear grass, making it vulnerable to disease.
Watch for brown patches or edges lifting from the soil—these indicate either underwatering or poor soil contact. Gently press down any raised edges and adjust your watering schedule. Within 4-6 weeks, you won’t be able to tell where the seams were.
After years of trial and error with lawn projects, I’ve learned these key details make all the difference between patchy grass and a seamless green carpet.
Soil Preparation Secret: In Step 1, when loosening the top 4-6 inches of soil, don’t skip testing the consistency with your hands. You want soil that holds its shape when squeezed but crumbles easily—like moist cake batter. If it’s too powdery, your sod won’t establish proper root contact. I always do a quick test by forming a loose ball: if it holds together but breaks apart with a light tap, it’s perfect.
Laying Technique That Changed Everything: For Step 2, here’s what nobody tells you—use a rubber mallet to gently tap the edges of each sod piece after placing it. This creates better soil contact than just pressing with your hands. Work in small sections (about 3×3 feet) to maintain the staggered brick pattern without getting overwhelmed. The mallet trick saved me from visible seams in my last three lawn projects.
Watering Wisdom: During those critical first 10-14 days of twice-daily watering in Step 3, set a timer for exactly 15 minutes per session with your sprinkler. This typically delivers the 4-6 inches of moisture depth you need without overdoing it. I place empty tuna cans around the lawn to measure water accumulation—when they’re full, you’ve hit your target. Remove the cans immediately to avoid creating small puddles.
Maintenance Insight: For Step 4, when checking if your grass has reached the 3-4 inch mowing height, use this trick: place a ruler flat on the lawn. The grass should just cover the 3-inch mark when viewed from the side. This prevents the common mistake of mowing too early, which can uproot your new sod before it’s fully established. I learned this after ruining a section of my first lawn by being overzealous with the mower.
Got questions about transplanting sod? You’re not alone! Here are the most common concerns—answered in a snap.
Aim for early spring or early fall when temps are mild (50–75°F). Avoid summer heat or winter freezes—stress kills new roots! Cool, moist conditions help sod establish faster. Pro tip: Lay it same-day as delivery for best results.
DIY is totally doable for small areas! You’ll need a sharp spade, wheelbarrow, and patience. For large lawns (1,000+ sq ft) or tricky slopes, pros save time and ensure even coverage. Costs vary—DIY runs $0.30–$0.80/sq ft; pros charge $1–$3/sq ft installed.
With proper watering, roots dig in 10–14 days. Test gently: Lift a corner after 2 weeks—if it resists, roots are growing! Keep soil consistently moist (not soggy) for the first month. Avoid heavy foot traffic for 3–4 weeks.
Brown patches usually mean underwatering, poor soil contact, or disease. Check:
Replace dead sections ASAP and adjust care!
Sod gives instant grass (no waiting!) and fewer weeds, but costs more. Seeding is cheaper for large areas and offers more grass varieties. Choose sod for quick results (e.g., before a party) or steep slopes where erosion is a risk. Seed if you’re patient and budget-conscious!
Transplanting sod doesn’t have to be intimidating—with the right prep, timing, and care, you’ll be enjoying a lush, green lawn in no time! 🌱 Remember: healthy soil, proper watering, and gentle handling are your keys to success. Now that you’re armed with the know-how, grab your tools and get started—your dream lawn is just a weekend project away!
Next step? Mark your calendar for the best planting season in your area and double-check your soil’s readiness. Happy sodding! 😊
