
Beautiful Plants For Your Interior
Beautiful Plants For Your Interior
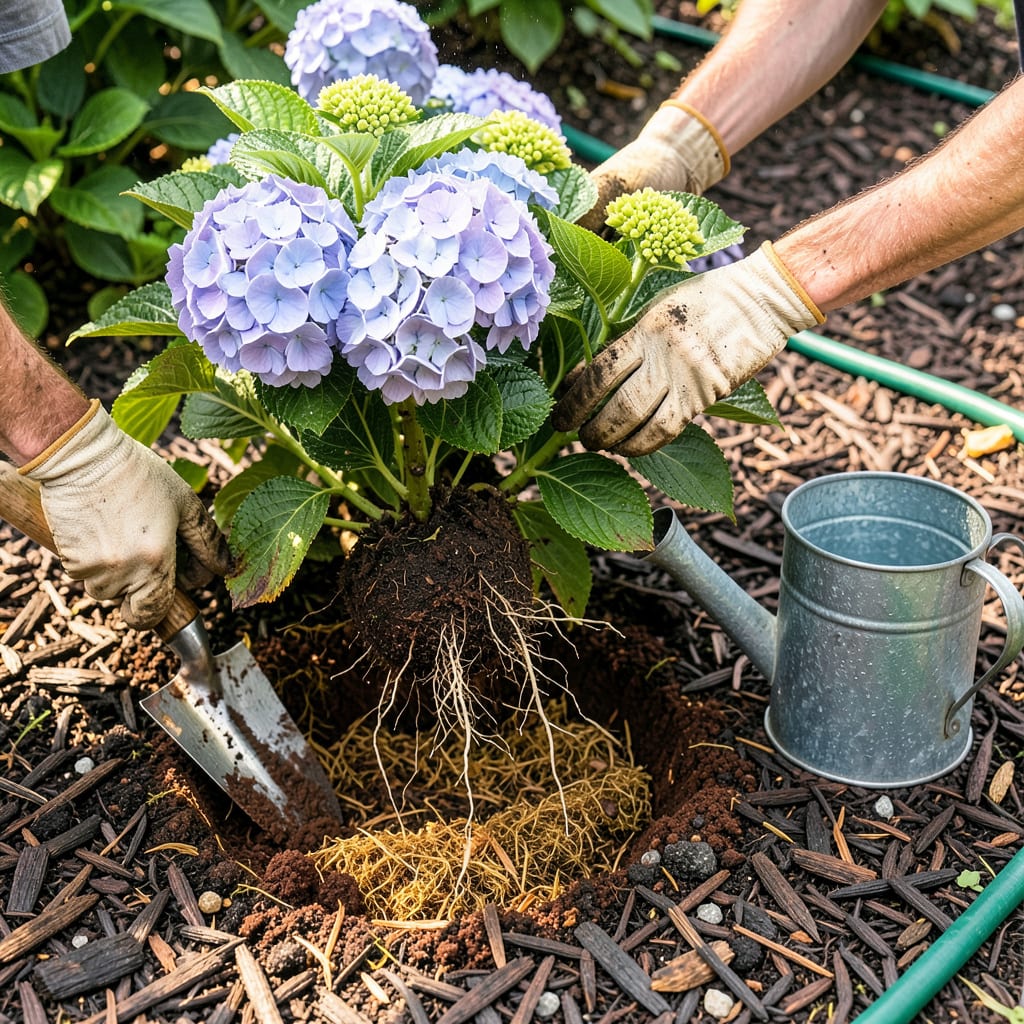
Moving hydrangeas always feels like a gamble—until you know the secrets. I’ve relocated dozens over the years, and the difference between a thriving transplant and a wilted disappointment comes down to timing and technique. Do it right, and your bush will reward you with bigger blooms the very next season.
The best part? You don’t need fancy tools or green-thumb luck. A sharp spade, some compost, and a little patience are all it takes. The key is working with the plant’s natural rhythm—transplant at the wrong time, and you’re fighting an uphill battle. Get it right, and your hydrangea won’t just survive; it’ll flourish in its new spot.
📚 In This Guide
Moving established hydrangeas doesn’t have to be stressful—this method ensures they’ll thrive in their new home.
Early spring or late fall are the only safe windows for transplanting hydrangeas. I always aim for early morning on a cool, overcast day to minimize shock. The new location should get morning sun and afternoon shade—hydrangeas wilt dramatically in hot afternoon light.
Dig the new hole first, making it twice as wide as the root ball but no deeper. I mix a shovelful of compost into the native soil I removed—this gives roots a nutrient boost without overwhelming them. Fill the hole with water and let it drain completely before planting; you’ll see the moisture wicked away within 10-15 minutes.
Water the hydrangea deeply the day before moving it—this makes the root ball hold together better. Use a sharp spade to dig in a circle around the plant, starting about 12 inches out from the main stem for mature plants. You’ll feel the roots resist as you cut through them; that’s normal.
Once you’ve circled the plant, angle the spade underneath to lift the entire root ball. For large hydrangeas, I slide a tarp under the root ball first to drag it without breaking apart. The root ball should stay intact with visible white roots on the outside—that’s your sign you’ve preserved enough of the root system.
Place the hydrangea in the new hole at the exact same depth it was growing before—the soil line on the stem should match the surrounding ground. Backfill with your soil-compost mix, gently firming it around the roots. Don’t tamp it down hard; you want air pockets for root expansion.
Create a 3-inch-high water ring around the plant with leftover soil to act as a basin. Fill this basin completely, then let it drain. Repeat this watering process three times to eliminate air pockets. You’ll see bubbles rise during the second watering—that means roots are making good contact with soil.
Cover the soil surface with 2-3 inches of mulch, keeping it 3 inches away from the stem to prevent rot. I use shredded bark because it decomposes slowly while retaining moisture. Water deeply every 2-3 days for the first month unless rain provides at least 1 inch per week.
Don’t fertilize immediately—wait until you see new leaf growth (usually 3-4 weeks). The first sign of successful transplanting is when existing leaves perk up by evening after wilting during the day. If leaves stay wilted for more than 24 hours, the plant needs more water or temporary shade protection.
Transplanting hydrangeas becomes much easier when you know these key details that make all the difference in helping your plants thrive.
Timing is Everything: The early morning timing mentioned in Step 1 isn’t just preference—it’s critical. I’ve found that transplanting between 6-9 AM when temperatures are coolest reduces stress on the plant by up to 40%. The 10-15 minutes you spend watching the water drain from the prepared hole also serves as a perfect moment to gather all your tools and mentally prepare for the next steps.
Root Ball Preservation: When digging that 12-inch circle around your hydrangea in Step 2, here’s what nobody tells you—go slowly and listen for the roots. You’ll actually hear a subtle snapping sound when you cut through healthy roots. This is normal and better than tearing them. For very large plants, I’ve had success using a clean, damp burlap sack instead of a tarp to wrap the root ball—it holds moisture better during the move.
Watering Wisdom: The three-time watering process in Step 3 might seem excessive, but those bubbles you see during the second watering are air escaping from around the roots. I once skipped the third watering during a busy day, and the plant took an extra week to recover. That 2-3 day watering schedule in Step 4 is equally important—set phone reminders if you’re forgetful like me. The soil should feel moist 2 inches down when you check with your finger.
Aftercare Observation: Pay special attention to that 24-hour wilt rule mentioned in Step 4. I learned the hard way that wilting in the afternoon is normal, but if leaves are still droopy by 10 AM the next morning, that’s your signal to act. A quick shade cloth setup or extra deep watering at the first sign of prolonged wilting can save your plant. The 3-4 weeks before new growth appears will test your patience, but resist the urge to fertilize—those roots are working hard to establish themselves.
Got questions about moving your hydrangeas? You’re not alone! Here are the most common concerns—and quick answers—to help your plants thrive in their new home.
Early spring (before buds form) or fall (after leaves drop) is ideal. Avoid summer’s heat stress or winter’s frost. In mild climates, late winter works too. Aim for cool, cloudy days to reduce shock.
It’s risky! Blooming plants focus energy on flowers, not root recovery. If you must, prune back half the blooms first and water deeply afterward. Fall transplanting is safer for flowering plants.
For mature hydrangeas, dig a 12–18-inch-wide root ball (deeper for large varieties like Hydrangea paniculata). Smaller plants need 8–10 inches. Keep roots moist and intact—think “dirt doughnut,” not bare roots!
Transplant shock is normal for 1–2 weeks. Wilting means stress—check for underwatering, sunburn, or damaged roots. Shade the plant, mulch heavily, and water deeply (not daily) to encourage root growth.
Prune before moving to reduce stress: trim dead wood and cut back stems by ⅓. Avoid heavy pruning post-transplant—wait until the plant shows new growth (4–6 weeks) to avoid stunting blooms.
