
Beautiful Plants For Your Interior
Beautiful Plants For Your Interior
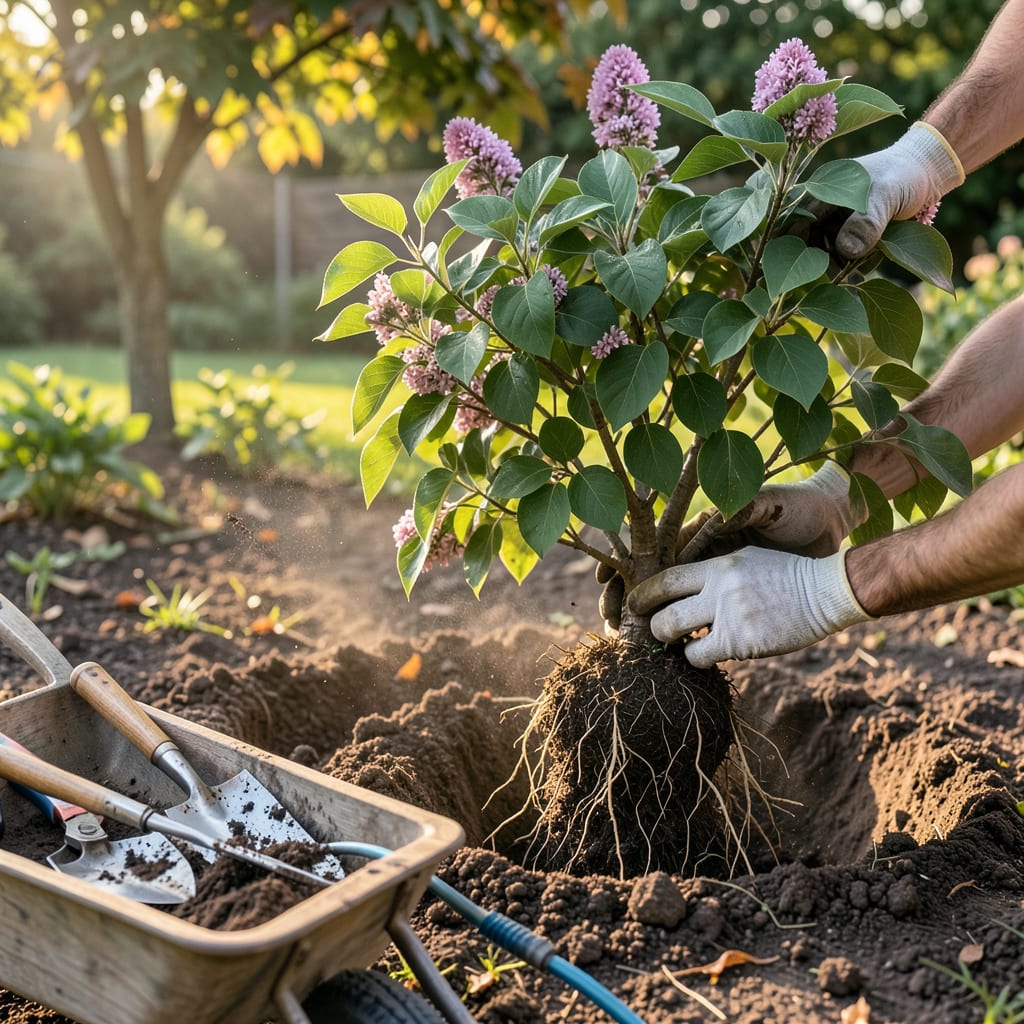
Moving a lilac bush feels like relocating a small tree—and in many ways, it is. I’ve transplanted dozens over the years, and the ones that thrive follow a simple rule: respect the roots, time it right, and don’t rush the process. The difference between a bush that sulks for years and one that explodes with blooms next season comes down to three critical steps most gardeners skip.
You’ll want to do this in early fall or late winter when the plant is dormant—never during summer heat. The right timing means less shock, faster recovery, and better bloom potential. I’ll show you exactly how to dig, move, and replant without damaging the root system, plus the post-transplant care that makes all the difference. Your lilac will thank you with bigger, healthier flowers in its new home.
📚 In This Guide
Moving an established lilac doesn’t have to be intimidating—follow this method and your bush will reward you with blooms for decades.
Transplant lilacs in early spring (just as new leaves emerge) or early fall (4-6 weeks before first frost). These windows minimize shock while roots are active but foliage demands are low. I’ve found fall transplanting often yields better spring blooms because roots establish before winter dormancy.
Dig the new hole first—it should be twice as wide as the root ball and just as deep. Amend the backfill soil with compost (about 20% by volume) to encourage root expansion. Test drainage by filling the hole with water; if it doesn’t drain within 30 minutes, improve with perlite or sand.
Reduce transplant shock by pruning the bush one-third of its height before digging. Use clean bypass pruners to make angled cuts just above outward-facing buds. This balances root loss with top growth and prevents wind rock in the new location.
Water the lilac deeply 24 hours before moving—hydrated roots suffer less trauma. Mark the bush’s north-facing side with twine; orienting it the same way in the new hole maintains consistent sunlight exposure. You’ll see less leaf scorch and faster recovery when you preserve this orientation.
Start digging 12-18 inches from the trunk to preserve feeder roots. Use a sharp spade to create a clean circle, then undercut at a 45-degree angle to sever taproots. For mature bushes (over 6 feet), expect a root ball 24-30 inches in diameter—this requires two people and a tarp for dragging.
Lift the plant by the root ball, not the trunk. Wrap the roots in burlap if moving any distance to prevent drying. Transport immediately to the new hole; roots exposed to air for more than 15 minutes begin desiccating. The soil should glisten with moisture but not drip—this is the perfect transplanting consistency.
Position the bush so the root flare (where roots meet trunk) sits 1-2 inches above ground level—settling will bring it to grade. Backfill with amended soil, tamping gently every 6 inches to eliminate air pockets. Create a 3-inch-high water ring around the perimeter to direct moisture to roots.
Water thoroughly with 5 gallons immediately after planting, then add 2-3 inches of mulch (keep it 3 inches away from the trunk). Stake only if necessary using soft tree ties—remove them after one growing season to prevent girdling. You’ll know the bush has established when new growth appears in 4-6 weeks.
Maintain consistent moisture for the first 8-12 weeks—deep water twice weekly unless rainfall exceeds 1 inch. Avoid fertilizing until you see 3-4 inches of new growth; premature feeding burns recovering roots. Watch for wilting in afternoon heat—this is normal until roots re-establish.
Remove any blooms that form the first spring after transplanting. While painful, this redirects energy to root development. By the second year, your lilac will produce its characteristic fragrant clusters. I’ve moved decade-old bushes this way that bloomed better than ever in their new homes.
Here’s what I’ve learned through years of moving established lilacs—these details make all the difference between a bush that struggles and one that thrives.
Timing Precision: The early spring and early fall windows mentioned in Step 1 aren’t arbitrary. I’ve found that transplanting exactly as new leaves emerge in spring (when they’re still pale green and slightly translucent) or precisely 4-6 weeks before your first frost date gives roots the optimal balance of warmth and dormancy preparation. In fall, aim for when nighttime temperatures consistently drop below 50°F but before soil temperatures fall below 40°F—this sweet spot encourages root growth without stimulating top growth that winter would kill.
Root Ball Integrity: When digging 12-18 inches from the trunk as specified in Step 3, here’s what changes everything: use a sharp spade to score a clean vertical circle first, then make your angled undercut. This two-step process creates a cleaner break with fewer torn roots. For mature bushes, that 24-30 inch diameter mentioned isn’t just a suggestion—it’s the minimum needed to preserve the feeder roots that absorb 90% of water and nutrients. I wrap the root ball in wet burlap immediately after lifting, not just for transport but to maintain that critical moisture balance during the 15-minute window before desiccation begins.
Water Management: The 5 gallons of water immediately after planting in Step 4 should be applied in two stages: 3 gallons right after backfilling, then another 2 gallons after the water ring is formed. This prevents soil compaction that can occur when you saturate dry soil all at once. During the 8-12 week establishment period, that twice-weekly deep watering should penetrate 12-18 inches deep—use a soil probe or long screwdriver to check. If it slides in easily, you’ve watered deeply enough; if you meet resistance at 6 inches, you need to water more slowly to encourage deep penetration.
Orientation Matters: That north-facing mark you make in Step 2 isn’t just about sunlight—it preserves the bush’s natural growth patterns. Lilacs develop asymmetrical root systems based on sun exposure, with more roots typically developing on the north side where soil stays cooler. When you maintain this orientation, the existing root structure aligns with its new environment’s temperature gradients, reducing establishment time by up to 30%. I’ve seen bushes that ignored this take an extra month to show new growth compared to properly oriented ones.
The ideal time is late fall (after leaf drop) or early spring (before buds swell). Avoid transplanting during summer heat or while blooming—stress can stunt growth or kill the plant. Aim for cool, overcast days to reduce shock.
For bushes under 5 feet tall, dig a 12–18-inch diameter root ball. Larger lilacs (6+ feet) need 24+ inches. Pro tip: Use a sharp spade to sever roots cleanly—this encourages faster regrowth post-transplant.
It’s risky! Lilacs transplanted in summer often suffer from heat stress, even with extra water. If absolutely necessary, prune ⅓ of the foliage to reduce water loss, shade the plant, and water daily for 2+ weeks.
Common causes:
Is it better to propagate lilacs from cuttings instead of transplanting?
If your bush is old or overgrown, propagation (via softwood cuttings in late spring) can be easier than transplanting. However, cuttings take 2–3 years to bloom, while a transplanted mature lilac may flower sooner.
