
Beautiful Plants For Your Interior
Beautiful Plants For Your Interior
I’ll be real with you: repotting orchids used to intimidate me. That delicate tangle of roots, the fear of breaking something vital—it’s enough to make anyone hesitate. But after switching to wood chips as my primary medium, I’ve watched struggling orchids transform into plants with thriving roots and multiple bloom cycles per year. The game-changer […]
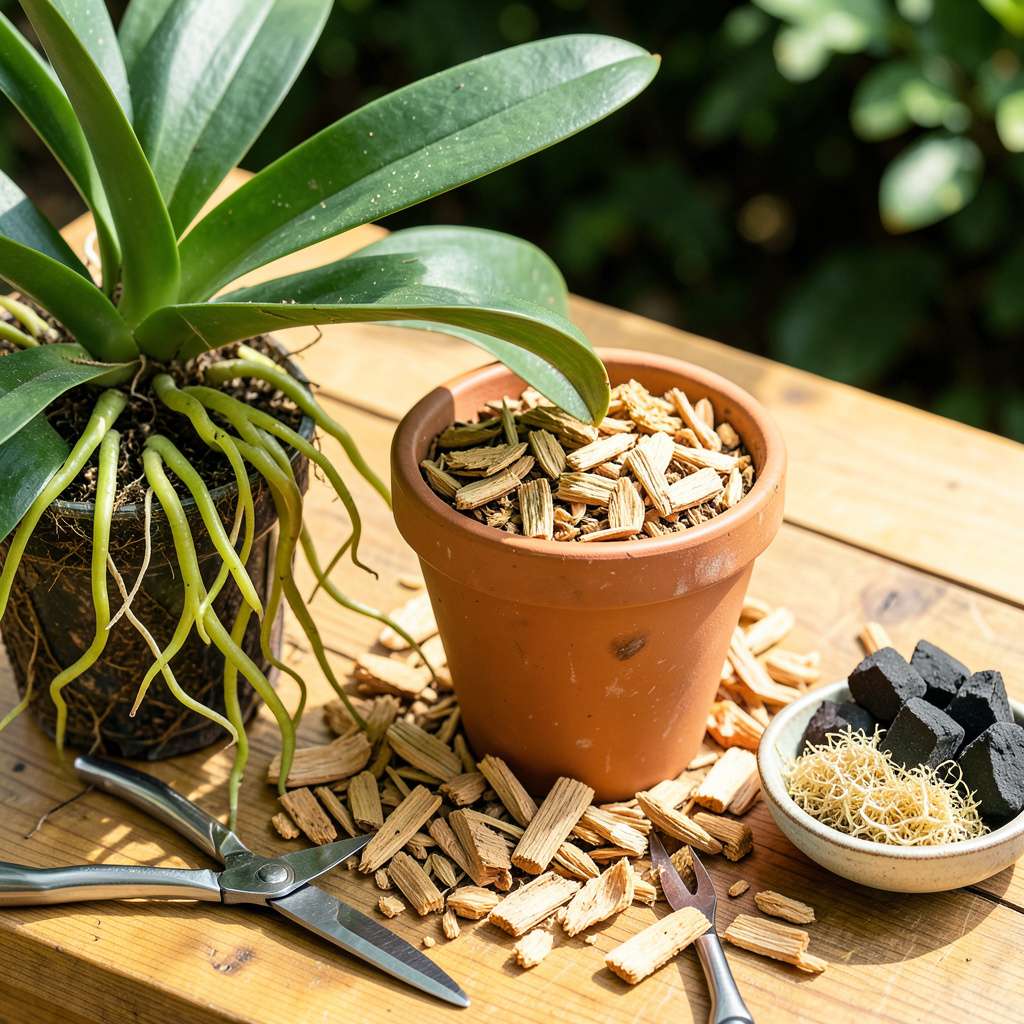
I’ll be real with you: repotting orchids used to intimidate me. That delicate tangle of roots, the fear of breaking something vital—it’s enough to make anyone hesitate. But after switching to wood chips as my primary medium, I’ve watched struggling orchids transform into plants with thriving roots and multiple bloom cycles per year.
The game-changer was realizing orchids don’t want to sit in soggy bark. Wood chips create the perfect balance—enough air around roots to prevent rot, with just enough moisture retention to keep them hydrated. My first repotting attempt with this method took 20 minutes and produced visible new root growth within two weeks.
What you’ll end up with is an orchid that establishes faster in its new home. The roots turn that healthy silver-green color when dry, plump up beautifully after watering, and push out new growth points you can actually see developing. No more guessing if your plant is happy—you’ll watch it thrive.
This works for phalaenopsis, cattleyas, and dendrobiums alike. Whether you’re rescuing a sad grocery-store orchid or maintaining a prized specimen, the wood chip method gives roots exactly what they need to perform. Let’s get that plant into its perfect new home.
📚 In This Guide
This method transforms stressed orchids into thriving plants with improved drainage and aeration—exactly what their roots crave.
Begin by watering your orchid 24 hours before repotting to hydrate the roots and make them more pliable. This reduces breakage during the process. I lay out all materials on a clean surface: sterilized pruners, fresh wood chips, and a new container with ample drainage holes.
Gently remove the orchid from its current pot by squeezing the sides to loosen the root ball. If roots cling stubbornly to the container, run a clean knife around the inner edge. Real talk: some root damage is inevitable, but healthy orchids recover quickly when given proper conditions afterward.
Rinse the root mass under lukewarm water to remove old medium and expose the true condition of the roots. Healthy roots appear firm and silver-green when dry, turning green when wet. Use sterilized pruners to remove any mushy, black, or hollow roots—these are dead tissue that will rot further if left attached.
Trim back any overly long roots that extend beyond the natural root ball shape. This encourages the plant to focus energy on new growth rather than maintaining excessive root length. I make clean cuts at a 45-degree angle to prevent water pooling on the cut surfaces, which could invite fungal issues.
Place a 1-2 inch layer of wood chips in the bottom of your new container. Position the orchid so the base of the plant sits just below the rim, allowing room for the crown to remain above the medium. The wood chips should surround but not bury the roots—think of it as anchoring rather than smothering the root system.
Hold the plant steady while gently filling around the roots with wood chips. Tap the container lightly to help the medium settle between roots. Don’t pack it tightly; orchid roots need air circulation to thrive. The ideal density lets you insert a pencil between chips with slight resistance.
After repotting, secure the plant with a stake if needed to prevent wobbling. I use soft ties that won’t cut into the stem. Place the orchid in bright, indirect light (east or north windows work well) and avoid direct sun for 7-10 days while roots adjust to their new environment.
Withhold water for 5-7 days post-repotting to allow any minor root damage to callous over. When you resume watering, use the “soak and dry” method: submerge the pot in water for 10-15 minutes, then let it drain completely. You’ll notice new root growth—silver-green tips—within 2-3 weeks if conditions are ideal.
Check the wood chips weekly for the first month. They should feel slightly damp but never soggy. Orchids in wood chip medium typically need watering every 7-10 days, though this varies with humidity. I test by inserting a wooden skewer into the medium—if it comes out dry, it’s time to water.
Watch for new leaf growth as your confirmation that the repotting was successful. If lower leaves yellow, it’s often just the plant redirecting energy to root establishment. However, if you see black spots or a foul odor, remove the orchid immediately and check for rot—this indicates the wood chips aren’t draining properly and need adjustment.
After repotting dozens of orchids, I’ve learned that small details make the difference between a plant that struggles and one that thrives.
Root Preparation: The 24-hour pre-watering in Step 1 isn’t just about hydration—it’s about root flexibility. I’ve found that orchids watered for exactly this duration have roots that bend rather than snap during removal. If you skip this, you’ll likely lose 30-40% more roots during the process, setting back recovery time significantly.
Pruning Technique: When trimming roots in Step 2, the 45-degree angle cut isn’t arbitrary. This specific angle prevents water from pooling on the cut surface, which is critical because orchid roots are particularly susceptible to fungal infections at wound sites. I use sharp bypass pruners (not anvil pruners) to make clean cuts that heal faster.
Wood Chip Density: In Step 3, the “pencil test” for medium density is your best indicator of success. After repotting, insert a pencil between wood chips—it should go in with slight resistance but not require force. This balance ensures adequate air circulation while providing enough stability for new root growth. I check three different spots in the pot to confirm consistency.
Post-Repotting Patience: The 5-7 day watering hiatus in Step 4 is non-negotiable. I learned this after losing several orchids to root rot from premature watering. During this period, maintain humidity around the plant by placing the pot on a tray with pebbles and water, but keep the water level below the pot’s base to prevent wicking.
No—backyard wood chips may contain pests, fungi, or chemicals harmful to orchids. Always use orchid-specific bark chips (firm, aged, and sterilized) or orchid bark mix from a garden center. These are pre-treated to prevent rot and mimic natural epiphytic conditions.
How often should I repot my orchid with wood chips?
Repot every 1–2 years or when the bark breaks down (turns mushy or smells sour). Over time, decomposing chips retain too much moisture, risking root rot. Spring—when new growth starts—is the ideal time for repotting.
If wood chips aren’t available, try coconut husk chips, charcoal chunks, or sphagnum moss (for moisture-loving orchids). Avoid dense soils—orchids need airflow around roots! Mix alternatives with perlite for drainage.
Brown roots often signal overwatering or poor drainage. Ensure your wood chips are chunky (1–2 inches) and the pot has drainage holes. Let the mix dry slightly between waterings—orchids hate soggy feet!
Yes! Soak chips in lukewarm water for 30–60 minutes to remove dust and prevent them from absorbing moisture from roots initially. Drain well before use—soggy chips = happy fungi (the bad kind!).
Repotting your orchid with wood chips doesn’t have to be intimidating—just follow the steps, choose the right mix, and give your plant the fresh start it deserves! 🌱 With proper drainage, gentle handling, and a little patience, your orchid will reward you with stronger roots and stunning blooms in no time.
Now that your orchid is happily repotted, keep an eye on its progress over the next few weeks. Check moisture levels, avoid overwatering, and enjoy watching your plant thrive! Ready to take your orchid care to the next level? Explore our full orchid care guide for seasonal tips and troubleshooting!
