
Beautiful Plants For Your Interior
Beautiful Plants For Your Interior
I used to dread repotting orchids—until I discovered hole pots. These specialized containers changed everything, transforming my struggling plants into ones with thriving roots and consistent blooms. The secret lies in the airflow and drainage that traditional pots simply can’t match, preventing the root rot that’s claimed too many of my orchids in the past. […]
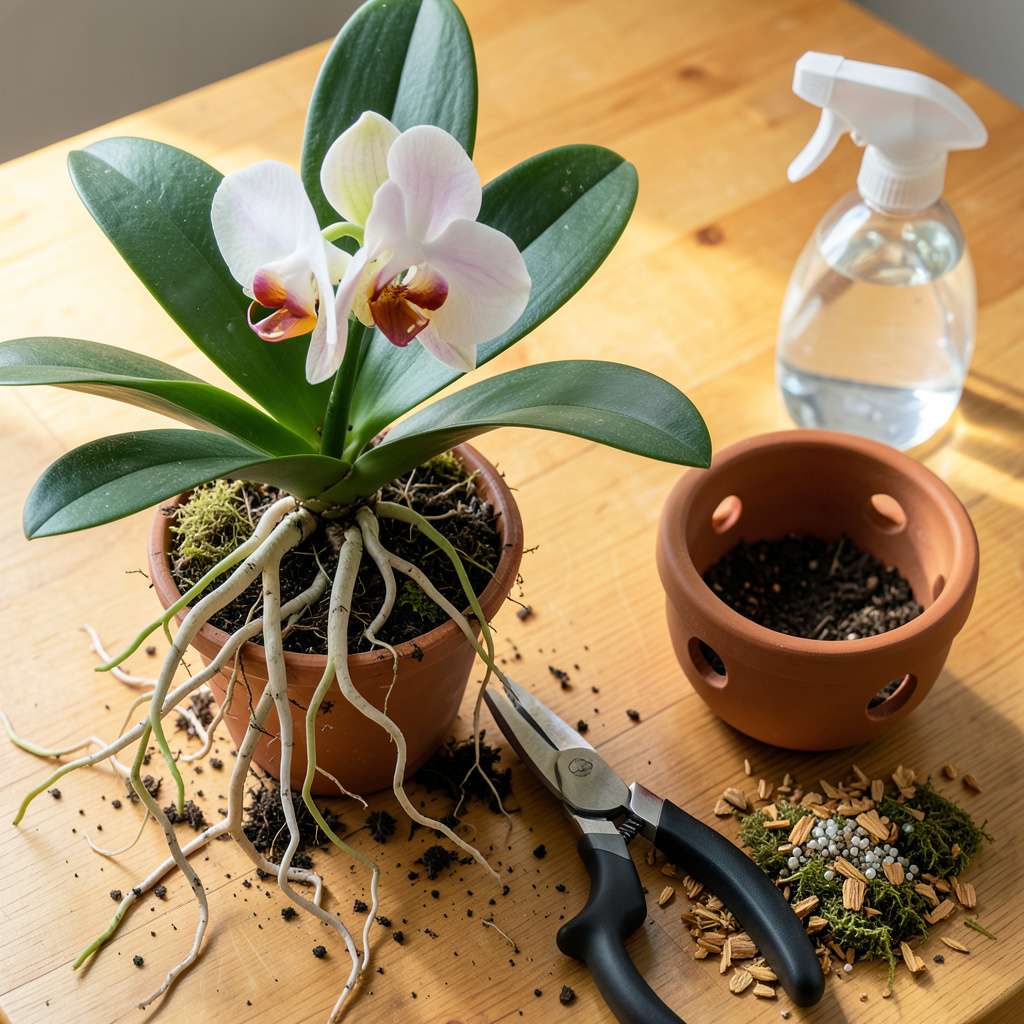
I used to dread repotting orchids—until I discovered hole pots. These specialized containers changed everything, transforming my struggling plants into ones with thriving roots and consistent blooms. The secret lies in the airflow and drainage that traditional pots simply can’t match, preventing the root rot that’s claimed too many of my orchids in the past.
Here’s the thing—most people wait too long to repot, letting roots become a tangled mess. I’ve found the sweet spot is every 12-18 months, or when roots start circling the pot’s edges. The process feels intimidating until you realize it’s just about giving roots room to breathe and fresh medium to grow into. No magic, just good technique.
What you’ll end up with is an orchid that establishes faster in its new home, with roots that stay firm and green instead of mushy and brown. I’ve watched repotted plants push out new leaves within weeks and flower spikes by the next season. The difference is that dramatic when roots get what they need.
Works for phalaenopsis, cattleyas, and most common orchid varieties. Whether you’re rescuing a struggling plant or giving a healthy one room to grow, this method sets them up for long-term success. Let’s walk through it step by step—your orchid will thank you.
📚 In This Guide
Repotting orchids doesn’t have to be intimidating—this method keeps roots healthy and promotes vigorous new growth.
Select a clean hole pot that’s 1-2 inches larger in diameter than your current container. The drainage holes should be at least ½ inch wide to allow proper airflow to the roots. I always use a pot with multiple side holes rather than just bottom drainage—this mimics the natural air circulation orchids love.
Set up your workspace with newspaper or a tray to catch debris. Have your sterilized pruning shears, fresh orchid mix, and a bowl of lukewarm water ready. The water should feel like comfortable bath temperature when you dip your fingers in—this prevents shocking the roots during cleaning.
Gently squeeze the sides of the current pot to loosen the root ball, then turn it upside down while supporting the base of the plant. If the roots resist, run a butter knife around the inner edge of the pot to release them. Never pull on the leaves—this can break the stem where it meets the roots.
Place the orchid in your bowl of water and let the roots soak for 5-10 minutes. This softens the old medium and makes it easier to remove. As you work, you’ll notice healthy roots are firm and silvery-green when dry, turning green when wet. Black, mushy, or papery roots need trimming.
Using your sterilized shears, cut away any roots that are black, brown, or hollow. Make clean cuts just above the damaged section—healthy tissue will be plump and white inside when you snip. I always disinfect my tools between cuts with rubbing alcohol to prevent spreading any potential infections.
Gently remove all old bark pieces from between the roots. You’ll feel when you’ve gotten it all—the roots should move freely without any clinging debris. Be patient with this step; forcing the process can tear healthy roots. The goal is to have nothing but clean, bare roots before repotting.
Place a 1-inch layer of fresh orchid mix in the bottom of your new pot. Position the orchid so the base of the plant sits just below the rim—this leaves room for watering. The oldest leaves should face the side of the pot, giving new growth room to emerge toward the center.
Hold the plant steady while you add more mix around the roots. Tap the pot gently on your work surface every few inches to help the medium settle. The roots should be completely covered but not packed tightly—you should still see air pockets throughout the mix when you’re done.
Water the orchid thoroughly until water runs freely from all drainage holes. I use the “soak and drain” method—place the pot in a bowl of water for 10-15 minutes, then let it drain completely. This ensures even moisture distribution without compacting the fresh mix.
After watering, check that the plant sits securely in the pot. It’s normal for orchids to wobble slightly at first—the roots will anchor themselves within 2-3 weeks. Place your repotted orchid in bright, indirect light (east or north windows work well) and avoid fertilizing for at least 2 weeks to let the roots recover.
Repotting orchids becomes much easier once you know these key details that make all the difference.
Root Soaking Technique: In Step 2, those 5-10 minutes of soaking aren’t just about cleaning—they’re critical for reviving dehydrated roots. I’ve found that orchids with severely dried roots benefit most from the full 10 minutes, while healthier plants only need 5 minutes. The water temperature matters too: if it feels too hot for your wrist, it’s too hot for the roots.
Pot Selection Insight: When choosing your hole pot in Step 1, remember that multiple side holes create better airflow than just bottom drainage. I learned this after struggling with root rot in traditional pots. The ½ inch minimum hole size isn’t arbitrary—smaller holes clog too easily with orchid mix, defeating the purpose of the hole pot design.
Medium Settling Trick: During Step 4, don’t just tap the pot gently—rotate it as you tap to ensure even settling. I place my pot on a folded towel while doing this to prevent scratching surfaces. The goal is to eliminate large air pockets without compacting the mix too tightly. You’ll know it’s right when the orchid sits firmly but still has a slight wobble.
Post-Repotting Care: After the 10-15 minute soak in Step 5, resist the urge to fertilize immediately. Those 2 weeks of waiting aren’t just suggestion—they give roots time to heal from any micro-tears that occurred during repotting. I mark my calendar to avoid forgetting this crucial recovery period.
Orchids typically need repotting every 1–2 years, or when roots overflow the pot or the medium breaks down. For hole pots, check if roots are circling tightly or poking through excessively—these are signs it’s time! Fast-growing varieties (like Phalaenopsis) may need it yearly.
No! Regular soil suffocates orchid roots. Opt for a chunky, airy mix like bark chips, sphagnum moss, or coconut husk. Hole pots improve airflow, but the right medium is critical—avoid dense, moisture-retentive soils that cause rot.
Aim for early spring or just after flowering, when orchids enter active growth. Avoid repotting during dormancy (winter) or peak blooming. Hole pots help reduce stress, but timing ensures faster recovery and root establishment.
Drooping is often due to overwatering or root shock. Hole pots drain well, but if the medium stays soggy, roots can’t breathe. Wait 5–7 days before watering post-repot, and ensure the pot isn’t sitting in water. Trim any mushy roots if rot is suspected.
Most epiphytic orchids (like Phalaenopsis, Cattleya, or Dendrobium) thrive in hole pots thanks to superior airflow. However, terrestrial orchids (e.g., Paphiopedilum) prefer slightly more moisture retention—adjust the mix or pot type if needed.
Repotting your orchid in a hole pot doesn’t have to be intimidating! 🌱 With the right tools, gentle hands, and a little patience, you’ve just given your plant the fresh start it needs to grow stronger roots and bloom beautifully. Remember, the key is timing—repot every 1-2 years or when the medium breaks down, and always prioritize drainage and airflow.
Now that your orchid is snug in its new home, keep an eye on its progress! Water lightly for the first week, then resume your regular care routine. Want to take your orchid game to the next level? Check out our guide on post-repotting care to ensure those stunning flowers keep coming! 🌸
