
Beautiful Plants For Your Interior
Beautiful Plants For Your Interior
Glass vases show off orchid roots like living art—but they demand a different approach than regular pots. I learned this after watching my first vase-grown phalaenopsis struggle with soggy roots and algae buildup. The solution isn’t complicated: it’s about matching the right materials with orchid biology, not just aesthetics. You’ll need just 4 supplies (clear […]
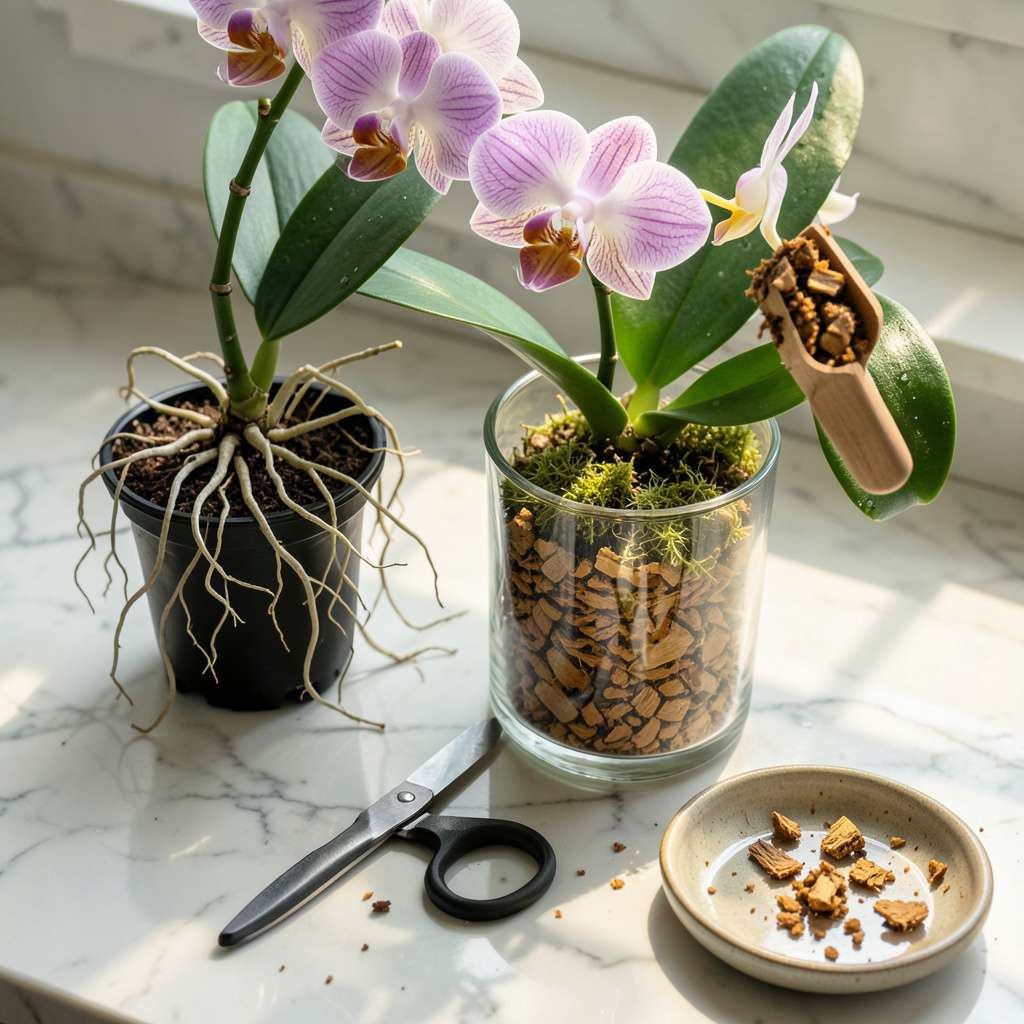
Glass vases show off orchid roots like living art—but they demand a different approach than regular pots. I learned this after watching my first vase-grown phalaenopsis struggle with soggy roots and algae buildup. The solution isn’t complicated: it’s about matching the right materials with orchid biology, not just aesthetics.
You’ll need just 4 supplies (clear vase, proper bark mix, sharp scissors, and sphagnum moss) to create an environment where roots can breathe while still looking stunning. The key difference from regular repotting? Glass traps moisture, so drainage becomes your top priority—not an afterthought. My current orchids in vases stay healthy for 2+ years between repottings using this method.
What you’ll achieve goes beyond survival. Healthy roots in glass vases develop that signature silver-green color with plump, firm tips—the sure sign of an orchid that’s ready to rebloom. The transparency lets you monitor moisture levels and root growth at a glance, catching problems before they start.
Works for phalaenopsis, dendrobiums, and other epiphytic orchids that thrive with air circulation. The process takes about 30 minutes once you’ve gathered materials, and the payoff is a display piece that keeps flowering season after season.
📚 In This Guide
This method ensures your orchid thrives with visible roots and sustained health—no guesswork required.
Begin by soaking the orchid’s root ball in room-temperature water for 10-15 minutes to loosen the potting medium. This makes root separation easier and reduces damage. Gently remove the plant from its old container, supporting the base of the stem to avoid snapping.
Wash the glass vase with mild soap and warm water, then rinse thoroughly to remove any residue. A clean environment prevents bacterial growth, which can rot roots. Dry the vase completely before proceeding—moisture on the glass can trap excess humidity later.
Use sterilized scissors to trim any black, mushy, or hollow roots—these are dead and will decay further if left. Healthy roots should be firm and silver-green when dry, turning green when wet. Avoid cutting healthy aerial roots; these adapt to the vase’s open environment.
If roots are tightly bound, gently tease them apart with your fingers. Forcing them risks tearing, which invites infection. A quick spray of hydrogen peroxide (3%) on cuts can sterilize and encourage healing, though this is optional for minor trims.
Place the orchid in the vase so the base of the stem sits 1-2 inches above the vase’s base. This elevation prevents water from pooling around the crown, which causes rot. Arrange the roots to cascade naturally—don’t cram them. The glass walls let you monitor root health and moisture levels visually.
Avoid overcrowding; the roots need airflow. If the plant feels unstable, use a clear plastic support stake (cut to size) to anchor it temporarily. The stake can be removed once roots attach to the glass, typically in 4-6 weeks.
Surround the roots with chunky orchid bark mix, leaving the top third of the roots exposed for airflow. The bark should fill gaps but not compress—orchid roots suffocate in dense medium. Tap the vase lightly to settle the mix, then top with a thin layer of sphagnum moss to retain humidity without waterlogging.
Mist the moss lightly and position the vase in bright, indirect light (east or north-facing windows work well). Avoid direct sun, which can overheat the glass and scorch roots. The first watering should occur 5-7 days later, giving cuts time to callous.
Check the roots weekly: silver-green indicates thirst, while bright green means they’re hydrated. Water by adding 3-4 ice cubes or ¼ cup of water to the base, letting it melt/absorb naturally. Empty any standing water after 20 minutes to prevent rot.
Fertilize monthly with a balanced orchid fertilizer (20-20-20) diluted to half-strength. New growth—like emerging leaf spikes or aerial roots—signals success. If roots pull away from the glass, increase humidity with a nearby tray of water and pebbles.
After years of repotting orchids in glass containers, I’ve learned these subtle details make all the difference between a struggling plant and one that thrives with visible roots.
Root Preparation Insight: During Step 2 when trimming roots, I’ve found that soaking the roots in room-temperature water for the full 10-15 minutes specified in Step 1 makes them significantly more pliable. This extra hydration prevents accidental tears when you’re separating tightly bound roots with your fingers. The difference between dry roots and properly hydrated ones is remarkable – hydrated roots bend without breaking.
Positioning Precision: In Step 3, that 1-2 inch elevation of the stem base above the vase isn’t arbitrary. I learned through trial and error that anything less than 1 inch risks crown rot from condensation, while more than 2 inches can make the plant unstable. Use a ruler if needed – this small measurement prevents most repotting failures I’ve seen.
Medium Mastery: When adding the chunky orchid bark mix in Step 4, here’s what changed my success rate: gently rotate the vase as you add the bark to ensure even distribution. The roots should be surrounded but not compressed – I can usually fit my pinky finger between roots and glass in several spots. This airflow gap prevents the root suffocation that plagues many glass vase setups.
Post-Repotting Care: The 5-7 day waiting period before first watering in Step 4 is critical for callous formation on trimmed roots. I’ve ruined plants by watering too soon – those fresh cuts need to heal first. During this time, I maintain humidity by misting just the sphagnum moss lightly every other day, never the roots directly.
Yes, but with caution! Glass vases lack drainage, so use chunky bark or LECA pebbles at the base to prevent root rot. Water sparingly—let roots dry slightly between waterings. Consider a vase with a wide opening for better airflow.
When’s the best time to repot an orchid into a glass vase?
Aim for early spring or after flowering, when orchids enter active growth. Avoid repotting during dormancy (fall/winter). Look for signs like crowded roots or degraded medium—these mean it’s time!
Try sphagnum moss (retains moisture but needs monitoring) or LECA (clay pebbles) for a semi-hydroponic setup. Avoid dense soils—they suffocate roots. Rinse moss/LECA before use to remove dust or debris.
Brown roots often signal overwatering or poor airflow. Check for soggy medium—replace it if waterlogged. Trim mushy roots with sterilized scissors, then repot in fresh, dry mix. Ensure the vase isn’t sealed tightly.
Glass vases work long-term if you adapt care: reduce watering frequency, boost humidity (try a pebble tray), and monitor roots weekly. For beginners, alternate between glass displays (short-term) and traditional pots (for recovery).
Repotting your orchid in a glass vase doesn’t have to be intimidating—just follow the steps, prioritize root health, and choose the right materials. With proper drainage, gentle handling, and a little patience, your orchid will thrive in its stylish new home! 🌿✨
Now that your orchid is happily settled, keep an eye on its progress over the next few weeks. Check moisture levels and adjust care as needed. Ready to take your orchid game further? Explore advanced tips on fertilizing or styling your glass vase display!
