
Beautiful Plants For Your Interior
Beautiful Plants For Your Interior
That orchid you’ve been neglecting? It’s not dead—just waiting for a fresh start. I’ve revived dozens of sad, root-bound orchids that owners were ready to toss, and the transformation always surprises people. The secret lies in understanding what those tangled roots and yellowing leaves are really telling you. Repotting isn’t just about bigger pots—it’s about […]
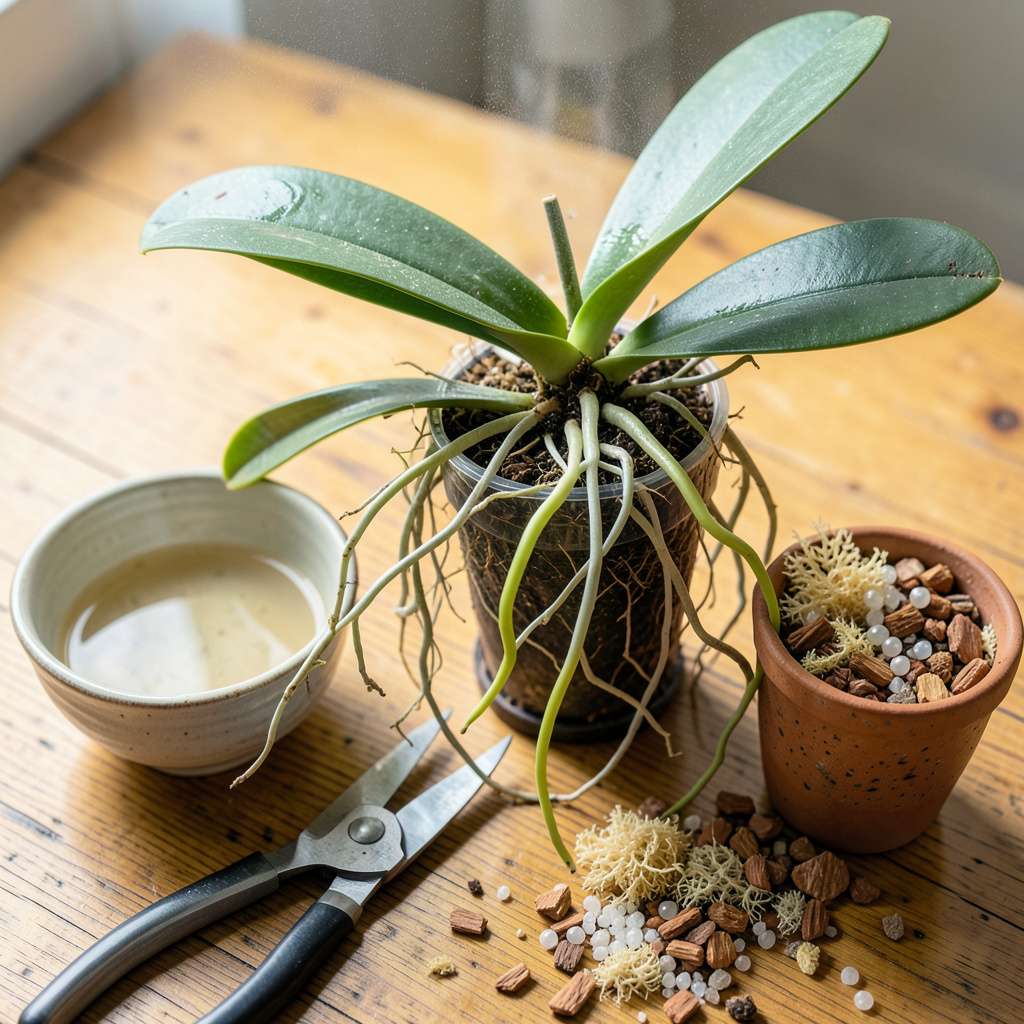
That orchid you’ve been neglecting? It’s not dead—just waiting for a fresh start. I’ve revived dozens of sad, root-bound orchids that owners were ready to toss, and the transformation always surprises people. The secret lies in understanding what those tangled roots and yellowing leaves are really telling you.
Repotting isn’t just about bigger pots—it’s about giving your orchid the right home to thrive again. After years of trial and error (and killing a few plants along the way), I’ve landed on a method that works even for orchids that haven’t bloomed in years. You’ll need just 3 basic tools and about 30 minutes to set your plant up for its next growth cycle.
The process reveals exactly why your orchid stopped blooming: compacted medium that suffocates roots, salt buildup from fertilizers, or simply running out of space. Once repotted properly, most orchids push new leaves within 4-6 weeks and often surprise you with flower spikes when you least expect them.
Works for phalaenopsis, cattleyas, or any orchid that’s outgrown its current home. Here’s how to do it right—without the common mistakes that do more harm than good.
📚 In This Guide
This method has saved my oldest orchids from decline—follow these steps and you’ll see new growth within weeks.
Start by covering your work surface with newspaper or a plastic bag. Old orchids often have tangled roots that may resist removal, so I always soak the entire pot in lukewarm water for 10-15 minutes first. This softens the root mass and makes extraction easier.
Gently squeeze the sides of the plastic pot to loosen the root ball, then turn it upside down while supporting the base of the plant. If it won’t release, run a clean knife around the inner edge of the pot to break the suction. Never pull on the leaves—they’ll snap off before the roots release.
Rinse the roots under room-temperature water to remove all old potting medium. You’ll likely see a mix of healthy green roots and dead brown ones. Use sterilized scissors to trim away any roots that are mushy, black, or completely dried out—these won’t recover and may spread rot.
Healthy roots should feel firm when gently squeezed, like a green bean. If you find any with soft spots, cut back to where the tissue is solid. I always disinfect my tools between cuts with rubbing alcohol to prevent spreading any potential infections between plants.
Choose a pot that’s 1-2 inches larger in diameter than the current one—orchids prefer being slightly root-bound. Clear plastic pots let you monitor root health, while decorative cache pots can hide the plastic. Make sure there are multiple drainage holes; I drill extra if needed.
Place a 1-inch layer of fresh orchid bark mix in the bottom of the new pot. Don’t use regular potting soil—it suffocates orchid roots. The bark should be chunky enough to allow airflow but not so large that roots can’t anchor. Moisten the bark slightly before adding the plant.
Set the orchid in the new pot so the base of the plant sits just below the rim. Spread the roots evenly over the bark layer—they shouldn’t be crammed together. Hold the plant in place while you add more bark mix around the sides, gently tapping the pot to help it settle.
The crown (where leaves meet roots) should remain 1 inch above the medium to prevent rot. I use a chopstick to carefully push bark between roots without compacting it. The plant should be snug enough to stand upright but not packed tightly—you should be able to lift it slightly with a gentle tug.
Don’t water immediately after repotting—wait 5-7 days to let any damaged roots callous over. Place the orchid in bright, indirect light (east or north windows work well) and maintain 60-70°F temperatures. Avoid direct sun, which can stress the plant during recovery.
Resist the urge to fertilize for 3-4 weeks. You’ll know the orchid is adjusting well when you see new root tips emerging—they’ll appear bright green with a slightly fuzzy texture. This is your signal that the plant is ready for normal care routines again.
Repotting an old orchid can feel intimidating, but these practical insights will help you avoid common pitfalls and set your plant up for success.
Root Handling Technique: When removing the orchid in Step 1, the 10-15 minute soak in lukewarm water is crucial—don’t rush this step. I’ve found that using water that’s too hot can shock the roots, while cold water won’t soften the root mass effectively. Gently massaging the root ball underwater after soaking helps separate tangled roots without tearing them. The goal is to preserve as much of the healthy root system as possible during removal.
Sterilization Matters: In Step 2, disinfecting your tools between cuts isn’t just good practice—it’s essential for preventing infections. I keep a small bowl of rubbing alcohol nearby and dip my scissors after every few cuts, especially when dealing with multiple plants. This simple habit has saved me from spreading fungal issues between my orchids. Remember that even healthy-looking roots can carry microscopic pathogens that might infect fresh cuts.
Pot Selection Wisdom: The 1-2 inch size increase mentioned in Step 3 is important for a reason—orchids actually thrive when slightly root-bound. I’ve made the mistake of choosing pots that were too large, thinking I was giving the plant more room to grow, only to find that the excess space led to moisture retention and root rot. Clear plastic pots are my preference because they allow me to monitor root health without disturbing the plant, though I understand the aesthetic appeal of decorative cache pots.
Aftercare Patience: The 5-7 day waiting period before watering in Step 5 tests every gardener’s patience, but it’s critical for recovery. I mark my calendar and place the plant where I’ll see it daily as a reminder not to water prematurely. During this time, I focus on maintaining that 60-70°F temperature range—cooler temperatures slow recovery, while warmer ones can stress the plant further. A simple digital thermometer near my orchids helps me monitor this consistently.
Most orchids need repotting every 1–2 years, but older plants may thrive for 3 years if healthy. Watch for signs like crowded roots, degraded potting mix, or slow growth—these mean it’s time! Pro tip: Repot after blooming for less stress on the plant.
It’s not ideal, but you can if the plant is struggling (e.g., root rot or pests). Expect some flower loss—orchids focus energy on recovery. If possible, wait until blooms fade to avoid shocking the plant.
Skip regular soil! Opt for chunky mixes like:
Avoid dense mixes—they suffocate roots!
Yellowing leaves often signal stress or overwatering. Check:
Trim mushy roots and adjust care—patience is key!
Yes, but only the dead or rotten ones! Use sterilized scissors to snip brown/mushy roots. Leave firm, silvery-green roots intact—they’re healthy. Trim conservatively; over-pruning weakens the plant.
Repotting an old orchid doesn’t have to be daunting—just follow the steps, patience, and a little TLC! 🌱 By refreshing the potting mix, trimming dead roots, and giving your plant a cozy new home, you’re setting it up for months (or even years!) of vibrant blooms. Remember, orchids are resilient, and even an older plant can thrive with the right care.
Now that your orchid is repotted, keep an eye on its progress—water lightly, provide indirect light, and watch for new growth. Ready to take your orchid care to the next level? Check out our guide on post-repotting care to ensure your plant stays happy and healthy!
