
Beautiful Plants For Your Interior
Beautiful Plants For Your Interior
I used to be terrified of pruning orchid roots—until I realized it’s the secret to bigger blooms and healthier plants. That first time I carefully trimmed away the mushy, dead roots and watched my struggling phalaenopsis bounce back with vibrant new growth? Total game-changer. What seemed like surgery turned out to be the kindest thing […]
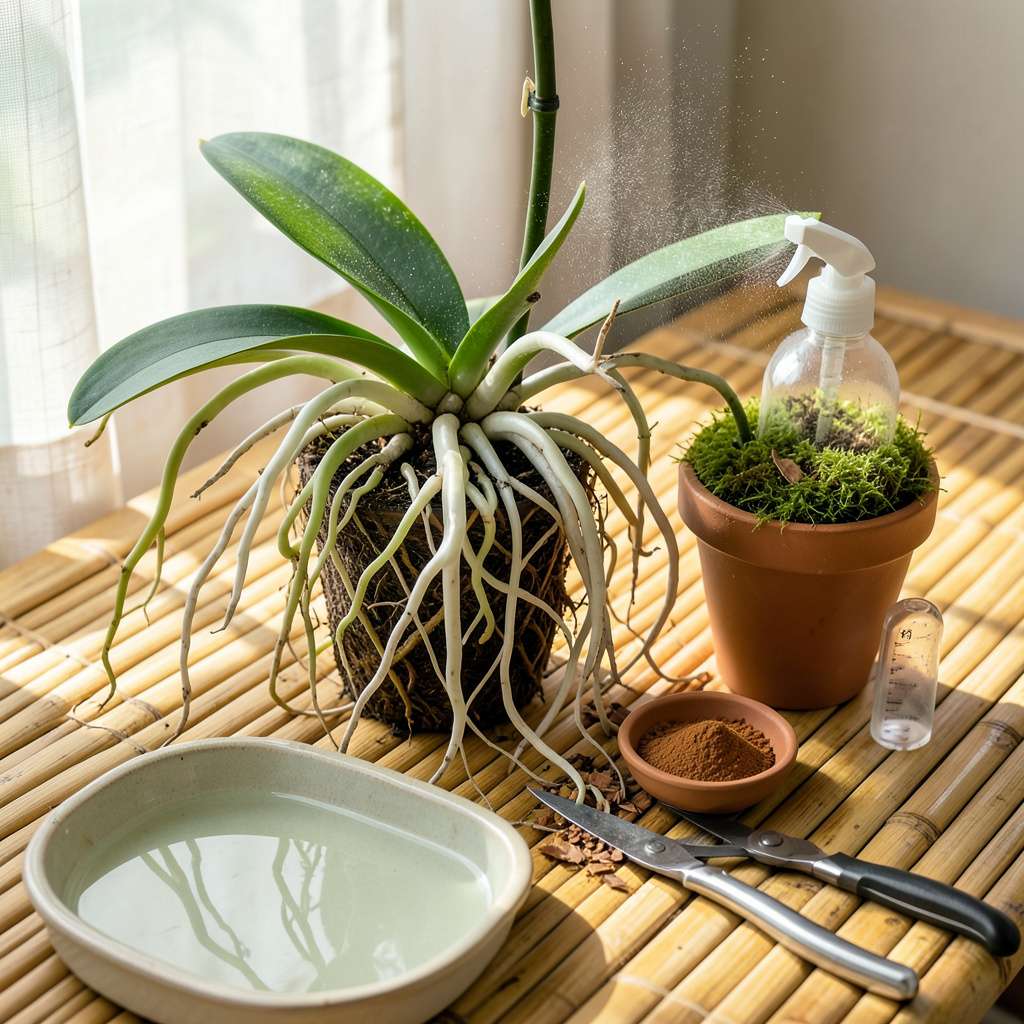
I used to be terrified of pruning orchid roots—until I realized it’s the secret to bigger blooms and healthier plants. That first time I carefully trimmed away the mushy, dead roots and watched my struggling phalaenopsis bounce back with vibrant new growth? Total game-changer. What seemed like surgery turned out to be the kindest thing I could do for my plants.
The truth is, orchids want this kind of attention. Left unchecked, crowded roots suffocate, rot sets in, and your plant wastes energy on dead tissue instead of producing those stunning flowers we all love. With just a few basic tools—a sterilized blade, some cinnamon (yes, really), and 20 minutes—you can transform a sad, root-bound orchid into one that’s ready to thrive.
What you’ll notice after pruning: faster recovery from repotting, more flower spikes in the next blooming cycle, and roots that actually grow where they’re supposed to—instead of circling the pot like tangled spaghetti. The first time I did this properly, my orchid rewarded me with three bloom stems instead of its usual one.
Here’s the thing—this isn’t about being aggressive. It’s about being observant. You’ll learn to spot the difference between roots that are just taking a break and ones that are truly gone, and that knowledge makes all the difference between a plant that survives and one that absolutely thrives.
📚 In This Guide
This delicate process transforms struggling plants into vigorous bloomers—just follow these precise steps.
Gently squeeze the sides of the pot to loosen the root ball, then carefully slide the plant out. If roots are tightly bound, run lukewarm water over the pot for 30-60 seconds to help release them. Never pull forcefully—orchid roots break easily when dry.
Once removed, place the plant on a clean surface. Healthy roots appear firm and silver-green when dry, turning bright green when wet. You’ll immediately notice the difference between viable roots and those that need removal.
Examine each root individually. Prune only roots that are mushy, black, or hollow—these are dead or rotting. Healthy roots, even if slightly discolored, should remain. Use your fingernail to test firmness: viable roots resist pressure while dead ones collapse.
Look for dried, papery roots as well—these have lost their moisture-retaining velamen layer and won’t recover. I always check the root tips too; green tips indicate active growth, while brown or shriveled tips signal decline.
Wipe your pruning shears or scissors with rubbing alcohol between each cut to prevent disease transmission. Make clean cuts at a 45-degree angle, about 1/4 inch above any healthy tissue on the root. This angle prevents water pooling on the cut surface.
Avoid leaving stubs—these become entry points for bacteria. If you encounter a root that’s partially healthy, trim only the damaged section. You’ll often find that removing 20-30% of the root mass is typical for neglected orchids, but don’t exceed 50% in one session.
Dust each cut surface with ground cinnamon or sulfur powder—this creates a natural antifungal barrier. Let the plant rest for 10-15 minutes while you prepare fresh media. I prefer orchid bark mix for its excellent drainage and aeration properties.
Position the plant in its new container so the base sits just below the rim, allowing room for watering. Spread roots evenly throughout the pot—don’t cram them. The first watering should occur 5-7 days after repotting to let cuts callous properly.
Place the orchid in bright, indirect light (east-facing windows work well) and maintain 60-70°F temperatures. Expect no new growth for 2-3 weeks as the plant recovers. During this period, mist leaves lightly every 2-3 days to maintain humidity without watering the roots.
Watch for new root tips emerging—these appear as bright green nubs. Once you see 1-2 inches of new root growth, resume normal watering. The pruning shock period is officially over when you spot the first signs of aerial root development.
Pruning orchid roots requires patience and precision—these insights will help you avoid common pitfalls while encouraging healthier regrowth.
Root Identification Technique: In Step 2, when testing root firmness with your fingernail, apply gentle but consistent pressure. Healthy roots should feel like a firm cucumber, while compromised ones will indent like an overripe banana. I’ve found that roots with even slight give often recover with proper care, so err on the side of caution when deciding what to remove. The velamen layer (that silvery outer coating) is your best indicator—if it’s intact, the root has potential.
Pruning Precision: The 45-degree angle mentioned in Step 3 isn’t arbitrary—it creates a sloped surface that sheds water while maximizing surface area for new growth. When making cuts, visualize where new roots will emerge: you want the cut to face outward from the plant’s center. This orientation guides new growth away from the stem, preventing future crowding. Between us, I keep a small spray bottle of rubbing alcohol nearby to re-sterilize tools between cuts without interrupting my workflow.
Recovery Environment: The 60-70°F temperature range in Step 5 is critical because orchids enter a protective stasis below 60°F and may rot above 75°F during recovery. I’ve had best results maintaining consistent temperatures by placing plants on a tray with pebble stones and water—this creates a stable microclimate. The east-facing window recommendation isn’t just about light intensity; it’s about the gentle morning sun that won’t stress the plant during its vulnerable recovery period.
Watering Discipline: Those 5-7 days without watering in Step 4 will test your patience, but this dry period allows cuts to callous properly. I mark my calendar and use the misting schedule as a distraction—lightly spraying the leaves every 2-3 days satisfies my nurturing instincts without risking root rot. The first signs of new growth typically appear as tiny green bumps at the base of the stem, not from the cut roots themselves. This is the plant redirecting energy to its strongest growth points.
It’s best to avoid pruning roots during blooming—focus on post-bloom or early growth phases instead. Pruning while flowering can stress the plant, causing buds to drop or blooms to wilt prematurely. Wait until the flowers fade and new roots or leaves start growing for safest results.
Orchids typically need root pruning every 1–2 years, or when you repot. Overpruning can weaken the plant, so only trim if roots are mushy (rot), dried out, or excessively tangled. Healthy, firm roots (silver-green when dry, green when wet) don’t need trimming!
Don’t panic! Even a rootless orchid can recover. Trim all dead roots, soak the base in diluted hydrogen peroxide (3%) for 10 minutes to disinfect, then place it in sphagnum moss or a humidity tray. Keep it warm (70–80°F) and mist daily—new roots may sprout in 2–6 months.
No! Regular scissors crush stems, inviting infection. Use sterilized pruning shears or sharp bypass pruners (wipe with rubbing alcohol before/after). Clean cuts heal faster and reduce stress on your orchid.
Always remove the orchid from its pot first! Pruning in water hides rot and makes it harder to see root health. Gently rinse roots after pruning to check for missed issues, then let them air-dry 10–15 minutes before repotting.
Pruning orchid roots doesn’t have to be intimidating—just remember, healthy roots equal happier blooms! 🌸 By following the steps we’ve covered, you’ll remove dead or damaged roots while giving your plant the fresh start it needs. Trust the process, stay patient, and your orchid will reward you with vibrant growth.
Ready to take the next step? Check your orchid’s roots today and schedule a pruning session if they’re looking overcrowded or unhealthy. Your green thumb is about to shine! ✨
