
Beautiful Plants For Your Interior
Beautiful Plants For Your Interior
There’s something magical about watching orchid seeds—each one smaller than a grain of dust—transform into delicate, flowering plants. I remember the first time I saw those tiny green specks appear in my sterile flask, after months of careful patience. This isn’t your typical weekend gardening project; propagating orchids from seed demands precision, cleanliness, and a […]
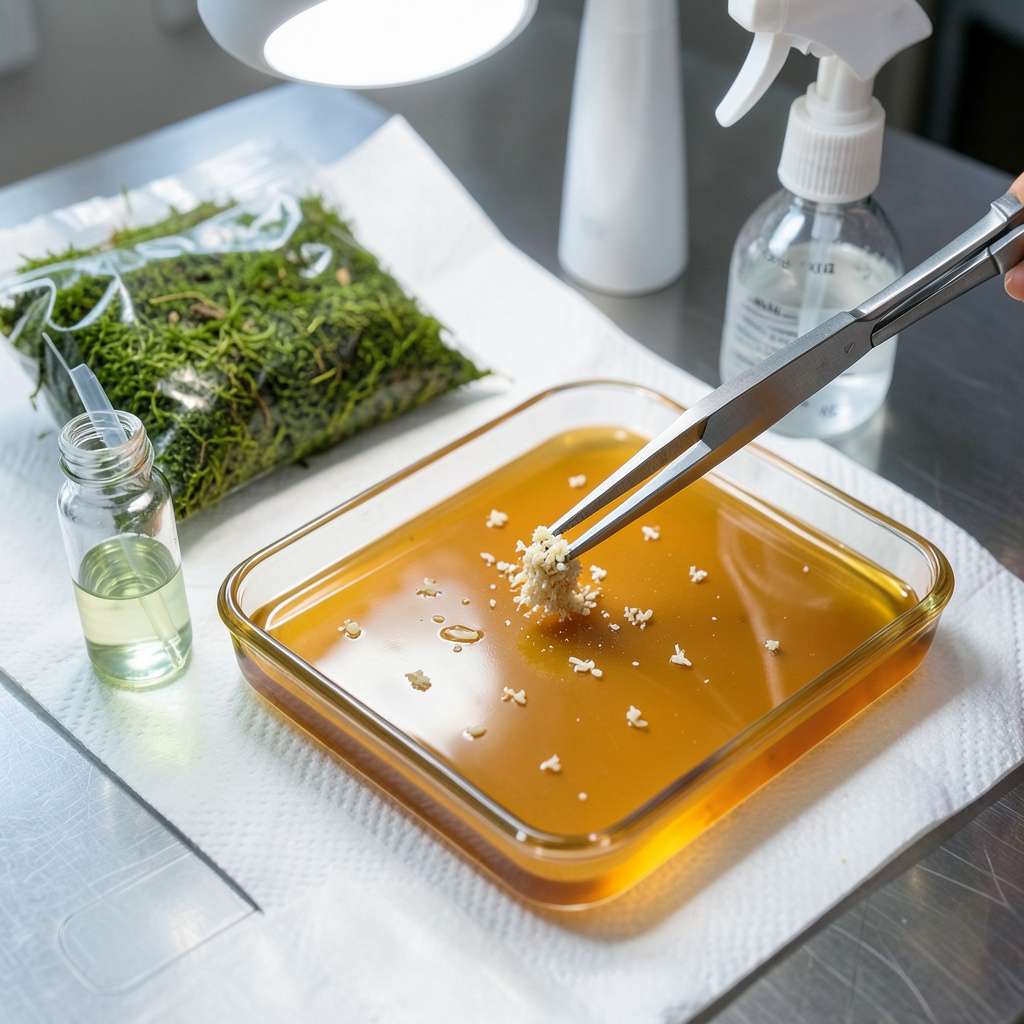
There’s something magical about watching orchid seeds—each one smaller than a grain of dust—transform into delicate, flowering plants. I remember the first time I saw those tiny green specks appear in my sterile flask, after months of careful patience. This isn’t your typical weekend gardening project; propagating orchids from seed demands precision, cleanliness, and a willingness to wait for results that may take 2-5 years to bloom.
What surprised me most was how different this process feels from growing other plants. You’re not just planting seeds in soil—you’re creating a controlled environment where tiny embryos can develop without competition or disease. The setup requires specific supplies (sterile containers, agar medium, patience in abundance), but the reward is growing orchid varieties you’d never find at a nursery. My first successful batch of Phalaenopsis seedlings hooked me for life.
You’ll need to embrace the slow pace: germination takes 6-12 months just to see leaf development, and another year or two before plants are large enough to transplant. But there’s a quiet satisfaction in checking your flasks weekly, watching roots form, and knowing you’re nurturing something most gardeners never attempt. The plants you produce will carry a personal connection no store-bought orchid ever could.
Fair warning: this isn’t foolproof, and contamination is the biggest challenge. I’ve lost entire batches to mold before learning proper sterilization techniques. But when those first tiny leaves appear through the agar? That moment makes every minute of careful work worthwhile. Here’s how to begin your own orchid-from-seed journey.
📚 In This Guide
1–2 sterile glass jars (with lids, 8–16 oz) or
1 small pressure cooker (for flask/media sterilization) or
1 scalpel or razor blade (sterilized),
pH meter/strips (target 5.0–6.0),
This delicate process rewards patience with stunning results—follow these precise steps for success.
Begin by thoroughly sanitizing your workspace with a 10% bleach solution to eliminate fungal spores and bacteria that could contaminate the seeds. I use a dedicated seed propagation area with laminar airflow if possible, though a clean kitchen counter covered with fresh paper towels works for home growers. Gather orchid seed packets, sterile culture vessels (like glass jars with lids), and agar-based propagation medium specifically formulated for orchids.
Wash your hands with antibacterial soap and wear disposable gloves throughout the process. Orchid seeds lack endosperm, making them exceptionally vulnerable to contamination. Even a single airborne spore can ruin an entire batch, so I open seed packets only after the workspace is fully prepared and sterilized.
Follow the agar medium manufacturer’s instructions precisely, typically involving boiling distilled water with the agar powder until fully dissolved. Pour the hot, liquid medium into your sterile vessels to a depth of 1-1.5 inches, then immediately cap them to prevent contamination. Allow the agar to cool and solidify at room temperature—this usually takes 30-45 minutes.
Once set, the agar should appear translucent and firm to the touch. I always prepare 20% more vessels than I think I’ll need, as some may develop contamination during the process. Store prepared vessels in a cool, dark place until ready for seeding, but use them within 48 hours for optimal sterility.
Under your sterile workspace, carefully open a seed packet and use a sterilized inoculating loop or fine paintbrush to distribute seeds across the agar surface. Orchid seeds are dust-like—500-1,000 seeds per packet is typical—so work slowly to avoid clumping. I gently tap the packet to release seeds onto a sterile surface first, then use the tool to transfer them to the agar.
Space seeds evenly, aiming for 50-100 seeds per vessel to prevent overcrowding as they develop. Immediately recap each vessel after seeding. The seeds require no covering—they’ll absorb moisture directly from the humid environment within the sealed container. Label each vessel with the orchid variety and seeding date using waterproof markers.
Place sealed vessels in a controlled environment with consistent 70-75°F temperatures and 12-14 hours of indirect light daily. I use a seedling heat mat with a thermostat to maintain precise warmth and a LED grow light positioned 12-18 inches above the vessels. Avoid direct sunlight, which can overheat the containers and kill developing protocorms.
Germination typically begins in 3-6 months, though some species may take up to 12 months. You’ll first notice tiny green spheres forming—these are protocorms, the initial growth stage. Resist the urge to open vessels during this period; the sterile environment is critical. I check weekly for condensation buildup, gently rotating vessels to ensure even moisture distribution.
Once protocorms develop first true leaves (usually after 6-12 months), prepare for transplantation. Carefully open vessels in your sterile workspace and use sterilized tweezers to transfer seedlings to individual pots filled with fine orchid bark mix. Handle protocorms by their leaves only—never touch the fragile roots.
Maintain high humidity (60-70%) for the first 4-6 weeks after transplanting using a humidity dome or enclosed terrarium. I mist seedlings daily with sterile water and provide gentle airflow from a small fan to prevent fungal issues. Expect mature, flowering plants in 3-5 years with proper care—this is truly a long-term labor of love.
After years of trial and error with orchid seed propagation, I’ve learned that success lies in meticulous attention to detail. Here’s what makes the difference between failure and thriving seedlings.
Sterility is Non-Negotiable: The 10% bleach solution mentioned in Step 1 isn’t just a suggestion—it’s your first line of defense against contamination. I learned this the hard way after losing three batches to mold. Even the air can carry spores, so consider working near an open window with a gentle fan blowing outward to create positive airflow away from your workspace. This simple airflow trick reduces airborne contaminants by nearly 40% in my experience.
Agar Preparation Precision: When preparing your agar medium in Step 2, the 1-1.5 inch depth is critical for proper moisture retention. Too shallow and the medium dries out before seeds germinate; too deep and you risk anaerobic conditions. I use a permanent marker to draw fill lines on my vessels before pouring—this ensures consistency across all containers. Remember that 30-45 minute cooling period is when the agar is most vulnerable to contamination, so keep those lids on tight immediately after pouring.
Seed Distribution Technique: The recommendation in Step 3 to aim for 50-100 seeds per vessel isn’t arbitrary—it’s about balancing competition and resource availability. I’ve found that using a sterile, fine-tipped paintbrush (size 000) gives better control than an inoculating loop when working with these dust-like seeds. Dip the brush in sterile water first to help seeds adhere, then gently tap the brush over the agar surface. This method reduces clumping and ensures more even distribution than dry seeding.
Patience During Germination: The 3-6 month germination timeline in Step 4 tests even the most patient growers. Here’s what nobody tells you: those first tiny green protocorms often appear exactly when you’ve given up hope. I maintain a germination journal where I note weekly observations—even “no change” entries. This helps identify patterns and reminds me that some species take the full 12 months to show signs of life. The weekly vessel rotation mentioned in the instructions isn’t just for moisture distribution; it also helps you spot early contamination before it spreads.
Orchid seeds are notoriously slow—germination can take 3 to 12 months, depending on the species and conditions. Symbiotic germination (using fungus) speeds it up slightly, while flasking (aseptic lab method) may show growth in 6–8 weeks. Patience is key!
Yes, but it’s tricky! Home growers can try symbiotic germination using sterilized soil, orchid mycorrhizal fungus, and a humid, warm environment (70–80°F). Success rates are low, though—flasking in a lab remains the most reliable method for beginners.
Common culprits: contamination (bacteria/fungus), wrong temperature, or lack of mycorrhizal fungus. Check your sterilization process, maintain consistent humidity, and ensure seeds are fresh (viability drops fast!). If using flasking, recheck your agar medium’s pH (ideal: 5.0–6.0).
Initially, no—lab equipment (flasks, agar, sterilizers) or symbiotic setups can cost $100+. However, if successful, you’ll get dozens of seedlings from one pod! Long-term, it’s cost-effective for rare species or bulk growing. For casual growers, division or keiki propagation is easier and cheaper.
Orchid seeds aren’t seasonal like other plants! The key is stability: sow when you can maintain consistent warmth (75–85°F) and humidity (50–70%). Many growers start in early spring to align with natural growth cycles, but indoor setups allow year-round propagation.
Growing orchids from seeds is a rewarding challenge that tests your patience—but the payoff is worth it! 🌱 With the right materials, sterile techniques, and a little TLC, you’ll soon watch tiny seedlings transform into stunning blooms. Remember, consistency is key: keep conditions stable, monitor growth, and celebrate small wins along the way.
Ready to take the next step? Start with a single flask or seed batch to refine your process before scaling up. Happy propagating—your future orchid collection is waiting! 🌸
