
Beautiful Plants For Your Interior
Beautiful Plants For Your Interior
There’s nothing like biting into a tomato you grew from seed—warm from the sun, bursting with flavor, and juicier than anything from the store. I still remember the first time I cut open a homegrown ‘Brandywine’ and watched the juice run down my arm. That’s the kind of harvest we’re aiming for here. Starting tomatoes […]
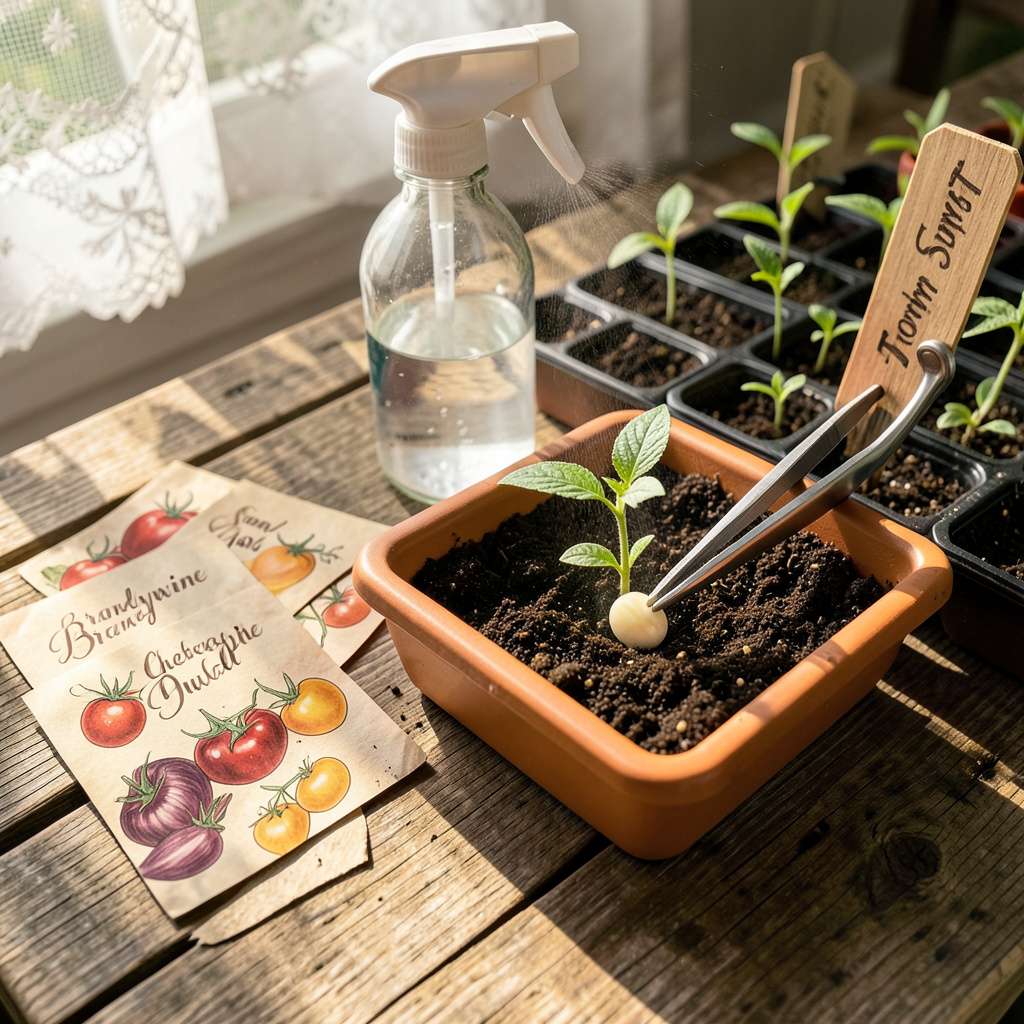
There’s nothing like biting into a tomato you grew from seed—warm from the sun, bursting with flavor, and juicier than anything from the store. I still remember the first time I cut open a homegrown ‘Brandywine’ and watched the juice run down my arm. That’s the kind of harvest we’re aiming for here.
Starting tomatoes from seed gives you access to hundreds of varieties you’ll never find as transplants. Plus, you control the whole process—no mystery pesticides, no root-bound plants, just healthy starts tailored to your garden. The secret isn’t green thumbs; it’s timing, warmth, and a little patience during those first 6-8 weeks indoors.
You’ll watch those tiny seeds push through soil, stretch toward light, and transform into stocky seedlings ready for the garden. By planting time, they’ll outpace any store-bought transplant because you’ve babied them from day one. We save seeds from our best performers every year—here’s how to turn yours into next season’s stars.
Works equally well for backyard plots, raised beds, or containers on a sunny patio. Whether you’re after heirlooms, cherry tomatoes, or paste varieties for sauce, the process starts the same way: with a seed, some soil, and this foolproof method we’ve perfected over dozens of seasons.
📚 In This Guide
This method delivers strong, productive plants that will reward you with the juiciest tomatoes you’ve ever tasted.
Start with fresh, high-quality tomato seeds from a reputable supplier. I always check the packet date—seeds older than two years have significantly lower germination rates. For containers, clean 2-3 inch deep seed trays or small pots work best. Sterilize them first with a 10% bleach solution to prevent damping-off disease.
Fill containers with a sterile seed-starting mix (never garden soil). The mix should feel light and fluffy when squeezed, not dense or heavy. Moisten it thoroughly before planting—water should glisten on the surface but not pool. Press gently to create a firm, even surface, leaving about ¼ inch space at the top.
Sow 2-3 seeds per container at a depth of about ¼ inch. This depth gives seeds enough soil contact for moisture while allowing quick emergence. Space seeds about ½ inch apart in case all germinate. Cover lightly with additional mix, then mist gently with a spray bottle—never pour water directly onto newly planted seeds.
Label each container with the variety name and planting date. I use plastic plant markers because ink won’t smudge when wet. Place containers in a warm spot (70-80°F)—the top of your refrigerator often provides ideal warmth. You’ll see sprouts emerge in 5-10 days if conditions are right.
As soon as seedlings break through the soil, move them to bright light immediately. A south-facing window may work, but I recommend a full-spectrum LED grow light positioned 2-4 inches above the plants. Seedlings need 14-16 hours of light daily to grow stocky and strong rather than leggy and weak.
Maintain daytime temperatures around 70-75°F and nighttime around 60-65°F. This temperature swing mimics natural conditions and produces healthier plants. You’ll know your seedlings are thriving when they develop thick stems and deep green leaves within the first two weeks.
When seedlings develop their first true leaves (the second set of leaves that appear), thin to the strongest plant in each container. Use clean scissors to snip unwanted seedlings at soil level—never pull them, as this disturbs the roots of the remaining plant. This seems harsh, but crowded seedlings compete for resources and produce weaker plants.
Begin fertilizing with a half-strength balanced liquid fertilizer every 10-14 days once true leaves appear. I prefer fish emulsion or seaweed extract for organic growing. Watch for the leaves to darken slightly after feeding—that’s your sign the plants are absorbing nutrients properly. Keep the soil consistently moist but never soggy.
Two weeks before your last frost date, begin hardening off seedlings by placing them outside in a sheltered location for 1-2 hours the first day. Gradually increase outdoor time by 1 hour daily over 10-14 days. This process toughens plants and prevents transplant shock. Choose an overcast day for the final transplanting.
Plant seedlings 18-24 inches apart in well-draining soil enriched with compost. Bury the stem deeply—up to the first set of leaves—as tomatoes will develop roots along the buried stem. Water deeply immediately after planting, then maintain even moisture as plants establish. You’ll see new growth within a week, signaling successful transplantation.
Here’s what years of starting tomatoes from seed have taught us—small details that make a big difference in your harvest.
Seed Selection Matters: Always check the seed packet date before planting. We’ve found seeds older than two years have germination rates that drop by 50% or more. For heirloom varieties, look for suppliers that specialize in organic, non-GMO seeds—they tend to have better viability. The extra few dollars for fresh seeds pays off when you don’t have to replant empty containers.
Light Positioning Secret: When using grow lights in Step 3, adjust them to stay just 2-4 inches above the seedlings as they grow. We use adjustable chains to raise the lights daily. This prevents leggy growth and ensures the 14-16 hours of light actually reaches the plants effectively. Seedlings will stretch toward distant light sources, creating weak stems.
Thinning Technique: In Step 4, use clean scissors to snip unwanted seedlings at soil level rather than pulling them. We learned this the hard way—pulling disturbs the remaining plant’s roots and can set growth back by a week. Choose the strongest seedling with the thickest stem, even if it’s not the tallest. That sturdiness indicates better future productivity.
Hardening Off Wisdom: During the 10-14 day hardening process in Step 5, watch the weather forecast closely. We once lost a tray of seedlings to an unexpected cold snap. If temperatures will drop below 50°F, bring plants inside or cover them with a lightweight row cover. The gradual exposure to outdoor conditions is crucial for preventing transplant shock.
Got questions about growing tomatoes from seed? You’re not alone! Here are the most common concerns—and quick answers—to help your seedlings thrive.
Tomatoes typically take 6-8 weeks to reach transplant size indoors, then 60-85 days (depending on variety) to mature after moving outside. Dwarf or cherry types often fruit faster (50-60 days). Start seeds 6-10 weeks before your last frost for a head start!
Yes, but success depends on bright, direct sunlight (6+ hours daily). A sunny south-facing window works, but seedlings may get leggy. Rotate pots daily and consider a DIY reflective surface (like foil) to maximize light. For cloudy climates, a $20 LED bulb can save the day!
Leggy seedlings = not enough light or too much heat. Move them closer to a light source (2-3 inches from bulbs) and lower temps to 65-70°F. If they’re already stretched, bury stems deeper when transplanting—they’ll grow roots along the buried stem!
Nope! Tomato seeds germinate fine without soaking. But for faster sprouting (especially with older seeds), soak them in lukewarm water for 1-2 hours before planting. Avoid soaking over 12 hours—it can drown them. Pro tip: Use a damp paper towel for a quick viability test!
Beginners, start with these foolproof picks:
Stick to determinate types for containers or small spaces.
Growing tomatoes from seed is a rewarding journey—one that starts with tiny seeds and ends with vibrant, homegrown tomatoes bursting with flavor! 🍅 By choosing the right variety, providing warmth and light, and nurturing your seedlings with care, you’re setting the stage for a bountiful harvest. Remember, patience and consistency are key, but the taste of your first sun-ripened tomato will make every effort worthwhile.
Ready to get started? Grab your seeds, prep your soil, and dive in—your future tomato plants (and taste buds) will thank you! For extra confidence, bookmark this guide or share it with a fellow gardening buddy to tackle the project together. Happy growing! 🌱
