
Beautiful Plants For Your Interior
Beautiful Plants For Your Interior
My first orchid under grow lights changed everything. What started as a desperate attempt to save a struggling plant turned into a year-round blooming machine on my bookshelf. The secret isn’t fancy equipment—it’s matching the right light spectrum to what orchids naturally crave in their jungle canopy homes. After killing three orchids with “bright window” […]
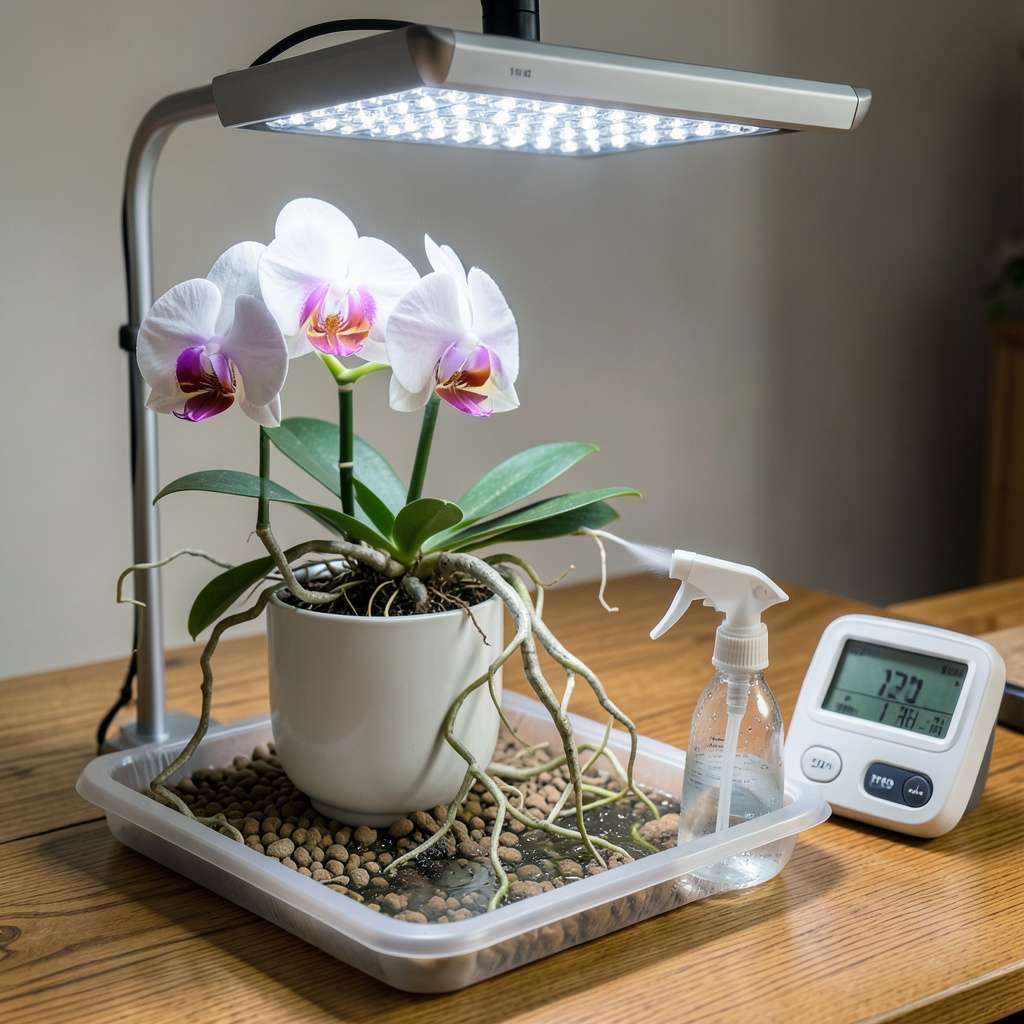
My first orchid under grow lights changed everything. What started as a desperate attempt to save a struggling plant turned into a year-round blooming machine on my bookshelf. The secret isn’t fancy equipment—it’s matching the right light spectrum to what orchids naturally crave in their jungle canopy homes.
After killing three orchids with “bright window” advice, I switched to artificial light and never looked back. A basic LED grow light setup for $30 outperforms any windowsill, giving you consistent 12-hour days regardless of winter gloom or apartment orientation. The plants respond with stronger roots and more flower spikes than they ever produced in natural light.
You’ll see new leaves unfurling within weeks, their deep green color signaling perfect light absorption. By month three, the first flower spikes emerge—sturdy, upright, and loaded with buds. The real magic? These plants keep blooming in cycles, with proper care producing 3-4 flower displays annually instead of the single seasonal show from window-grown orchids.
Works for Phalaenopsis, Cattleya, or any orchid you’ve been told “needs natural light.” Here’s exactly how to set it up—no greenhouse required, just a shelf and the right bulbs. Fair warning: once you see those first artificial-light blooms, you’ll want to convert your entire collection.
📚 In This Guide
Reflectors or white foam boards to maximize light efficiency.
This method delivers consistent blooms without natural sunlight—perfected through years of indoor experimentation.
Choose a full-spectrum LED grow light with a color temperature between 5000-6500K to mimic natural daylight. Orchids require specific wavelengths for photosynthesis and flowering, so avoid basic household LEDs. I recommend a fixture with adjustable intensity—this allows you to customize output as plants grow.
Position the light 12-18 inches above the orchid’s foliage initially. You’ll notice the ideal distance when leaves appear medium green (not dark or yellowish). Too close causes bleaching; too far results in weak, elongated growth. Use a timer to maintain a 12-14 hour photoperiod daily—consistency triggers blooming cycles.
Maintain ambient temperatures between 65-80°F during the day with a 10-15°F drop at night. This fluctuation is critical for flower spike initiation in many orchid species. Place a small oscillating fan nearby to provide gentle air movement—this strengthens stems and prevents fungal issues by reducing surface moisture.
Humidity should remain between 40-70%. Use a hygrometer to monitor levels accurately. If your space is dry, place the orchid pot on a tray filled with pebbles and water (ensure the base doesn’t sit in water). The evaporating moisture creates a microclimate around the plant without risking root rot.
Water orchids in the morning using the “soak and dry” method: submerge the pot in room-temperature water for 10-15 minutes, then allow it to drain completely. Never let the plant sit in standing water. The potting medium should feel slightly damp but never soggy—press your finger 1 inch into the mix to check moisture levels accurately.
Between waterings, observe the roots: healthy roots appear silver-green when dry and turn bright green when hydrated. Yellow or mushy roots indicate overwatering. Adjust frequency based on your environment—most orchids under artificial light need watering every 7-10 days, but this varies with humidity and pot size.
Use a balanced 20-20-20 orchid fertilizer diluted to half-strength every 2-3 waterings during active growth periods. Switch to a high-phosphorus 10-30-20 formula when flower spikes appear to encourage blooming. I flush the potting medium with plain water every 4th watering to prevent salt buildup, which can burn roots over time.
Watch for new growth at the base of the plant—this indicates the orchid is entering an active phase. Reduce fertilization during dormant periods (typically after blooming) when growth slows. Always apply fertilizer to damp roots to prevent chemical burn, and never fertilize a completely dry plant.
Inspect plants weekly for signs of stress: yellowing leaves suggest too much light or fertilizer, while dark green foliage indicates insufficient light. Flower spikes typically emerge from between the leaves—when you see these, increase phosphorus slightly and ensure the light remains consistent. Rotate pots quarter-turn weekly to prevent lopsided growth toward the light source.
Repot every 1-2 years or when the potting medium breaks down. Use a chunky, well-draining orchid mix (never regular potting soil) and choose a pot only 1-2 inches larger than the previous one. Orchids prefer being slightly root-bound, and oversized containers lead to waterlogged medium and root rot.
After years of experimenting with indoor orchid cultivation, I’ve learned that success comes down to mastering a few key details. Here’s what makes the difference between struggling plants and thriving blooms.
Light Positioning Precision: The 12-14 hour photoperiod mentioned in Step 1 is non-negotiable for blooming, but here’s what nobody tells you: adjust the light height gradually as your orchid grows. Start at 18 inches, then lower to 12 inches as the plant matures. I use a simple string test—if the light casts a soft shadow of my hand, it’s perfect. Too sharp means it’s too close; no shadow means it’s too far.
Temperature Fluctuation Strategy: That 10-15°F nighttime drop in Step 2 isn’t just helpful—it’s essential for triggering flower spikes in many species. I’ve found that placing orchids near an east-facing window at night (even with artificial light) creates the perfect natural temperature variation. If your home stays consistently warm, try moving plants to a cooler room overnight or use a small fan to simulate the drop.
Watering Wisdom: The 10-15 minute soak in Step 3 works perfectly, but here’s my game-changer: use lukewarm water, not room temperature. The slight warmth stimulates root activity and helps the plant absorb nutrients more efficiently. I also mark my calendar for the 7-10 day watering cycle, but always check root color first—those silver-green roots when dry are your most reliable indicator.
Fertilizer Timing Hack: When Step 4 mentions switching to high-phosphorus fertilizer at flower spikes, watch for this subtle sign first: tiny bumps forming along the spike where buds will emerge. That’s your cue to make the switch. I’ve also found that alternating between the 20-20-20 and 10-30-20 formulas (rather than a hard switch) prevents the shock that can sometimes cause bud drop.
Many orchids (like Phalaenopsis or Paphiopedilums) thrive under only artificial light if the setup mimics natural conditions! Use full-spectrum LED or fluorescent grow lights for 12–14 hours daily. Avoid direct sunlight if supplementing—it can scorch leaves.
Distance depends on the light type! LEDs: 12–18 inches away; fluorescents: 6–12 inches. Watch for leaf color: dark green = too far; reddish/purple = too close. Adjust height as plants grow!
Most orchids need 12–16 hours of light daily (with 8 hours of darkness for rest). Use a timer for consistency! For blooming, some (like Cattleyas) may need a slight winter reduction (10–12 hours) to trigger flower spikes.
You don’t need top-tier lights, but avoid basic household LEDs—they lack the right spectrum. Look for full-spectrum or 5000K–6500K bulbs labeled for plants. Budget picks like T5 fluorescents work well for beginners!
Yellowing leaves often mean too much light (sunburn!) or nutrient issues. Check light distance, reduce intensity, or test your water for pH/fertilizer imbalances. Lower leaves yellowing? That’s normal aging—no panic!
Growing orchids under artificial light is simpler than you think! With the right light spectrum, consistent care routine, and a little patience, you can enjoy stunning blooms year-round—no greenhouse required. 🌱✨ Remember, success starts with matching your orchid’s needs to the right setup and adjusting as you learn.
Ready to see your orchids thrive? Start small with a single plant, track its progress, and refine your approach. Before you know it, you’ll have a vibrant indoor garden that turns heads! For next steps, check out our orchid fertilizer guide to keep those blooms coming.
