
Beautiful Plants For Your Interior
Beautiful Plants For Your Interior
Mounting orchids on logs replicates their natural growing conditions better than any pot ever could. Through years of experimentation, we’ve found this method produces stronger root systems, more frequent blooms, and plants that thrive for decades rather than just a few seasons. The key lies in selecting the right wood and understanding how orchids naturally […]
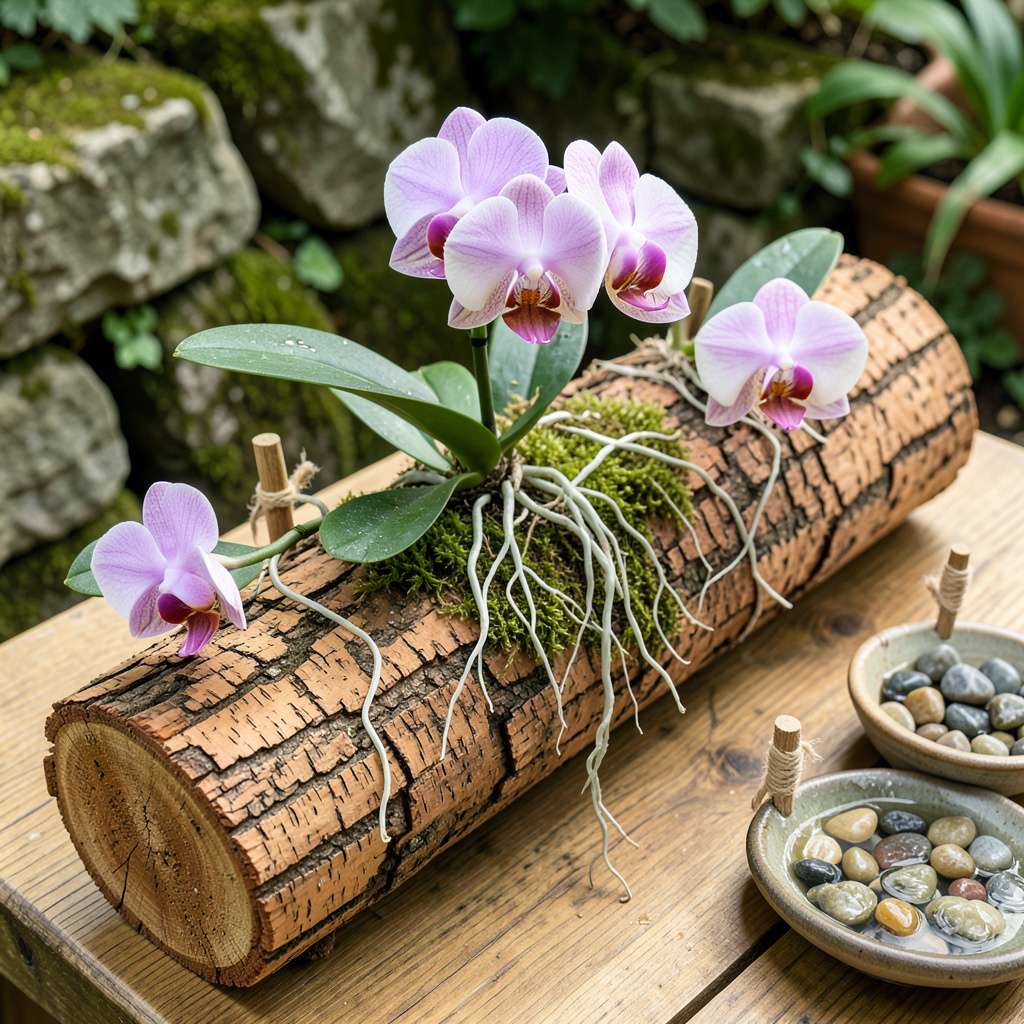
Mounting orchids on logs replicates their natural growing conditions better than any pot ever could. Through years of experimentation, we’ve found this method produces stronger root systems, more frequent blooms, and plants that thrive for decades rather than just a few seasons. The key lies in selecting the right wood and understanding how orchids naturally attach themselves to trees in their native habitats.
What surprised us most was how simple the process becomes once you understand the basic principles. You’ll need just three essential components: a suitable log, proper mounting materials, and the right orchid varieties. Our team has successfully grown dozens of species this way, from common Phalaenopsis to rare Cattleyas, all using the same fundamental approach.
The results speak for themselves. Orchids mounted on logs develop thicker roots that cling naturally to the wood, absorbing moisture and nutrients exactly as they would in the wild. Within 6-8 weeks of mounting, you’ll see new root growth emerging, followed by stronger stems and more abundant flower spikes than container-grown plants typically produce.
This technique works equally well for indoor growers and outdoor enthusiasts in appropriate climates. The initial setup takes less than 30 minutes per plant, with maintenance requirements actually decreasing over time as the orchid establishes itself on the mount. Here’s how to begin with confidence.
📚 In This Guide
This natural mounting technique mimics orchids’ wild habitat for stronger growth and spectacular blooms.
Choose a log with rough, textured bark that provides natural attachment points for roots. I prefer cork bark, tree fern plaques, or aged hardwood branches at least 6-8 inches long and 3-4 inches wide. Avoid treated lumber or softwoods that decompose quickly.
Soak the log in water for 24 hours to fully saturate the wood. This prevents it from absorbing moisture meant for your orchid roots. Scrub the surface gently with a soft brush to remove loose debris while preserving the natural texture orchid roots will cling to.
Remove the orchid from its pot and gently rinse the roots under lukewarm water to eliminate all potting media. Use your fingers to carefully untangle roots, working from the tips toward the base. Healthy roots should appear plump and silver-green when dry, turning bright green when wet.
Trim any dead or damaged roots with sterilized scissors, cutting 1/4 inch above the damaged section. Look for roots that remain brown and mushy after soaking—these should be removed. The remaining root mass should form a natural fan shape that will spread across the log surface.
Position the orchid against the log so the base sits slightly above the center, allowing room for downward root growth. I use nylon stockings or sphagnum moss wrapped around the root base and log, secured with non-copper wire or plastic-coated ties. Avoid metal wires that can damage roots over time.
The attachment should be snug enough to hold the plant securely but loose enough to allow 1/4 inch of movement for root expansion. Check that the orchid’s growth direction (new pseudobulbs or leaves) faces outward from the log for proper orientation.
Mist the mounted orchid daily for the first 2-3 weeks until new root growth appears. Use a fine spray bottle to simulate tropical humidity without saturating the roots. You’ll see new root tips emerging as bright green nubs within 7-14 days if conditions are ideal.
Hang the log in a location with 50-70% humidity and bright, indirect light (east or north windows work well). The log should dry slightly between mistings but never become completely dry to the touch. Properly mounted orchids will develop a robust root system that eventually adheres to the log without additional support.
Once established, water by soaking the entire log in room-temperature water for 5-10 minutes every 5-7 days. Allow excess water to drain completely before returning to its display location. The log should feel slightly damp but not waterlogged when you press against it.
Fertilize monthly with a balanced orchid fertilizer diluted to half strength, applied as a foliar spray or added to the soaking water. Watch for new growth emerging from the base—this indicates your mounting was successful. Blooms typically appear within 12-18 months of mounting, with each subsequent flowering becoming more prolific.
Mounting orchids on a log creates a stunning natural display, but success depends on understanding their unique needs during this transition. Here’s what I’ve learned through years of trial and error.
Log Selection Insight: The 24-hour soaking period in Step 1 isn’t just about hydration—it’s about creating a stable microclimate. I’ve found that cork bark maintains moisture more consistently than hardwood, especially in dry indoor environments. Test your log after soaking by pressing firmly; it should feel heavy and release water when squeezed, but not be soggy. This balance prevents the log from competing with your orchid for moisture during those critical first weeks.
Root Preparation Technique: When trimming roots in Step 2, sterilize your scissors between each cut by dipping in rubbing alcohol. This prevents potential fungal spores from entering fresh wounds. The 1/4-inch buffer above damaged sections allows for natural callusing without risking further dieback. I also recommend working with slightly damp roots—they’re more pliable and less likely to snap during positioning on the log.
Attachment Strategy: In Step 3, the 1/4-inch movement allowance isn’t arbitrary—it accommodates the natural swelling and contracting of orchid roots as they absorb and release moisture. I’ve had best results using nylon stockings cut into 1-inch strips rather than moss, as they allow better airflow while still providing support. Position the orchid so its oldest pseudobulbs (if present) are closest to the log, giving newer growth room to expand outward.
Establishment Period Wisdom: During the 2-3 week misting phase in Step 4, use distilled or rainwater to prevent mineral buildup on roots. The bright green nubs you’ll see emerging after 7-14 days are actually root tips covered in velamen—the spongy tissue that helps orchids absorb water and nutrients. This is your sign that the mounting was successful and you can begin transitioning to the soaking method described in Step 5.
Not all logs work well! Opt for rotting-resistant hardwoods like oak, cedar, or redwood. Avoid softwoods (pine, fir) that decompose quickly. The bark should be rough to help roots attach. Pro tip: Soak the log in water for 24 hours to remove tannins before mounting.
Log-mounted orchids dry faster than potted ones. Water every 2–5 days (depending on humidity/climate), misting roots until saturated. Check moisture by touching the roots—silver-gray means thirsty; green means hydrated. Reduce watering in winter when growth slows.
Patience is key! Secure loose roots with nylon stockings or sphagnum moss tied gently around the base. Avoid tight bindings that restrict growth. Roots typically anchor within 3–6 months. If roots shrink/turn black, check for overwatering or poor airflow.
Cork slabs and tree fern plaques are great log alternatives—they’re lightweight and retain moisture well. Tree fern mimics natural habitats, while cork resists rot. Just ensure the surface is rough for root grip. Avoid treated woods or chemicals.
Yellow leaves often signal stress from overwatering, sunburn, or poor airflow. Ensure the log has partial shade (no direct midday sun) and good ventilation. Adjust watering—roots should dry slightly between sessions. If yellowing spreads, check for pests or fungal issues.
Growing orchids on a log is a rewarding way to mimic their natural habitat while adding a stunning, organic touch to your space. With the right log, proper mounting technique, and consistent care, your orchids will thrive with vibrant blooms and healthy roots. 🌿
Don’t be afraid to experiment—each log and orchid combo is unique! Ready to start? Pick a suitable log, gather your supplies, and give this natural method a try. Your orchids (and your green thumb) will thank you! 😊
