
Beautiful Plants For Your Interior
Beautiful Plants For Your Interior
Orchids in LECA represent a fundamental shift in how we care for these elegant plants. After years of struggling with bark mixes and unpredictable watering schedules, I discovered that expanded clay pellets create an ideal environment for root health and consistent blooming. The method eliminates the guesswork that plagues traditional orchid cultivation. This approach requires […]
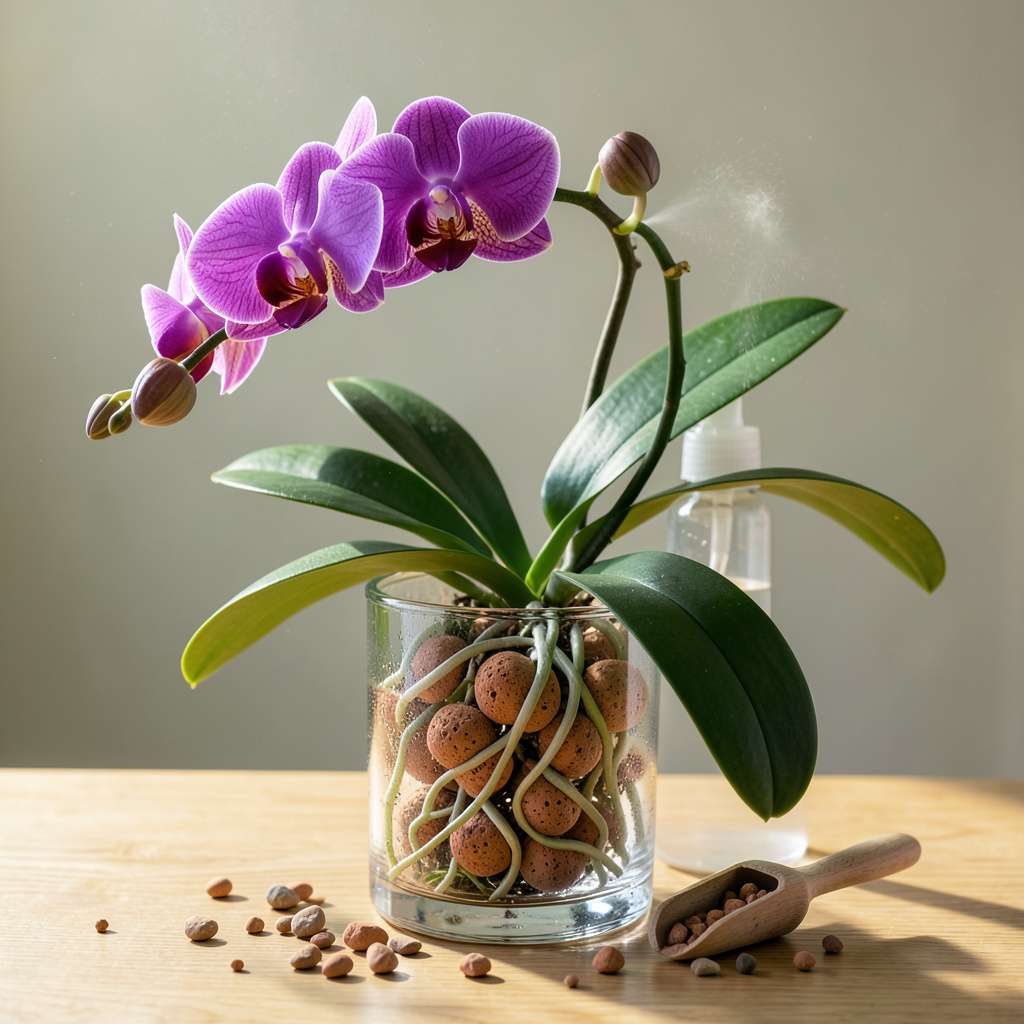
Orchids in LECA represent a fundamental shift in how we care for these elegant plants. After years of struggling with bark mixes and unpredictable watering schedules, I discovered that expanded clay pellets create an ideal environment for root health and consistent blooming. The method eliminates the guesswork that plagues traditional orchid cultivation.
This approach requires minimal supplies—a clear container, quality LECA, and the right nutrient solution—but delivers transformative results. Roots develop a robust, silvery-green appearance within weeks, and plants establish faster than in conventional media. The system’s self-regulating moisture levels prevent the overwatering issues that typically plague orchid growers.
You’ll observe stronger growth patterns and more abundant flowering cycles once the plants adapt to their new medium. The transition period reveals exactly how orchids respond to their environment, with visible root activity that serves as a real-time health indicator. This method particularly excels for Phalaenopsis and other epiphytic varieties.
While the initial setup differs from traditional potting, the long-term maintenance proves simpler and more reliable. The technique adapts well to various growing spaces, from windowsills to dedicated orchid cases, making it accessible regardless of your current setup.
📚 In This Guide
This semi-hydroponic method cuts through the complexity—here’s exactly how I transitioned my orchids to LECA with zero root rot.
Start with mature orchids that have at least 3 healthy roots (plump, green or silver, not mushy). I avoid newly blooming plants because the transition stress can shorten flower life. Remove all potting media by soaking the root ball in lukewarm water for 10-15 minutes—this loosens stubborn bark without damaging roots.
Use sterile scissors to trim any black, hollow, or papery roots. Leave even slightly firm roots intact; they’ll often recover in LECA. Disinfect cuts with a dusting of cinnamon powder (natural antifungal). This prep step determines whether your orchid thrives or struggles—don’t rush it.
Rinse expanded clay pebbles under running water until the water runs clear. This removes dust that could clog roots. For a standard 6-inch net pot, you’ll need about 1 quart of pebbles. I use a colander for efficient rinsing—shake vigorously to dislodge fine particles.
Sort pebbles by size: use 1/4-inch diameter for the base layer (promotes drainage) and 1/2-inch for the upper reservoir. The size gradient prevents compaction while maintaining air pockets. Dry pebbles completely before use—excess moisture at this stage invites bacterial growth.
Fill the net pot’s base with 1 inch of small pebbles, then position your orchid so the root crown sits 1-2 inches below the pot rim. This prevents crown rot while allowing new roots to grow upward. Surround roots with medium pebbles, gently shaking the pot to settle them without compacting.
Place the net pot into a cache pot without drainage and add water to 1/3 the net pot’s height. The water should never touch the orchid’s base—roots will wick moisture upward. I mark the water level with a permanent marker on the cache pot for consistency.
Maintain the water level at that 1/3 mark, replenishing as it drops. Every 7-10 days, empty the reservoir completely, rinse pebbles, and refill with fresh water to prevent salt buildup. Use rainwater or distilled water—tap water’s minerals accumulate dangerously in closed systems.
Provide 12-14 hours of bright, indirect light daily (east window or 10,000-lux grow light). You’ll know light is adequate when new leaves develop their species-typical color without reddening. Rotate the pot quarter-turn weekly to prevent lopsided growth.
After 4-6 weeks, check for new root growth—healthy LECA roots appear plump with bright green tips. If roots look shriveled, increase humidity around the plant (not in the pot). I mist the air around my orchids daily until new growth stabilizes.
Fertilize monthly with hydroponic nutrient solution at 1/4 strength. Watch for mineral deposits on pebbles—this signals it’s time to flush the system. Your first bloom cycle in LECA may take 6-9 months, but subsequent cycles come faster with established root systems.
Transitioning orchids to LECA doesn’t have to be intimidating—here’s what I’ve learned from years of trial and error.
Root Preparation Insight: That 10-15 minute soak in Step 1 is absolutely critical. I’ve found that using water just slightly warmer than room temperature (about 85°F) works best to loosen potting media without shocking the roots. Don’t rush this step—gentle agitation during soaking helps dislodge stubborn bark pieces that could harbor pathogens in your new LECA system. The difference between a smooth transition and root stress often comes down to this single preparation step.
LECA Size Strategy: When sorting your 1/4-inch and 1/2-inch pebbles in Step 2, here’s what nobody tells you—the smaller pebbles at the base create capillary action that pulls water upward more efficiently. I actually use a mesh strainer to separate sizes quickly. And don’t skip drying them completely; even slight dampness can create a microbial bloom that sets your orchid back weeks during the critical 4-6 week adaptation period mentioned in Step 5.
Water Level Wisdom: Maintaining that 1/3 height water level in Step 4 is more art than science. I mark my cache pots with a permanent marker at the exact fill line, but here’s the real trick—check the water level at the same time daily, as evaporation rates vary with humidity. During the first 7-10 day period when you’re establishing the system, you might need to top up every 2-3 days rather than weekly. The roots will tell you if they’re happy—plump and silver-green means you’ve nailed it.
Light Consistency Tip: For that 12-14 hour light requirement, I’ve found that consistency matters more than intensity. If using artificial lights, set them on a timer—orchids thrive on predictable cycles. And don’t underestimate the quarter-turn rotation; I do mine every Sunday without fail. This simple habit prevents the lopsided growth that plagues so many LECA-grown orchids, especially in that crucial 6-9 month period before first blooming.
No! Transition gradually to avoid shock. Start by rinsing roots to remove soil, then soak in water for 30 minutes. Trim dead roots before placing in LECA. Use a semi-hydroponic method for 2-4 weeks (partial LECA + water) before full conversion. Patience prevents stress!
How often should I water orchids in LECA?
Unlike soil, LECA relies on a reservoir system. Fill the outer pot’s water level to 1/3 of the inner pot’s height every 7–10 days. Check roots—bright green = hydrated; silvery = thirsty. Adjust based on humidity (drier air = more frequent top-ups).
Use 4–10mm clay pebbles (8mm is ideal). Smaller sizes (like 4mm) retain too much moisture, risking rot, while larger ones (10mm+) may not support roots well. Pro tip: Mix sizes for better aeration and stability!
Brown roots = rot or nutrient burn. Causes: stagnant water, over-fertilizing, or poor aeration. Fix it: Rinse LECA, trim mushy roots, and reduce water level. Use hydroponic fertilizer at ¼ strength. Healthy roots should be plump and green!
No! Regular fertilizers contain salts that build up in LECA. Opt for hydroponic or orchid-specific liquid fertilizer (balanced 20-20-20 or 10-10-10). Dilute to ¼–½ strength and flush the system monthly to prevent salt buildup.
Growing orchids in LECA might feel intimidating at first, but with the right setup—proper hydration, light, and patience—you’ll be rewarded with healthier roots and stunning blooms 🌸. This semi-hydroponic method eliminates guesswork, reduces rot risks, and simplifies care once you nail the basics.
Now that you’re equipped with the know-how, pick a hardy orchid variety (like a Phalaenopsis) and start small with a single plant. Track your progress, adjust as needed, and don’t forget to share your success—your thriving LECA orchids could inspire others! Ready to dive in? Gather your supplies and let the growing begin! 🌱
