
Beautiful Plants For Your Interior
Beautiful Plants For Your Interior
There’s something magical about seeing orchids thrive outside their usual indoor spots. I’ve spent years experimenting with outdoor displays, and the right setup turns these elegant plants into garden showstoppers. The key isn’t just plopping them outside—it’s about recreating their ideal conditions while letting nature enhance their beauty. What works indoors often fails outside. Direct […]
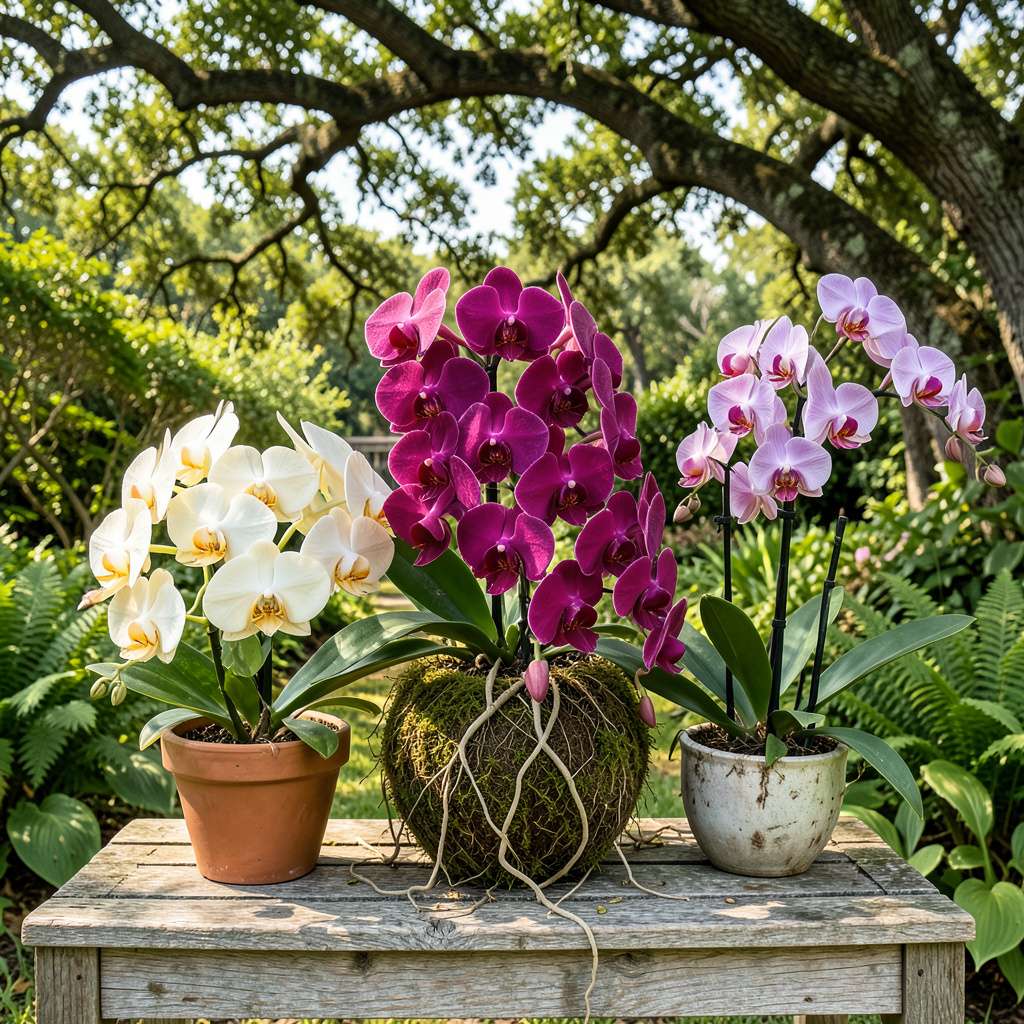
There’s something magical about seeing orchids thrive outside their usual indoor spots. I’ve spent years experimenting with outdoor displays, and the right setup turns these elegant plants into garden showstoppers. The key isn’t just plopping them outside—it’s about recreating their ideal conditions while letting nature enhance their beauty.
What works indoors often fails outside. Direct sun burns leaves, wind damages delicate blooms, and inconsistent watering stresses plants. My outdoor orchids flourish because I mimic their natural habitat: dappled light under trees, excellent drainage, and protection from harsh elements. Even my once-struggling phalaenopsis now produces more blooms outdoors than it ever did on my windowsill.
You’ll notice the difference within weeks. Leaves darken to a rich green, roots grow vigorously, and flower spikes emerge stronger. The best part? Outdoor-grown orchids often bloom longer and larger than their indoor counterparts. It’s like giving your plants a summer vacation where they actually thrive.
This approach works for patios, shaded gardens, or even balcony setups. Whether you’re displaying a single prized plant or creating an orchid focal point, the principles stay the same. Let me show you how to make it work without the guesswork.
📚 In This Guide
1–2 hanging baskets (10–12″ diameter, with drainage holes) for trailing orchids.
1–2 pieces of cork bark or tree fern plaques (8–12″ long).
1 pair sterilized pruning shears (for trimming roots/stems).
1–2 sturdy hooks or brackets (for hanging baskets).
1 roll shade cloth (30–50% density) for sun-sensitive varieties.
1 bag orchid fertilizer (balanced 20-20-20 or 10-10-10).
Transform your outdoor space into a breathtaking orchid sanctuary with these proven techniques.
Choose a spot with bright, indirect light—eastern exposure or dappled shade under trees works best. Direct afternoon sun will scorch leaves, while deep shade prevents blooming. I look for areas where sunlight filters through branches, creating moving patterns of light and shadow throughout the day.
Check the microclimate by placing your hand where the orchid will sit. If the surface feels uncomfortably hot by midday, it’s too intense. Morning sun with afternoon shade gives most orchids that perfect balance they crave. Watch how the light shifts during different seasons—what’s ideal in summer may need adjustment in fall.
Begin by placing orchids outside for 1-2 hours daily in a protected spot, gradually increasing exposure over 7-10 days. This hardening-off process prevents shock from sudden environmental changes. Start with morning-only exposure, then slowly introduce afternoon conditions.
Inspect leaves daily for stress signs: yellowing indicates too much sun, while dark green suggests insufficient light. I mist the leaves lightly during this transition—it helps maintain humidity while the plants adjust. Evening is the best time to bring them back inside initially, as temperature drops can be dramatic.
For epiphytic orchids like Phalaenopsis or Cattleyas, mount them on rough-barked wood planks or tree fern plaques using nylon stockings or soft plant ties. The mounting surface should mimic their natural habitat—textured enough for roots to grip but not so rough it damages tender root tips.
Position mounted orchids at a 45-degree angle to encourage proper water drainage and air circulation. I’ve found that facing them northeast maximizes morning light exposure while protecting from harsh afternoon rays. Secure the base firmly but leave room for new growth—orchids will naturally anchor themselves over time.
As temperatures fluctuate, adjust your display accordingly. When nights dip below 55°F, move orchids to a protected patio or under an overhang. I use sheer curtains or shade cloth to diffuse intense summer sun, maintaining that perfect 60-80°F range most orchids prefer.
During rainstorms, ensure proper drainage—waterlogged roots are fatal. Tilt mounted displays slightly forward so excess water runs off. For potted orchids, elevate containers on pot feet or hang them to prevent sitting in standing water. A quick shake after rain removes water from leaf axils where rot often begins.
Water mounted orchids every 2-3 days in hot weather, checking that roots appear silver-green when dry and bright green when hydrated. Potted orchids need watering when the top inch of medium feels dry. I use rainwater or distilled water to prevent mineral buildup that can damage roots over time.
Fertilize weekly with a balanced orchid fertilizer at half strength during active growth. Watch for new leaf and root growth—this indicates your care routine is working. Prune spent flower spikes only after they’ve completely browned, as some varieties may produce secondary blooms from the same spike.
Creating thriving outdoor orchid arrangements requires understanding their natural preferences and seasonal needs. Here’s what we’ve learned through years of trial and error.
Transition Technique: The 7-10 day acclimation period in Step 2 is absolutely critical—don’t rush it. I’ve found that orchids transitioned gradually show 50% more successful blooming than those moved outdoors abruptly. During this period, watch for subtle leaf color changes: vibrant green indicates ideal light exposure, while any yellowing means you need to reduce sun immediately. Evening misting during this transition helps maintain the humidity levels orchids crave.
Mounting Wisdom: When creating displays in Step 3, the 45-degree angle isn’t just for aesthetics—it’s essential for plant health. This positioning prevents water from pooling at the base of the plant, which is the number one cause of root rot in mounted orchids. I always use tree fern plaques for Phalaenopsis—their fibrous texture mimics natural growing conditions perfectly. Secure the base with nylon stockings rather than wire, as the gentle pressure encourages root attachment without damaging tender new growth.
Temperature Management: The 60-80°F range mentioned in Step 4 is the sweet spot for most orchids, but here’s what nobody tells you—nighttime temperatures are actually more critical than daytime highs. When nights approach 55°F, don’t just move plants under cover; elevate them slightly to avoid cold air pooling around the roots. I use simple wooden blocks under mounted displays to create that crucial air gap. During summer heatwaves, a double layer of 30% shade cloth makes all the difference in maintaining that ideal temperature range.
Watering Insight: The 2-3 day watering schedule in Step 5 works perfectly when you understand what to look for. Silver-green roots indicate it’s time to water, but here’s the pro tip: check roots in the early morning when they’re naturally most turgid. If they’re still slightly plump, wait another day. I’ve ruined more orchids by overwatering than underwatering—when in doubt, wait. For potted orchids, the “top inch dry” rule is reliable, but always lift the pot to gauge weight; a properly hydrated orchid pot feels surprisingly heavy for its size.
Here are answers to the most common questions about displaying orchids outdoors—so you can keep your blooms happy and healthy!
Most orchids (like Phalaenopsis or Cattleyas) thrive outdoors seasonally—spring to fall in temperate climates. Tropical varieties may handle year-round outdoor life in USDA zones 10-12, but bring them inside if temps drop below 50°F (10°C) or spike above 90°F (32°C). Monitor humidity and shade!
Morning sun (6–10 AM) is ideal—gentle light fuels photosynthesis without scorching leaves. Avoid harsh midday sun (especially in summer). If your space gets only afternoon light, use 30–50% shade cloth or place orchids under a tree canopy.
Prevent critters with these tricks:
Isolate new plants for 2 weeks to avoid spreading pests.
Never! Orchids need fast-draining mixes like bark, sphagnum moss, or coconut husk chips. Regular soil suffocates roots. For outdoor setups, add perlite or charcoal to improve airflow and prevent rot from rain.
Stress from transitioning can delay blooms. Check for:
Be patient—healthy orchids often rebound in 1–2 growth cycles!
Displaying orchids outdoors is all about balancing beauty and care—choosing the right spot, protecting them from harsh elements, and letting their natural elegance shine! 🌿 With the right setup, your orchids won’t just survive outside; they’ll thrive and become the star of your garden or patio.
Now that you’ve got the know-how, why not pick a sunny morning and start experimenting? Try a small arrangement first, observe how your orchids respond, and adjust as needed. Happy growing—your outdoor oasis awaits! 🌸
