
Beautiful Plants For Your Interior
Beautiful Plants For Your Interior
I killed three orchids before I figured out their secret. The truth is, these elegant plants thrive indoors when you mimic their natural habitat—not with complicated routines, but with simple adjustments to light, water, and humidity. My Phalaenopsis now blooms reliably every 8-12 months, and the difference came down to understanding what they actually need […]
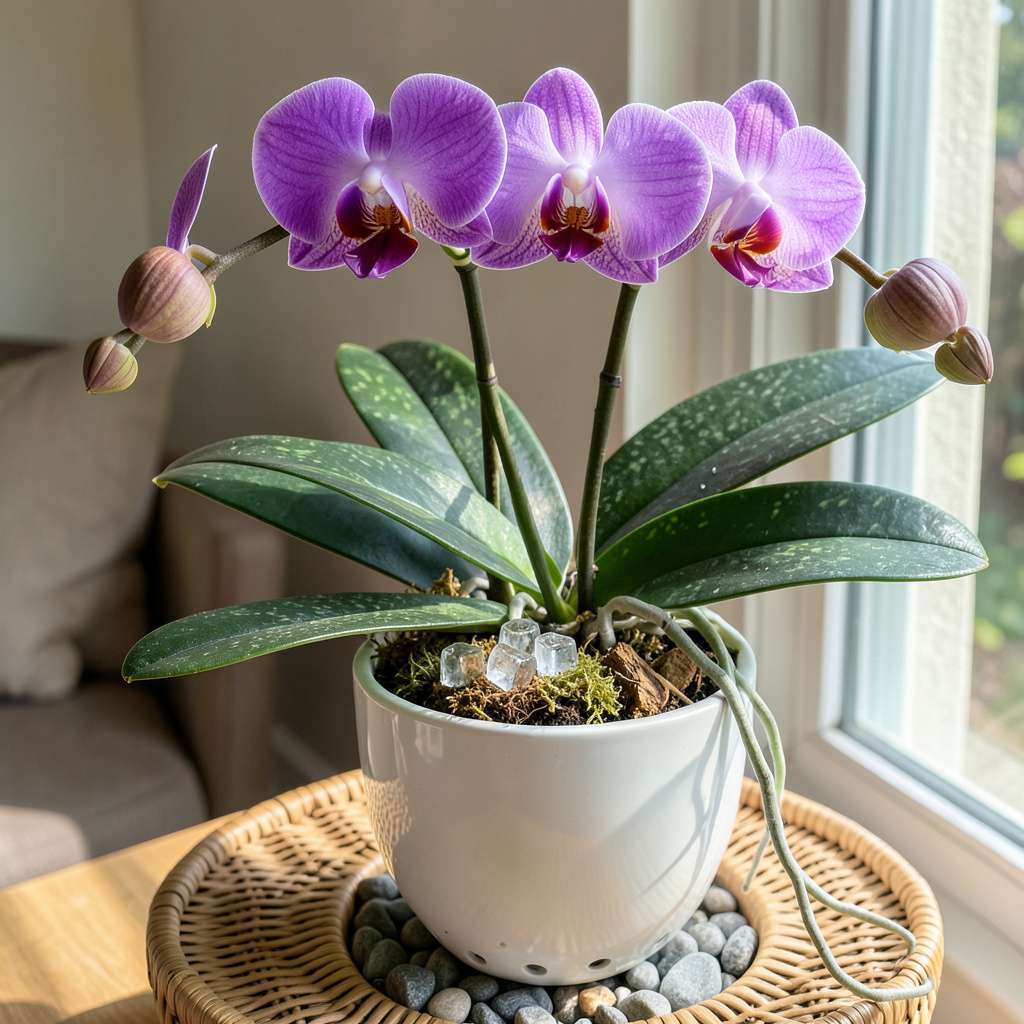
I killed three orchids before I figured out their secret. The truth is, these elegant plants thrive indoors when you mimic their natural habitat—not with complicated routines, but with simple adjustments to light, water, and humidity. My Phalaenopsis now blooms reliably every 8-12 months, and the difference came down to understanding what they actually need versus what we assume they want.
Most people overcomplicate orchid care. You don’t need a greenhouse or expensive equipment—just a bright windowsill (east-facing works best), a consistent watering rhythm, and attention to air movement. The biggest mistake I see? Treating orchids like typical houseplants. They’re epiphytes, meaning their roots need air as much as moisture. Once you grasp that, everything else falls into place.
What you’ll achieve is a plant that rewards you with months of blooms, not just a single flush. The flowers last longer, the leaves stay firm and vibrant, and you’ll stop worrying about mysterious yellowing or bud drop. Even better, the care routine takes less than 10 minutes a week once you’ve got the basics down.
Whether you’re rescuing a sad grocery-store orchid or nurturing a prized Dendrobium, the principles are the same. The key is observing your plant’s signals—not just following a generic schedule. Let’s get those roots happy and those spikes growing.
📚 In This Guide
With the right approach, you can transform your orchids from finicky plants into reliable bloomers that thrive for years.
Orchids die more often from overwatering than neglect. I water mine using the ice cube method—place 3 ice cubes on the growing medium once a week. This provides slow, measured hydration without waterlogging the roots. Always water in the morning so foliage dries completely by evening, preventing fungal issues.
Check the roots before watering: healthy roots are plump and silver-green when dry, turning bright green when properly hydrated. If roots appear mushy or brown, you’re watering too frequently. Use room-temperature water only—cold water shocks the plant and can trigger bud blast.
Place your orchid in bright, indirect light—an east-facing window is ideal. Direct southern exposure will scorch leaves, while north-facing windows provide insufficient light. You’ll know light levels are correct when leaves are medium green (dark green indicates too little light; yellow-green means too much).
Rotate the pot a quarter turn weekly to ensure even growth. Without rotation, plants develop lopsided growth patterns and may refuse to bloom. If natural light is inadequate, supplement with a full-spectrum LED grow light positioned 12-18 inches above the plant for 12-14 hours daily.
Orchids require 40-70% humidity—most homes are too dry. I place my plants on a tray filled with pebbles and water, ensuring the pot sits above the waterline. The evaporating moisture creates a humid microclimate without soggy roots. Grouping plants together also increases local humidity naturally.
Air circulation is equally critical—stagnant air encourages fungal growth. Use a gentle ceiling fan on low setting to provide consistent airflow, or open nearby windows for 1-2 hours daily. Avoid placing orchids near heating vents or air conditioners, as sudden temperature fluctuations cause bud drop.
Use a balanced, water-soluble orchid fertilizer (20-20-20) diluted to half strength every 2 weeks during active growth. I switch to a high-phosphorus formula (10-30-20) when flower spikes appear to encourage larger, longer-lasting blooms. Always fertilize after watering to prevent root burn.
Flush the growing medium with plain water every 4th watering to remove salt buildup from fertilizers. Yellowing leaf tips often indicate excess salts. During dormant periods (typically winter), reduce fertilizing to once monthly—the plant needs rest to prepare for the next blooming cycle.
After flowers fade, cut the spike back to 1 inch above the base if it’s brown and dried. For green spikes, trim just above a node (the small bump where a flower was attached)—this may produce a secondary spike. Continue regular care, and you’ll typically see new growth within 8-12 weeks.
The key to re-blooming is maintaining a 10-15°F temperature differential between day and night. I move my orchids to a cooler room (55-65°F) at night during fall to trigger bloom spikes. Once you see a new spike emerging, return to normal temperatures and increase humidity slightly to support development.
Caring for orchids indoors becomes much easier once you understand these key insights from years of hands-on experience.
Watering Wisdom: The ice cube method mentioned in Step 1 works beautifully because it mimics the slow, measured hydration orchids receive in their natural epiphytic environment. I’ve found that using exactly 3 ice cubes once weekly prevents the root rot that plagues so many beginner orchid growers. Remember to check those roots before watering—plump silver-green roots indicate perfect hydration, while mushy brown roots signal you’ve overdone it.
Light Mastery: When implementing Step 2’s quarter-turn rotation, mark your calendar to maintain consistency. I learned the hard way that skipping even one weekly rotation can lead to lopsided growth that takes months to correct. For those using grow lights, maintain the 12-18 inch distance precisely—too close causes leaf burn, while too far renders the light ineffective. The medium green leaf color is your perfect indicator of ideal lighting conditions.
Humidity Hack: The pebble tray method in Step 3 creates an ideal microclimate, but here’s what nobody tells you—use lava rocks instead of regular pebbles. Their porous surface holds and releases moisture more effectively, maintaining that critical 40-70% humidity range without constant refilling. I’ve extended the time between water changes from daily to every 3-4 days using this simple upgrade.
Temperature Technique: Achieving the 10-15°F differential mentioned in Step 5 doesn’t require moving plants between rooms. I’ve successfully triggered blooming by simply placing orchids near (not in) a cooler window at night during fall. The key is consistency—maintain this temperature swing for at least 4 consecutive weeks to reliably initiate spike development.
Got orchid questions? You’re not alone! Here are the most common concerns—and quick answers—to help your plants thrive.
Water every 7–10 days, but check the roots first! Stick your finger in the potting mix—if it’s dry 1 inch down, it’s time. Avoid soggy roots by using pots with drainage holes. Overwatering is the #1 killer of orchids!
Lack of blooms usually means insufficient light or no “rest period.” Move your orchid to a bright, indirect light spot (east/west windows work best) and ensure a 10–15°F temperature drop at night for 4–6 weeks to trigger reblooming. Patience is key!
While some growers swear by the ice cube method (1–3 cubes weekly), it’s risky for tropical orchids. Ice can shock roots and cause cold damage. Room-temperature water is safer—just pour slowly until it drains out the bottom.
Use a balanced, water-soluble fertilizer (20-20-20 or 10-10-10) diluted to half-strength. Feed every 2–4 weeks during active growth (spring/summer), but flush with plain water monthly to prevent salt buildup. Less is more!
Yellow leaves often signal overwatering, sunburn, or aging. Check roots (mushy = rot; silver/green = healthy). Move away from direct sun and adjust watering. If only 1–2 lower leaves yellow, it’s natural shedding—no panic!
Caring for indoor orchids doesn’t have to be intimidating—just remember the basics: bright, indirect light, consistent watering (but never soggy roots!), and the right humidity and temperature. With a little patience and these simple steps, your orchids can reward you with stunning blooms for years to come! 🌸
Ready to put your new skills to the test? Pick up a healthy orchid (like a beginner-friendly Phalaenopsis) and start your journey—your first bloom will feel like a well-earned victory! For extra confidence, bookmark this guide or join an orchid care community to swap tips with fellow enthusiasts. Happy growing! 🌱
