
Beautiful Plants For Your Interior
Beautiful Plants For Your Interior
There’s something magical about orchids swaying gently in the breeze, their delicate blooms adding elegance to any outdoor space. I’ve been growing hanging orchids outside for years, and the secret lies in recreating their natural environment—dappled light, perfect drainage, and just the right amount of attention. What surprised me most was how well these tropical […]
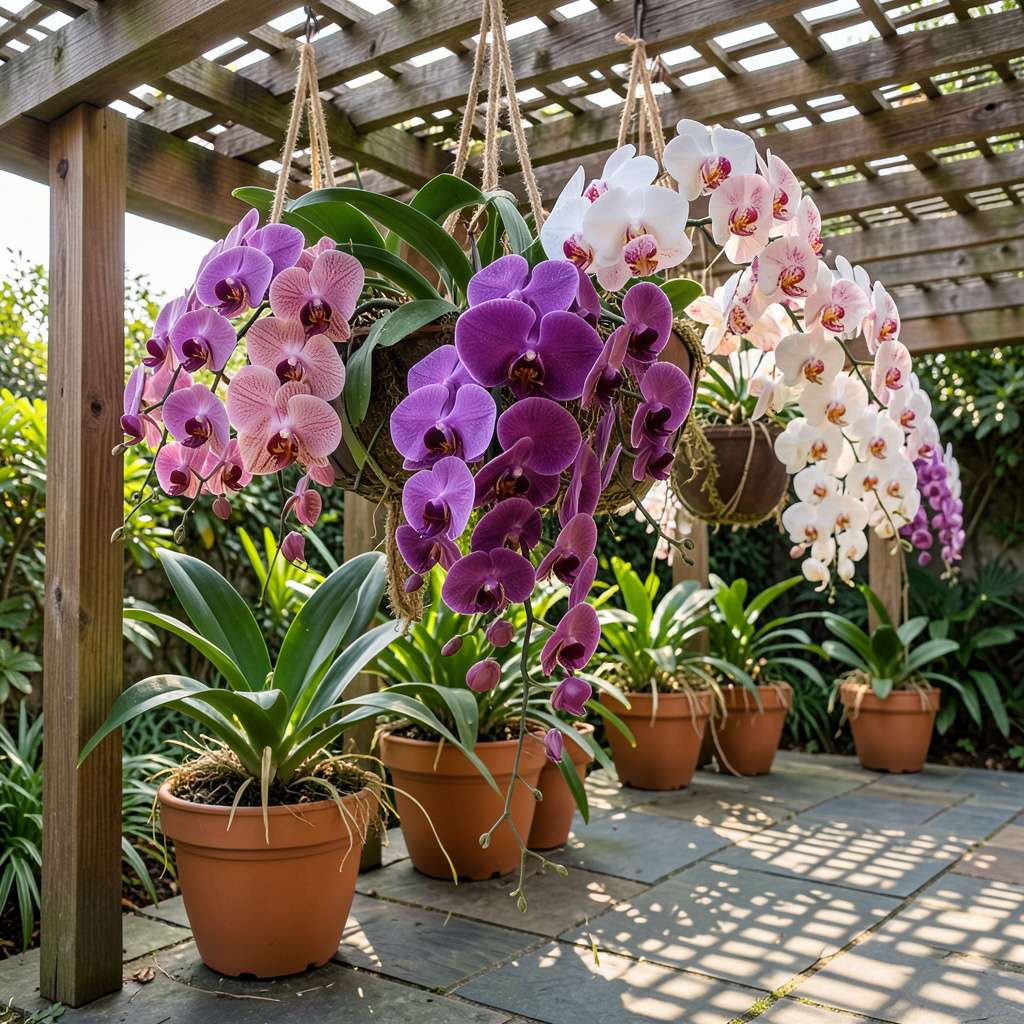
There’s something magical about orchids swaying gently in the breeze, their delicate blooms adding elegance to any outdoor space. I’ve been growing hanging orchids outside for years, and the secret lies in recreating their natural environment—dappled light, perfect drainage, and just the right amount of attention.
What surprised me most was how well these tropical beauties adapt to outdoor living when given proper support. A sturdy hanging basket with excellent airflow, paired with a watering routine that mimics their native rainforest conditions, makes all the difference. My first attempt failed spectacularly (overwatering strikes again!), but now my orchids reward me with months of continuous blooms.
You’ll discover that outdoor orchids often grow more vigorously than their indoor counterparts, with stronger stems and more abundant flowers. The key is finding that sweet spot where they get morning sun but afternoon shade—just like they would under a jungle canopy. Even small patios or balconies can become stunning orchid displays with the right setup.
Whether you’re working with phalaenopsis, cattleyas, or dendrobiums, the principles remain the same. The best part? Once established, these plants require surprisingly little maintenance while delivering maximum visual impact to your outdoor oasis.
📚 In This Guide
Heavy-duty S-hooks or chains (stainless steel, 12–18″ long, rust-resistant).
Pruning shears (sterilized).
Moss or coconut fiber liners (for extra moisture retention).
Transform your outdoor space with these proven techniques for vibrant, long-lasting orchid displays.
Choose a spot that receives bright, indirect light—east-facing patios or under the dappled shade of tall trees work beautifully. Direct afternoon sun will scorch leaves, while deep shade prevents blooming. I’ve found morning sun with afternoon protection creates the perfect balance for most varieties.
Check the microclimate carefully. Avoid areas with strong wind exposure that could damage delicate blooms or dry out roots too quickly. A sheltered porch or balcony with 50-70% humidity mimics their natural epiphytic environment. Test the location for a few days before hanging—sudden temperature swings can shock plants.
Begin by placing potted orchids in their new location for 2-3 hours daily, gradually increasing exposure over 7-10 days. This hardening-off process prevents leaf burn and bud drop. Watch for subtle signs of stress: pleated leaves indicate insufficient humidity, while yellowing suggests too much light.
Inspect plants thoroughly before moving them. Remove any dead roots or leaves that could harbor pests. I always spray with a mild neem oil solution (1 tsp per quart of water) as a preventive measure against common outdoor pests like scale and mealybugs. Ensure the potting medium is fresh and well-draining—outdoor conditions break down bark faster than indoors.
Use sturdy, weather-resistant hangers rated for at least 10 pounds—mature orchids become surprisingly heavy when watered. I prefer coated metal hooks that won’t rust or degrade in outdoor conditions. For cascading varieties like Vandas, choose hangers that allow the plant to grow downward naturally without restriction.
Position plants so water drains freely—never let them sit in saucers of water. Elevate containers slightly by placing pebbles between the pot base and hanger. This creates essential airflow around roots while preventing rot. In windy areas, use clear fishing line to secure pots discreetly without detracting from the display.
Water more frequently than indoors—outdoor orchids typically need moisture every 4-5 days in warm weather, compared to weekly indoors. Check by feeling the weight of the pot (light means dry) and examining root color (silver-green indicates thirst). Morning watering allows foliage to dry before evening, preventing fungal issues.
Fertilize with a balanced orchid formula (20-20-20) at half strength every 2 weeks during active growth. I switch to a bloom booster (10-30-20) when spikes appear. Monitor for pests daily—outdoor environments attract more insects. A sharp stream of water dislodges most invaders before they establish themselves.
As temperatures drop below 55°F, begin transitioning plants indoors. Sudden cold snaps can damage tropical orchids irreparably. I use a digital thermometer to track nighttime lows—when they consistently hit 60°F, it’s time to move them inside for the season.
Before bringing them in, inspect thoroughly for hitchhiking pests. A 10-minute hydrogen peroxide soak (1 part 3% peroxide to 4 parts water) eliminates most problems. Document what worked each season—outdoor orchid care becomes easier each year as you learn your specific microclimate’s quirks.
These practical insights will help you avoid common pitfalls and ensure your outdoor orchids thrive beautifully.
Transition Technique: The 7-10 day hardening-off period in Step 2 is absolutely critical—don’t rush it. I learned this the hard way after losing several blooms to sunburn. Start with just 2-3 hours of morning exposure, gradually increasing by 30-60 minutes daily. Watch for subtle stress signs: pleated leaves mean the air is too dry, while yellowing edges indicate excessive light. This gradual approach builds resilience in your plants.
Microclimate Mastery: What most beginners overlook is testing the location for 3-5 days before committing. I use a simple hygrometer to verify humidity levels stay between 50-70% as mentioned in Step 1. Even small variations can make a big difference. Pay special attention to temperature fluctuations—orchids hate sudden changes. A sheltered east-facing spot with morning sun and afternoon shade consistently produces the best results in my experience.
Support System: The 10-pound weight rating for hangers in Step 3 isn’t arbitrary—mature orchids with wet potting medium can easily exceed this. I recommend using heavy-duty vinyl-coated hooks that won’t degrade in outdoor conditions. For windy areas, secure pots with clear fishing line tied to the hanger in two places. This prevents swinging that can damage roots while remaining nearly invisible. Elevate pots with pebbles to ensure proper drainage—this simple step prevents root rot that plagues many outdoor orchid displays.
Seasonal Strategy: The 55°F threshold in Step 5 is your warning sign to start preparing for indoor transition. I’ve found that when nighttime temperatures consistently hit 60°F, it’s time to move plants inside. Use this transitional period to inspect thoroughly for pests. A 10-minute hydrogen peroxide soak (1:4 ratio) eliminates most hitchhiking insects without damaging plants. Document your seasonal observations—this data becomes invaluable for planning next year’s display.
Got questions about hanging orchids outside? You’re not alone! Here are the most common concerns—and quick answers—to help your orchids thrive in their new outdoor home.
It depends on your climate! Most orchids (like Phalaenopsis or Cattleya) thrive outdoors in USDA Zones 10-12 year-round. In cooler zones, move them indoors when temps drop below 50°F (10°C) at night. Watch for frost—it’s a bloom killer!
Spring or early summer is ideal—when nighttime temps stay above 55°F (13°C). Avoid extreme heat (above 90°F/32°C) or monsoon seasons. Acclimate them gradually (1-2 hours/day at first) to prevent shock.
Yes! Wind and sun dry them faster. Check moisture daily (stick your finger in the bark—if dry, water). Use rainwater or distilled water to avoid mineral buildup. Morning watering helps prevent fungal issues.
Yellow leaves often mean too much sun (burn) or overwatering. Move to bright, indirect light (under a tree or patio cover) and ensure the pot drains well. If spots appear, check for pests like spider mites.
Most orchids hate harsh midday sun—it scorches leaves! Opt for dappled shade (like under a pergola) or east-facing spots for gentle morning light. Vandas tolerate more sun, but start with 2-3 hours max.
Hanging orchids outside can transform your space into a vibrant, low-maintenance paradise—as long as you nail the basics! 🌿 From choosing the right spot with dappled sunlight to picking hardy varieties like Vandas or Cattleyas, you’re now equipped to help these beauties thrive. Remember, consistency in watering, airflow, and seasonal adjustments makes all the difference.
Ready to take the plunge? Start small with one or two plants, monitor their progress, and adjust as needed. Before you know it, your outdoor oasis will be bursting with gorgeous, healthy blooms—and you’ll be the envy of the neighborhood! 🌸 Grab your supplies and get growing today!
