
Beautiful Plants For Your Interior
Beautiful Plants For Your Interior
I’ll be real with you: store-bought orchid mixes often disappoint. After watching too many Phalaenopsis plants struggle in dense, waterlogged bark, I started blending my own decorative potting mix that actually supports those stunning blooms we all want. The difference shows in faster root growth and flowers that last weeks longer. This isn’t about fancy […]
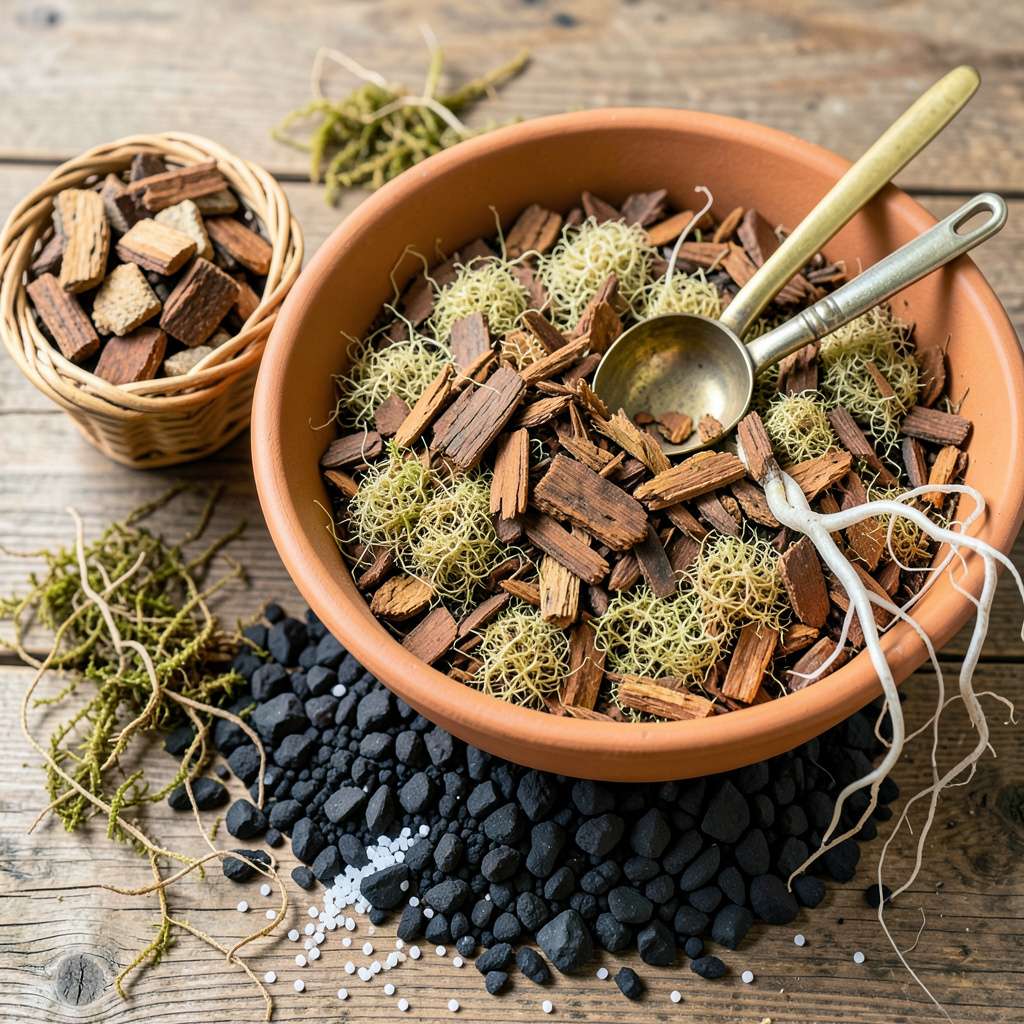
I’ll be real with you: store-bought orchid mixes often disappoint. After watching too many Phalaenopsis plants struggle in dense, waterlogged bark, I started blending my own decorative potting mix that actually supports those stunning blooms we all want. The difference shows in faster root growth and flowers that last weeks longer.
This isn’t about fancy ingredients—it’s about getting the texture right. Orchids need air around their roots as much as they need moisture. My mix combines chunky bark, charcoal, and just enough moisture-retaining elements to keep plants happy between waterings. No more soggy roots or sad, wilted leaves.
You’ll notice healthier roots within 2-3 weeks of repotting. The white, plump roots tell you it’s working, and new leaf growth follows soon after. Best part? This mix stays fresh and airy for 12-18 months before needing replacement.
Works for Phalaenopsis, Cattleya, and Oncidium orchids alike. Whether you’re rescuing a struggling plant or setting up a new one, this blend gives roots exactly what they need to thrive—not just survive.
📚 In This Guide
4 cups of fir bark (½–1 inch chunks for aeration)
½ cup of coconut husk chips (extra moisture retention)
Large mixing bowl or bucket (5+ quarts)
Sterilized materials (bake bark/moss at 200°F for 30 mins to kill pests)
This method ensures perfect drainage and aeration—exactly what your orchids need to produce those spectacular blooms you love.
Begin with 1 part fir bark (the backbone of any orchid mix) and 1 part sphagnum moss for moisture retention. I recommend using medium-grade bark (about ½-inch pieces) which provides ideal air pockets while still supporting root attachment. Avoid fine bark—it compacts too easily and suffocates roots.
The sphagnum moss should be dried and loosely packed, not compressed into bricks. If you’re using pre-packaged moss, fluff it thoroughly to restore its natural structure. This ensures proper airflow around the roots, which is critical for preventing rot in these epiphytic plants.
Add 1 part perlite and ½ part charcoal to the mix. The perlite creates permanent air pockets that won’t break down over time, while the charcoal helps absorb impurities and prevent souring of the mix. I use horticultural-grade charcoal rather than aquarium charcoal—it’s more porous and better suited for potting media.
Gently combine these elements with your hands, being careful not to crush the perlite. You want to maintain the integrity of those air pockets. The finished texture should feel light and chunky, with visible spaces between components when you squeeze a handful.
Incorporate ¼ cup of worm castings and 1 tablespoon of dolomite lime per gallon of mix. The worm castings provide gentle, long-lasting nutrition without risk of burning delicate orchid roots. The dolomite lime helps stabilize pH and provides essential calcium and magnesium.
Sprinkle these components over the mix and fold them in gently. Don’t overmix—you want an uneven distribution that mimics the natural variability orchids experience in their native habitats. The finished blend should have visible flecks of all components when examined closely.
Fill a test pot with your mix and water it thoroughly. Observe how quickly the water drains through—it should flow freely within 10-15 seconds while still leaving the bark slightly damp. If water pools on the surface, you need more perlite or larger bark chunks.
After draining, check the moisture level at the bottom of the pot after 24 hours. The mix should feel barely damp, not wet. Orchid roots need that perfect balance between air and moisture, and this test ensures your blend provides exactly that environment.
When repotting, choose a container with multiple drainage holes. Place a layer of your mix in the bottom, then position the orchid so its roots spread naturally over the surface. Fill around the roots gently, allowing some to remain exposed to the air.
Don’t pack the mix down—orchid roots need room to breathe. The plant should sit firmly but not tightly in its new home. Water lightly after repotting, then wait 5-7 days before resuming normal watering to allow any damaged roots to heal.
Creating the perfect orchid potting mix is both science and art—here’s what I’ve learned from years of trial and error to help you avoid common pitfalls.
Bark Selection Secret: In Step 1, the medium-grade fir bark (½-inch pieces) is non-negotiable. I learned this the hard way after using fine bark that compacted within weeks, suffocating my orchid’s roots. The ½-inch size creates that critical balance between air pockets and root support. If you can only find larger chunks, simply break them down gently—don’t use a hammer, as that creates too much dust that can clog the mix.
Moisture Test Precision: The 10-15 second drainage test in Step 4 reveals everything about your mix’s performance. Here’s what nobody tells you—time it with your phone’s stopwatch. If water drains in under 10 seconds, your mix is too coarse and won’t retain enough moisture. Over 15 seconds means it’s too dense. I keep adjusting with small amounts of perlite until I hit that sweet spot where water flows through like a gentle rain rather than a flood.
The Charcoal Difference: Step 2’s horticultural-grade charcoal isn’t just for show. I once skipped it to save money, and within months my mix developed that sour smell that signals root rot. The charcoal’s porosity absorbs excess minerals and prevents bacterial buildup. Between us, it’s worth hunting down at specialty nurseries rather than settling for aquarium charcoal, which lacks the necessary absorption capacity for long-term potting mixes.
Post-Repotting Patience: That 5-7 day waiting period in Step 5 after repotting feels like eternity when you’re eager to see your orchid thrive. Trust me on this—I’ve ruined more orchids by watering too soon than I care to admit. The roots need this recovery time to heal any micro-tears from repotting. I mark my calendar and use the waiting period to observe how the mix settles around the roots, which tells me if I need to adjust my technique next time.
Repot every 1–2 years or when the mix breaks down (loses airiness). Signs it’s time: roots crowding the pot, slow drainage, or salt buildup on the container. Spring is ideal—just after blooming—when orchids enter active growth. Over-repotting stresses plants, so stick to this schedule!
No! Regular soil compacts, suffocates roots, and retains too much moisture, causing rot. Orchids need chunky, fast-draining mixes (like bark, perlite, or coconut husk). For decor, add sphagnum moss or leca balls—but skip dense garden soil entirely.
Aim for 50% aeration (bark/perlite), 30% moisture retention (moss/charcoal), and 20% decor (colored stones, glass chips). Example: 3 parts fir bark + 1 part perlite + 1 part moss + a handful of decorative pebbles. Adjust if your home is dry (add moss) or humid (extra bark).
Root rot usually means poor drainage or overwatering. Fix it by:
Trim black/mushy roots with sterilized scissors before repotting.
Yes, but only for epiphytes (like bromeliads, tillandsias, or hoyas) that love airy, chunky mixes. Avoid using it for succulents (needs more grit) or tropical foliage plants (too fast-draining). Sterilize reused mix by baking at 200°F for 30 minutes to kill pests.
Creating your own DIY decorative orchid potting mix doesn’t have to be complicated—just airy, nutrient-rich, and tailored to your plant’s needs! 🌿 With the right blend of bark, perlite, and organic boosters, you’ll give your orchids the perfect home for vibrant blooms and healthy roots. Now that you’ve got the recipe, why not gather your materials and mix up a batch today?
Once your orchids are happily potted, keep an eye on their growth and adjust moisture or nutrients as needed. Happy potting—and here’s to your most stunning orchid display yet! ✨
